This cake is made from a large number of eggs, with very little flour added to the dough. This biscuit practically dissolves in the cream.
For the biscuit:
- Eggs 6 pcs.
- Flour 100 g
- Sugar 150 g
- Butter 50 g
- Cocoa 50 g
For impregnation:
- Jam 70 g
For cream:
- Butter 200 g
- Condensed milk 120 g
- Water 20 g
- Egg (yolk) 1 pc.
- Vanilla sugar 1 pack
- Cocoa 15 g
For the glaze:
- Dark chocolate 1 bar
- Butter 50 g
First of all, prepare the biscuit. Melt the butter. In a bowl, beat the eggs with the sugar. Add some sifted flour, then pour in the oil. In this case, the mass must be stirred continuously. Preheat the oven to 200 degrees. Transfer the dough into a springform pan with a diameter of 20 centimeters. Bake the cake for about half an hour. Carefully remove the biscuit from the mold and cool. Cut lengthwise into three parts.
Prepare the cream. Leave the butter on the counter at room temperature until it becomes soft. Grind the yolk with vanilla sugar, add condensed milk and water. Put on fire and cook until the mixture thickens. Don't forget to stir. Then remove from heat, cool, add butter, cocoa and beat.
Melt the jam and soak the cakes with it. Grease two cake layers with cream, assemble the cake and put it in the refrigerator for 2 hours.
After the time has passed, prepare the glaze. Melt butter with 100 grams of chocolate. Stir until smooth. Spread the glaze evenly over the cake and let it sit in a cool place for a few hours. You can decorate the cake with chocolate shavings and whole pieces.
Chocolate Hazelnut Cake
 Chocolate Hazelnut Cake
 Another chocolate cake recipe. For a birthday, the glaze can be replaced with gloss. This coating paste will give your cake a delightful mirror shine.
- Flour 0.5 cups
- Cocoa 0.5 cups
- Dark chocolate 3.5 bars
- Peanuts 1 cup
- Peanut butter 120 g
- Heavy cream 1 cup
- Butter 2 tbsp.
- Sugar 2 tbsp.
- Brown sugar 0.5 cups
- Eggs 6 pcs.
- Vanillin 1 pack
- Salt 2 pinches
For glaze:
- Sugar 180 g
- Heavy cream 130 ml
- Water 140 ml
- Cocoa 60 g
- Gelatin 2 tsp.
Grind the roasted peanuts in a blender. Add sugar, sifted flour, cocoa and a pinch of salt. Stir everything. In a separate bowl, beat the eggs and rub them with brown sugar. Combine both masses and mix well. Preheat the oven to 180 degrees. Place parchment paper on the bottom of the springform pan, pour the dough into the pan and bake until the cake in the middle is soft and elastic at the same time. Baking will take about 20 minutes. While preparing the biscuit, the oven door must not be opened, otherwise the biscuit will settle.
Pry the edges of the cake with a knife and carefully open the pan. Transfer the crust to a wire rack. It's best to leave it overnight. Then when cutting it will not crumble.
To prepare the cream, break the chocolate and place in a water bath. Pour cream into it and stir well. Beat butter at room temperature with a blender, add peanut butter, salt, then chocolate mixture and vanilla, while continuing to beat. Cool the cream in the refrigerator.
Cut the cake lengthwise into 4 parts; it is most convenient to do this with regular thread. Grease the cut of each resulting cake with cream and assemble the cake. Start preparing the glaze.
While the cake is freezing, prepare the frosting. Combine everything except gelatin in a saucepan. Cook over low heat for 10 minutes. Take a few more tablespoons of water and pour the gelatin into it in a separate bowl. After 10 minutes, remove the pan from the stove and add the swollen gelatin. Stir until it is completely dissolved. Pour frosting over the cake on all sides and refrigerate for several hours.
Juliet Cake
This cake can be prepared for a young girl’s birthday.
For the cakes:
- Flour 2 cups
- Eggs 3 pcs.
- Sugar 1 cup
- Condensed milk 0.5 cans
- Sour cream 1 cup
- Soda 0.5 tsp.
For cream:
- Condensed milk 0.5 cans
- Butter 150 g
- For impregnation:
- Sugar 1 cup
- Water 1 glass
- Cognac 1 tbsp.
- Citric acid 1 pinch
For decoration:
- Chocolate 50 g
- cranberries
Grind eggs with sugar. Add sour cream, condensed milk, soda, sift the flour and knead the dough. Divide the dough into four parts, roll out 4 identical cake layers. Bake each in the oven for 15 minutes at 180 degrees.
Prepare a simple cream: beat butter with condensed milk. Place in the refrigerator.
For cake impregnation, dissolve sugar in water, put on the stove and boil. Add cognac and a pinch of citric acid. Mix everything.
Grease the cakes with impregnation. To prevent the cake from getting soggy, do not put a lot of syrup on it. To control the amount of syrup, it is best to apply the impregnation using a silicone brush. Then generously coat the cakes with cream. Grate the chocolate on a fine grater. Decorate the cake with chocolate and berries.
"Napoleon" in a frying pan
The cook spends a lot of time preparing dishes for a home birthday party. Napoleon is a complex cake and can take several hours to prepare. To make the process go faster, the cakes can be fried in a frying pan.

For the cakes:
- Flour 3 cups
- Condensed milk 1 can
- Egg 1 pc.
- Soda 1 tsp.
- Vinegar
For cream:
- Milk 0.5 l
- Eggs 2 pcs.
- Flour 3 tbsp.
- Sugar 1 cup
- Vanilla sugar 1 pack
To prepare the dough, break an egg into a bowl and stir it with condensed milk. Quench the soda with vinegar, add to the bowl and sift the flour into it, constantly stirring the dough. When the dough in the bowl mixes with difficulty, put it on a table sprinkled with flour and knead until finished. The dough should be soft. Divide it into 8 equal parts. Roll each into a round layer, pierce it several times and quickly fry on both sides in a dry frying pan until the cake is browned.
This will take no more than 2 minutes. An important condition: each cake must be fried in a clean frying pan. Adjust the finished cakes to one size. They can be trimmed using the lid from a small frying pan or saucepan. Do not throw away the trimmings.
Prepare the cream. Pour milk into a small saucepan, beat in eggs, add sugar and sift flour. Whisk everything, bring to a boil and cook until the mixture thickens. Remove the pan from the stove and add butter. The butter should be warm, but there is no need to specifically melt it, otherwise the cream will turn out liquid. Beat everything with a blender.
Coat each cake with warm cream so that the cake is better soaked. It should take about 4 tablespoons of cream to grease one cake. It should be noted that at the end the cream will also be needed to coat the sides of the cake. Assemble the cake. Chop the remaining cake scraps and sprinkle them on all sides of the cake, pressing with your hands. Leave overnight in the refrigerator.
Cake "Machine"
A birthday cake can be a great gift for a child. Especially if it is made in the shape of a doll or car.
- Ready-made sponge cake 3 layers
For cream:
- Butter 450 g
- Eggs 3 pcs.
- Eggs (yolks) 4 pcs.
- Sugar 270 g
- Vanilla sugar 1.5 tsp.
For mastic:
- Powdered sugar 400 g
- Marshmallow 300 g
- Sunflower oil 1 tbsp.
- Lemon juice 1 tsp.
- Gelatin 1 tsp.
- Water 5 tbsp.
- Food colors
You can make a cake machine from any sponge cake and butter cream. For the cream, grind 3 eggs and 4 yolks with regular and vanilla sugar. Melt the butter in a water bath and combine with the rest of the mixture. Mix well and let cool. Assemble the cake, coating the layers with cream. Let soak for several hours.
Give the cakes a machine shape. To do this, cut off a quarter of the cake from both edges. There should be a rectangle left from the middle with curves at the front and back. This is the basis of the car, its body. It can be given a more rounded shape. Cut a semicircle from one cut piece; its length in diameter should be half the size of the machine itself. Do the same with the second cut piece. Connect the resulting parts and spread cream between them. This is the cabin. Install it closer to the rear “bumper”, also lubricate the joint with cream. Make four wheels from the remaining sponge cake.
Soak the gelatin in cold water for half an hour. Then heat it in a water bath. Place marshmallows in a microwave-safe bowl, add butter and lemon juice. Place the dishes in the microwave for 3 minutes. Add powdered sugar and gelatin to the melted marshmallows. Mix everything and put it in a plastic bag. Tie the bag tightly and place it in a container. It is important that air does not get into the prepared mass. Set aside at room temperature for 4 hours. The result is soft and plastic mastic.
Pinch off a large piece of mastic and mix it with blue or red dye. Roll out into a thin layer and cover the machine with it, pressing and leveling it in shape on all sides. Paint another piece of mastic white, roll it out and decorate the car windows and headlights. Cover the wheels with brown mastic and attach them to the body with a toothpick. You can use round cookies as wheels. You can also make additional decorations for the machine. Serve immediately.
Cake "Strawberry"
 Cake "Strawberry"
 If your birthday falls in June, a cake with fresh strawberries will be a delicious and beautiful treat for dessert.
- Sugar 200 g
- Eggs 5 pcs.
- Flour 3 tbsp.
- Starch 3 tbsp.
- Baking powder 1 tsp.
- Butter for greasing
- Almond petals
- Strawberries for decoration
For cream:
- Butter 200 g
- Sugar 1 cup
- Eggs 2 pcs.
- Milk 500 ml
- Flour 1 tbsp.
- Strawberry
Grind eggs with sugar. Add the rest of the dry ingredients and beat. Grease the pan with butter and sprinkle generously with almonds. Pour the dough on top. Preheat the oven to 190 degrees and bake the crust for 40 minutes. Cool.
Place the pan on the fire, pour milk into it, and boil. Add eggs, sugar and flour. Cook until thickened, stirring continuously. Cool the cream. At this time, soften the butter. Wash the strawberries and cut into small pieces. Beat the cream with a blender, adding oil to it. Then add strawberry pieces to it.
Cut the biscuit in half, coat each cake with cream, and combine. Coat the sides with cream as well. Place halved strawberries in a circle on top of the cake.
Meringue cake
 Meringue Cake
 Another option for a summer cake is with fresh berries and ice cream.
- Eggs (whites) 5 pcs.
- Powdered sugar 280 g
- Ice cream 500 g
- Cream 200 ml
- Berries 250 g
Grind 230 g of powdered sugar with egg whites and place in a water bath. Heat until you get a homogeneous shiny mass. Then cool. Transfer the mixture into a pastry bag. Draw a circle on the parchment and pipe half the mass according to its shape, filling it inside in a spiral. Preheat the oven to 100 degrees, transfer the parchment to a baking sheet and bake the cake. Do the same with the remaining mass.
Leave half the berries to decorate the cake. Use the second part for filling, combining with softened ice cream.
Take a springform baking pan on which a circle was drawn. Place one cake layer in it, place the filling on it, and cover with the second cake layer. Snap the ring onto the mold and put it in the freezer for a couple of hours.
Whip the cream with 50 grams of powdered sugar. Remove the cake from the freezer just before serving. Garnish with whipped cream and berries if desired.
Cake is a favorite treat for both adults and children. Each of us dreams of a beautiful and original dessert for his birthday, and, naturally, every mother dreams of being able to create an unforgettable holiday for her child. The best option for a children's cake is classic sponge cakes, Genoese or butter sponge cake.
Cake ideas
Thoughtful and coordinated celebration programs, fun competitions and prizes are an integral part of any children's party, and what birthday would be complete without a cake? None!
Literally 10 years ago, the whole variety of cakes was represented by all the usual “Napoleon”, “Anthill”, “Biscuit with cream”, “Sher-Ami”, “Smetannik” and a couple of other cakes that our mothers baked or bought in pastry shops . And the standard decoration for a birthday cake were candles - straight, twisted, multi-colored, sometimes it was possible to purchase a number candle.
Gradually, the confectionery market expanded and offered more and more new products decorated with cream roses, stumps, leaves and chocolate chips, which are still a favorite delicacy for most of us today.
And only after broadcasting a series of programs about the king-pastry chef Buddy from New Jersey, we learned that a variety of technologies and ingredients are used to decorate cakes and create confectionery products, making it possible to create an exclusive cake for a child’s birthday, the idea of which will emphasize the child’s individuality and will suit holiday format.


No time - better order
The use of marzipan and mastic allowed our masters to create confectionery masterpieces that delight not only the eye, but also the stomach. Modern confectionery shops offer their customers a huge selection of birthday cake options for children, the weight, shape and decoration of which completely depends on the customer’s wishes.
In most cases, making such a cake will take at least 2-3 days and requires advance ordering (usually 2-3 weeks before the celebration).


You should not choose a confectionery shop at random. Don’t be lazy and don’t regret 10-15 minutes spent searching for reviews and recommendations from clients of a particular confectionery shop, and also first familiarize yourself with the recipes for cakes and cream used. Remember, the picture in the catalog of a confectionery shop can be very different from reality. A good option would be a catalog of color photographs that have not undergone typographical or design processing. Most websites of confectionery shops or private artisans contain real photographs and reviews, which will greatly facilitate your search.


DIY
“I don’t know what’s in that cake that’s made to order,” “I like to bake cakes myself,” “My family doesn’t eat store-bought cakes” - these and many other phrases can be heard when the conversation turns to store-bought confectionery. If you belong to this category of people, you may find the information below interesting.
Modern needlewomen not only know how to bake delicious cakes, but also decorate them no worse than professionals. In most cases, very complex and labor-intensive cakes at first glance are not prepared at home, which is wrong; from the outside, any beautifully decorated cake seems like a work of art.
A cake for a child's birthday is an idea that can be nurtured for months, or even years, and, in the end, the mother awakens the desire to make a gift with her own hands.
The first rule to remember when preparing a cake is the correct dough for the cakes. Using recipes for shortcrust pastry and shortbread when preparing a cake for children under 3 years of age is not advisable, since such dough is quite brittle and hard and can cause one of the children to choke or choke. You should also be careful when preparing your favorite honey cake, as one of your guests may be allergic to honey. It is unacceptable to use alcoholic beverages when preparing cakes and especially cream.
Using sponge dough makes it possible to experiment with the color of the cake layers and the shape of the future cake.
Particular attention should be paid to the cream. Recently, yogurt cream has become popular, which children love very much. The advantage of this cream is its low fat content and ease of preparation. Heavy butter creams and whipped cream can negatively affect our children’s digestive system and ruin the holiday.

Simple baby cake decorating ideas
There are a huge number of different technologies for decorating a birthday cake - it can be custard protein cream, butter cream, icing, mastic or marzipan, the recipe for which can be found on the Internet or bought ready-made ingredients in specialized stores. If this is your first time deciding to use new decorating technologies, practice for a few days to get the hang of it. Working with mastic is greatly facilitated by special tools, cutting tools and rolling pins.
The main thing is not to be afraid to experiment! Go for it and you will succeed!


Cakes for girls - themes
- Flower
- Butterfly
- Dinosaur
- White sophisticated with sparklers
- Cake with colored sprinkles or beads
- Pinata cake with surprise candies inside like M&M's
- Animals
- Fairies and princesses
- Moana
- Elsa and Anna
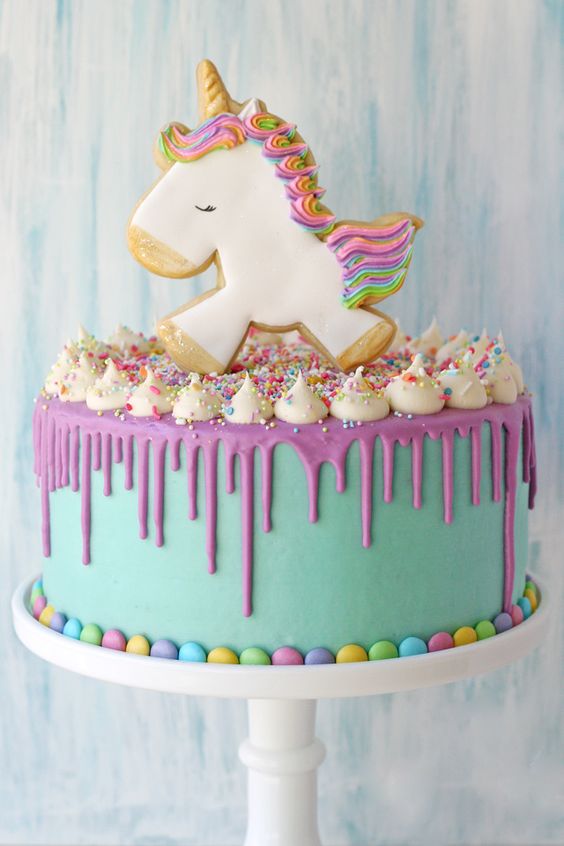
- Unicorn
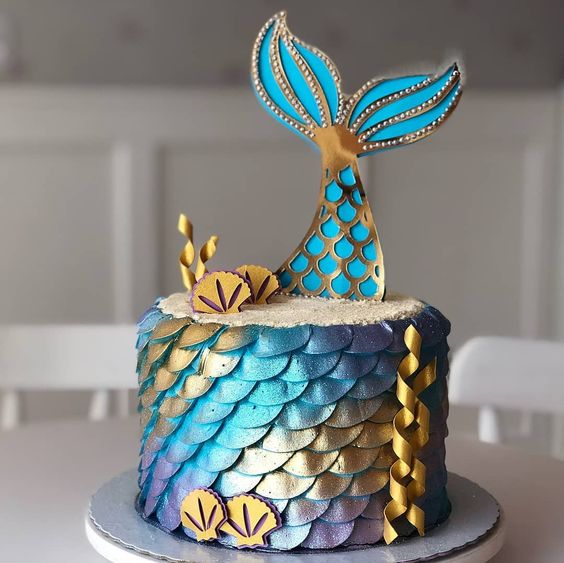
- Little Mermaid
- Castles
- Cake decorated with candies
- Cake decorated with berries


Cakes for boys - themes
- Age figure
- Multicolored cake inside
- Forest animals
- Cars, trains, airplanes and other equipment
- Lego figures and parts
- Spidermen and other superheroes
- Minecraft and other computer games
- Planets and space
- Aliens, minions, monsters
- Rubik's Cube
- Shark cake
- Volcano with sparklers


Learn how to make your own birthday cake!
Fortunately for mothers, a child’s birthday comes once a year, but you need to prepare properly for this event! Think through everything down to the smallest detail. Starting from . And especially the main detail of the holiday, without which there simply is no birthday. It's a cake! It must be there.
Of course it must be tasty. But for a child it is important that the cake is BIG! When talking about the holiday the next day, the child will certainly talk about the cake. But if the cake was simply delicious ─ of course, good. But not impressive. And if the cake wasoooooooooooooocool!

How to make a cake like this with your own hands? Every mother decides for herself. Depending on your capabilities and skills.
We'll give you some tips on how to make a baby cake with your own hands.
Option one. It is suitable if you have a large dish or a large tray. Then you increase the width of the cake. Here the round option is not suitable, we settle on a square or rectangular one, depending on the available shapes.
If you have a sponge cake, then double the number of cakes baked (three times, and so on, depending on the size of what the cake will lie on and the number of guests).
We lay out the cakes very tightly to each other, spread them and decorate.
One moment: it is necessary to take into account the design feature when cutting and direct the knife in the child’s hand to the right place.
Second option simpler, but also very interesting: we enlarge the cake in an upward direction. The technology is the same. Instead of two or three cakes, we bake five or six. In this case, you can use a round shape, it is even preferable.
DIY children's cakes popular recipes:
A child's birthday cake must have fruits, nuts, and chocolate. Cakes can be baked or made without baking.
Let's start with a homemade sponge cake for a child!

There is no sugar in this cake.
Sponge cake with fruits
We calculate the products for two biscuits. If you bake a larger cake, the amount of ingredients will increase.
We will need:
200 grams of flour
100 grams of starch
2 grams citric acid
2 grams vanillin
If you wish, you can add raisins, pieces of dried apricots, and prunes directly to the biscuits.
We tie on an apron and start preparing biscuits.
First, break the eggs into a bowl and begin to beat them, slowly adding sugar and citric acid. Take a larger bowl. The mass should double. And keep in mind, it will not be very thick, as happens if you beat only egg whites.
- Now you need to mix the starch with flour and slowly, stirring constantly, pour it into the beaten eggs.
- Here you can add dried fruits (don’t forget to finely chop the dried apricots and prunes before doing this), mix everything thoroughly again.
- Preheat the oven to approximately 200 degrees.
- Grease the mold with vegetable oil and carefully pour out about half of the resulting mass.
- Place in the oven and increase the temperature to 250 degrees.
- Bake for about 30 minutes, making sure that the cake is baked evenly; to do this, swap the baking sheet with the mold. You can check readiness with a wooden spatula.
- Carefully remove the cake from the mold and begin baking the second one in the same way.
Please note that the cakes rise during baking, almost doubling in size.
We soak the first biscuit while it is hot. For impregnation, you can dilute any jam in a small amount of water. Don't be afraid if you end up with some jam berries on the sponge cake. You need to thoroughly soak the second sponge cake after removing it from the oven.
Since we are preparing without using sugar, and it is a children’s birthday, you can grease the first bottom cake with condensed milk after it has cooled. And then we connect both cake layers.
Let's start preparing the cream.
For this we need thick yogurt. You can take any one.
- Mix yogurt with a teaspoon of gelatin, add 3-4 tablespoons of syrup or jam.
- Spread the cake with cream and put it in the refrigerator.
It is better to prepare the cake itself on the eve of the holiday and leave it in the refrigerator to soak. But It’s best to decorate with fruit in the morning. This will keep the fruit fresh. You can take any fruit and arrange them as you wish. But on a birthday cake it is better to place them around the edges, in a circle, leaving room for candles without fruit. Use orange slices, kiwi pieces, juicy pears, bananas. And don't forget about! A beautiful cake, should stand on a beautiful table!
You can make a cake without flour. For example, using plain oatmeal. By the way, there is no sugar either.

Oatmeal fruit cake! Another version of a homemade birthday cake for a child.
We will need:
Walnuts 100 gr
Raisins 200 gr
Prunes 100 gr
Dried apricots 100 gr
Oat flakes 500 gr
Sour cream 400 gr
Baking powder 1 teaspoon
Orange 1 piece
Banana 1 piece
- Let's start by chopping nuts, dried fruits and oatmeal.
- Add sour cream and baking powder and mix thoroughly.
- Then beat the eggs and add to the mixture. Let's mix.
- Let's divide the mass into two parts.
- In the first place we put orange slices, cut into four parts crosswise.
- Pour the mixture into a mold greased with vegetable oil.
- Then add bananas, whipped into a homogeneous mass, into the remaining mixture and pour on top of the first portion.
- Place everything in a preheated oven and bake for 30-35 minutes at 200 degrees.
The cake can be made without baking.
Coconut cake
We will need
pulp of two coconuts,
2 cups dates,
6 tablespoons cocoa.
Let's start cooking.
- First we clean the coconut.
- Pour one and a half glasses of water into a bowl, add the contents of the coconut and beat until smooth.
- Place the mixture in cheesecloth and squeeze.
- Place the resulting thick mass from gauze into a bowl.
- Now beat the bananas into a homogeneous mass and combine with coconut.
- Add cocoa and chopped dates. Mix well. Put it in the form.
Preparing the cream:
Banana 1 piece
Dates half a glass
Cocoa 2 tbsp. spoons
Beat all the listed ingredients into a homogeneous mass and place on top. If desired, decorate with fresh or canned berries.
We put it in the refrigerator.
Usually a no-bake cake is made using cookies, but you can use waffles and gingerbread as a base. Let's try the last option.
Gingerbread cake.
We will need:
Fresh gingerbread, preferably chocolate 500 g
Curd mass or homogeneous cottage cheese 500 g
Sour cream 200 gr
Sugar 1 cup
Any dried fruits 150-200 g
So let's get started!
- We cut all the gingerbreads in half or even into three parts.
- Beat cottage cheese with sugar and sour cream. This will be cream.
- Soak the dried fruits in boiling water, and when the water has cooled, cut them into smaller pieces.
- Cover the mold with cling film.
- Now generously grease each piece of gingerbread with cream and carefully place it in the mold.
- Having laid a layer, sprinkle with dried fruits, lay out the next one, sprinkle, and so on until the end.
- Place the cake in the refrigerator for two hours.
- Take it out, turn the container over, and place the cake on a plate.
- remove the film
- grease the top of the cake with the remaining cream and decorate with fruit as desired
The cake is ready! Again, remember: the cake can be made the day before, but it is better to lay out the fruit for decoration on the day of the holiday!
For many people, a holiday is primarily about pie. And indeed, what could be better than a homemade classic pie, which can be decorated with the name of the birthday person on top, laying it out from thinly rolled strips of dough! Just like in the good old days, this is exactly what our grandmothers did on our mothers’ birthdays.
So, let's bake sour cream pie with apples
- Take a stick of butter it must be taken out of the refrigerator in advance because it should be soft.
- Grind butter with sugar. Determine the amount of sugar yourself. If you like sweet dough, then put half a glass, and if just for taste, then two to three tablespoons will be enough.
- Now add sour cream (half a glass) and soda to the resulting mass (half a teaspoon and no need to quench! We put it in sour cream),
- then add 2 cups of flour and knead the dough. It should turn out very soft.
- Grease the mold with vegetable oil and place the dough in it, filling the entire mold evenly.
- Let's make edges from the dough around the edges.
The apples should be cut into slices and carefully placed on top of the dough. Each slice should “peek out” from the next one.
Now we prepare the filling.
- Grind an egg with half a glass of sugar,
- add half a glass of sour cream and two tablespoons of flour. You can take a tablespoon of starch instead of flour, both flour and starch are needed so that the filling does not float away.
Let's preheat the oven and place the pie. We will bake for 40 minutes at 170-200 degrees.
Now let's write down the ingredients:
Flour 2 cups
Sour cream 1 cup
Sugar 1 cup
Oil 1 pack
Apples 4-6 pieces
Starch 1 tbsp. spoon
You can also add cinnamon, 2 teaspoons, if you like
Making a children's cake with your own hands is easy! May your holiday be merry!
It has probably happened to many housewives that guests should arrive in a few minutes, but there is nothing sweet at home to treat their friends. What if someone in the family has a birthday, but there’s simply no time to prepare a big cake? For such a case, the simplest, yet delicious cakes were invented that you can prepare with your own hands in a matter of minutes.
In this article we will describe the most delicious homemade birthday cake recipes. It will take very little time to prepare the delicacy, but the result will certainly please the birthday boy.
Cottage cheese cake with cream
Ingredients:
- cream 33% fat - 1.2 liters;
- fat cottage cheese - 550 grams;
- baking powder - 12 grams;
- gelatin - 14 grams;
- large chicken eggs - 5 pieces;
- cognac - 35 ml;
- lemon - 1 piece;
- granulated sugar - 355 grams;
- white chocolate - 65 grams;
- white flour - 85 grams;
- potato starch - 45 grams.
Cooking method:
To make a delicious birthday cake according to the presented recipe with your own hands, beautifully and easily, you need to prepare all the listed ingredients. To begin, place chicken eggs in a large bowl; we only need two eggs for the dough. The product is mixed with two tablespoons of drinking water, and then gradually begin to beat; while whipping, a little lemon zest, a pinch of salt and one hundred grams of granulated sugar are added to the mass. Beat the mixture for no more than three minutes, and then add a little baking powder to it, add flour and starch.
Baking the dough:
The dough is thoroughly kneaded, and then placed in a baking dish and transferred to the oven, which has been preheated to 200 degrees. Baking is carried out for 25-35 minutes; it is necessary to periodically check the readiness of the cake with a match. As soon as the biscuit is ready, it is cooled and divided horizontally into two equal cake layers.
Cream preparation process:
Now the cream is being prepared for the future delicious cake, beautifully made with your own hands. To do this, beat three yolks with granulated sugar in a bowl. Next, add a little cognac to the mass and stir in the prepared cottage cheese. First, soak the gelatin in water so that it swells, and add the resulting gelatin mixture to the curd mass in a thin stream. Separately, it is necessary to beat the chilled egg whites and cold cream, both products are gradually added to the curd cream, and everything is mixed until smooth.
Cake assembly:
Now we begin to assemble a fairly simple and tasty birthday cake, made with our own hands according to the recipe presented with a photo. To do this, take a special split mold and place the first cake in it. The creamy mass is first divided into two parts, one should be a little larger. Only one part of the cream is poured onto the sponge cake, then it is covered with another cake layer, and the rest of the curd mass is poured over it.
You need to put the dessert in the refrigerator, and in the morning decorate it with berries, glaze or grated chocolate. This delicacy can be prepared beautifully and easily in a slow cooker; your child will certainly like it. It is also possible to make a dessert without baking; for this, ready-made sponge cakes are used.
Light cake in a slow cooker with chocolate
Dough ingredients:
- baking powder - 12 grams;
- chicken egg - 4 pieces;
- lemonade - 230 ml;
- white flour - 680 grams;
- milk chocolate - bar;
- granulated sugar - 340 grams;
- vegetable vegetable oil - 215 ml.
Cream ingredients:
- butter - 195 grams;
- cow's milk - 225 ml;
- granulated sugar - 125 grams;
- chicken egg - 2 pieces;
- wheat flour - 35 grams.
Preparation:
To make a sponge cake for a delicious birthday cake with your own hands, you can watch a video on how to prepare it, but we will describe below the step-by-step process of preparing the cake layer for this dessert. First, you need to take a large bowl for the dough, then break the eggs prepared for the dough into it and pour the required amount of granulated sugar. The mass is lightly mixed, and then the prepared lemonade and vegetable oil are poured into it. Immediately after this, you can add flour and baking powder to the dough, and then knead the dough.
Baking the crust:
As soon as the dough is ready, it can be poured into the prepared pan; first, grease the multicooker bowl with butter. On the “baking” program, the cake is cooked for at least one hour, but it may take a little less time.
Preparation of cream:
While the biscuit base is baking, you can make cream for the dessert. To do this, a bowl is prepared again, granulated sugar is placed in it, and chicken eggs are broken. The required amount of milk is poured into the resulting mass and flour is gradually introduced. This mixture is poured into a saucepan and transferred to the fire. The cream is boiled until a thicker mass is obtained, and it must be constantly stirred so that lumps do not form in the milk.
Forming the cake:
As soon as the creamy mixture for a delicious birthday cake, made with your own hands according to this recipe, is ready, you can cool it. Butter is added to the already cooled cream, and the resulting cream is whipped. It is advisable to add a small amount of vanillin to it. The biscuit should lie in the mold for about twenty minutes, then it is taken out and cut into two parts. The cakes are coated with cream, and melted milk chocolate is poured on top of the cake. The dessert is put in the refrigerator for a couple of hours.
Delicious cake with coconut and cocoa
Ingredients:
- table soda - 2 g;
- cocoa powder - 110 grams;
- cow's milk - 230 ml;
- granulated sugar - 420 grams;
- chicken eggs - 4 pieces;
- premium flour - 110 grams;
- butter - 125 grams;
- coconut shavings - 220 grams;
- liqueur - 135 ml.
Cooking method:
First, you should take care of the eggs; to do this, separate the whites from the yolks into a separate bowl. Add the required amount of granulated sugar to the yolks and rub everything thoroughly with a spoon. Now you can take the whites, add the remaining 145 grams of granulated sugar to them, and beat the resulting mixture with a mixer at high speed. As soon as the whites form a stable foam, you can stop the beating process, and then add the yolks, a little baking powder or soda to the protein mass. Mix everything, then add flour and cocoa powder. As a result, we should get a dough similar in consistency to sour cream. Bake the biscuit at a temperature of 170 degrees for at least half an hour.
Preparation of cream:
Now cow's milk is poured into a separate container, granulated sugar and coconut shavings are added to it. Lastly, butter is added to the cream. This mixture is placed on the fire and boiled, while the milk will have to be constantly stirred so that it does not burn. As soon as the cream becomes thicker and denser, remove it from the heat and cool.
Cake formation process:
The chocolate cake is cooled and cut in half, then it is soaked with liqueur, and a layer of cream is placed on top. The milk is mixed with granulated sugar and cocoa, and then boiled down a little. The mixture is poured over the top of the dessert.
You can find several dozen more equally simple desserts that are prepared in a matter of minutes, but these are the cakes that turn out incredibly tasty and tender. The most important thing is that the process of preparing them does not take much time.
I don’t know about you, but in February we start having birthdays one after another. And although everyone is a little tired from the previous holidays, I still want to cook something delicious. And a cake is not just food, but also a gift, especially if you make it yourself at home.
Therefore, today we will look at several delicious cakes, known to everyone by name, but not everyone baked them themselves. And even if you don’t have any birthdays in the coming days or weeks, this will still be useful to you.
Recipes for holiday cakes with photos, step by step, at home
When you're getting ready to bake a cake, the most important thing is to take your time and do it with passion. If you are not in the mood, it is better not to take the cake. Good luck!
1. Zebra Cake
Everyone knows this miracle from early childhood. His recipes have been passed down for generations. The taste is simply amazing. Consider the classic recipe for this cake.
Ingredients:
- flour 2 tbsp.
- eggs 4 pcs.
- sugar 1.5 tbsp.
- sour cream 200 gr.
- butter 180 gr.
- soda 0.5 tsp.
- vinegar essence
- cocoa 3 tbsp.
- vanillin on the tip of a knife
Preparation:

1. Combine fresh eggs with sugar in a cup and beat with a mixer.

2. Melt the butter over a fire or steam bath and cool it slightly. Pour the oil into the eggs in a thin stream, stirring them constantly.
It is advisable to use butter with at least 80% fat content. Not only quality, but taste and aroma depend on this.

3. Add sour cream to the total mass. It is better to take it with more than 20% fat content. Mix everything thoroughly.

4. Gradually add flour, sifting it. It is imperative to control the consistency of the dough. It should not be very thick, but not liquid either. Mix everything well again.

5. Combine soda with a few drops of vinegar (sour cream), thereby extinguishing it. Add to the dough and mix everything.

6. Divide the finished dough in half. Add cocoa to one half, flour to the other. They should have the same consistency.

7. The dough should resemble thick sour cream.

8. Having completed kneading the dough, you can move on to the creative part of preparing the cake.
9. Initially, you need to grease the mold well with vegetable oil, or use parchment.
10. Place 2 tablespoons of light dough in the center, then 2 tablespoons of chocolate dough. And so alternate until the required amount of dough in the pan.
To make the drawing beautiful, you need to try to pour the dough into the same point.

11. A lot of patience is needed here. You will immediately notice when a pattern begins to form. You should get multi-colored circles. Continue adding until the dough is finished.

12. To create a more original design, I advise you to use a toothpick or skewer. Here you can show all your imagination. Or do as I did - draw lines with a toothpick from the center to the edge of the mold. If you draw the lines the other way around, from the edge to the center, you will get a completely different drawing.

13. Place the cake in a preheated oven at 160 degrees and bake for 40 minutes. Since the dough is made with sour cream, the baking process may take a little longer than usual due to the low temperature.
By lowering the temperature and increasing the baking time, the cake turns out more even. The middle practically does not rise and remains at the same level with the main mass. It turns out an even cake.
14. While baking the cake, do not open the oven door so that it turns out smooth and fluffy. Otherwise, it may settle abruptly.
15. When the cake is browned, take it out and check for doneness with a toothpick. If it is crumbly and wet, put it back in the oven for another 5 minutes on the previous setting. If dry and clean, it is completely ready.
If your cake turns brown quickly, but is still damp, you can cover it with foil. Then it will bake well and not burn.

16. Remove the finished cake from the mold and can be served as a cupcake or made into a cake base. If this is a cake, then the cake needs to be cut into several flat cakes and soaked in cream to your liking. Place on the table with aromatic tea.
17. Consider a recipe for making universal sour cream, which is suitable for soaking any cake.
Ingredients:
- Sour cream 500 ml.
- Sugar 200 gr.

1. Mix fresh sour cream and sugar. Refrigerate for 10-15 minutes. After this, mix again and beat well with a mixer.

2. Beat sour cream and sugar at maximum speed until a creamy consistency is formed. The cream will be thick and fluffy.
3. Grease the cake layers with the prepared cream. Decorate as desired with whatever you like best. You can invite all household members to the table.
Bon appetit everyone!
2. Cake “Honey cake”
Honey cake is a delicate and pleasant-tasting cake, where many thin cakes are soaked and greased with cream. With a slight taste and aroma of honey.

I bring to your attention a recipe for a classic honey cake, which presents a step-by-step preparation recipe with photographs.
Ingredients for the crusts
- eggs 4 pcs.
- sugar 1 tbsp.
- honey 4 tbsp. l.
- butter 100 gr.
- flour 3 tbsp.
- salt a pinch
- vanillin - on the tip of a knife
- soda 1 tbsp. l.
Cream ingredients
- butter 250 gr
- condensed milk 1 can (380 gr.)
Honey cake can be prepared in two different ways: using a water bath or in a saucepan over heat. Here is a method using a water bath.
 1. The meaning of such a bath is that a smaller one is placed in a larger vessel. But it should seem to cover a large saucepan with a lid.

2. The small saucepan should not be placed in boiling water. It should be above it and heated with steam.
3. Before adding honey to the total mass, you must taste it. After all, whatever its taste is, that’s how the whole dessert will turn out.

4. Heat the ingredients together in a small saucepan. in this way they seem to melt. To prevent the mixture from sticking to the bottom, it must be constantly stirred. The fire should be as strong as possible.

5. Beat the eggs so that the white is well combined with the yolk, since when adding eggs to a hot mixture, the white may curdle. There should be a light foam.
6. It is better to beat eggs with a mixer at high speed. They should be poured in in a very thin stream and actively stir the hot mixture so that the white and yolk do not cook when adding them to boiling water.

7. Without removing the dough from the heat, add soda and mix thoroughly again.
There is no need to extinguish the soda here, since it will be completely extinguished by honey. Its taste will not be felt in the finished delicacy.
8. The resulting mixture must be warmed well. In this case, a light foam and airiness should form. Only then can it be removed from the fire.
9. In a separate deep bowl, sift the flour (you can do it several times) and add vanillin. Mix everything.
The more often and more you sift the flour, the fluffier the cakes will be. Since flour is saturated with oxygen during sifting, which is not so unimportant!

10. Add sifted flour in parts to the kneaded dough. At the same time, do not forget to stir.

11. The batter is very sticky. Therefore, by gradually adding flour, it becomes less sticky and more dense.
Be careful! If you add a lot of flour, the cakes will turn out very dry and hard.

12. When the dough becomes very difficult to stir with a spoon, you need to transfer it to the table, adding a little flour. Ideally, the dough should not stick to your hands. At the same time, it spreads noticeably.

13. Wrap the dough in cling film or cover with a lid and refrigerate for 1 hour. Once it cools down, it will completely stop sticking and it will be easier to form the cakes.

13. After the time has passed, remove the dough and divide the “sausage” into 8 equal parts.
14. Form each part into a ball and place in a cup, covering with a towel or film. Place in the refrigerator. Leave only one of them on the table. Continue further work with him.

15. Roll out the first cake layer. It is better to put parchment paper under it. The dough does not stick and it is easier to transfer it to a baking sheet. Or you can constantly sprinkle a small amount of flour under the cake.

16. Immediately cut out the desired shape. You can use the lid here. Place it on top of the cake and, using a knife, trim off the excess that will be needed to decorate the cake.

17. In a preheated oven to 160-180 degrees, bake the future cake. The main thing is not to dry it out. Otherwise, it will turn out fragile and will not be saturated with cream.

18. Bake each cake until a reddish color appears, about 5 minutes. Depends on oven temperature.
19. Do the same with the remaining balls.

20. Bake and scraps. Then chop them using a rolling pin. They look very interesting as decoration on a cake. If you need smaller chips, it is better to use a blender.
21. Place the cakes in a stack on a separate tray and leave until required.
Butter cream with condensed milk
It is important that condensed milk and butter are at the same temperature.

1. In a bowl, beat the butter until light and fluffy. It should be soft and warm.
2. Without stopping whipping the cream, gradually add condensed milk. The main thing in such a cream is not to overpower it.

3. If your cream has grains, then it needs to be heated and then whipped again. Our butter cream is ready!
Cake assembly:

1. Place the first cake layer on a beautiful dish and brush it with cream. The cream should be in moderation, and not so much that it runs. You can divide the total amount of cream by the number of cakes.

2. Grease all the cakes in this way. Be sure to lubricate the top and sides. Sprinkle crumbs, broken or crushed, over the top and sides of the cake.

3. Leave the finished cake to stand in a warm place for an hour or two. During this time it will be well soaked. And then put it in the cold for 2-3 hours, then a pleasant honey aroma and taste will appear.
Your family will be delighted, bon appetit!
3. Low-calorie yoghurt cake with kiwi and banana

And this wonderful cake will delight you not only with its lightness, but also with its appearance. And pieces of fruit will give you some pleasant aroma and taste. In addition, it is very easy to prepare.
Ingredients:
- Kiwi – 6 pcs.
- Banana – 2 pcs.
- Sugar – 70 g
- Water - ½ tbsp
- Natural yogurt – 500 ml
- Butter – 70 g
- Edible gelatin – 4 tsp.
- Shortbread cookies – 200 g
- Lemon juice – 1 tbsp.

1. Grind regular cookies into crumbs as finely as possible.

2. Add soft butter and stir everything into a homogeneous mass.

3. Place cookies in the form of a cake in a springform baking dish and place in the refrigerator for 30 minutes.

4. Pour gelatin with warm boiled water and leave to swell for 30 minutes.

5. Peel the kiwi and cut into cubes.

6. Combine kiwi with lemon juice and sugar.

7. Warm everything over medium heat for about 2-3 minutes so that the kiwi releases its juice. Then cool the resulting mass.

8. Then add gelatin, yogurt to the kiwi and mix everything well.

9. Cut bananas into rings.

10. Place the sliced bananas on top of the crust.

10. Pour the yogurt mixture over everything and leave in the freezer for 6 hours or in the refrigerator overnight.
The cake is ready. Enjoy your tea!
4. Video - recipe for a delicate fruit cake without baking
Happy Holidays and Bon Appetit!