Each mob has its own special weak points. Sometimes you suffer for a long time with some boss, but it turns out you had to hit him in the eye =)
Gast
One of the main problems of those who built the portal to the Twilight Forest is how to kill the Dark Ghast:
It should be noted that this boss is quite serious, and it will be quite difficult to destroy him.
Here he is, far, far away at the very top!
But before we go into battle, let's immediately clarify the main points:
- The Dark Ghast is a huge mob that constantly flies around its victim;
- His one-time attack is a fire beam, which consists of three firewalls at once;
- The boss can create more and more ghast cubs, which cause the player a lot of problems;
- There is a special state, tantrum, into which the Dark Ghast can fall, in which case you can only cause him a quarter of the damage of everything you deal;
- For the boss, blows inflicted by melee weapons are completely painless;
- The High Ghast can cry, and his tears cause one and a half HP damage to the player;
- The reward for victory appears at the place where the boss dies in a chest, and to get there you will need to use blocks of cobblestones or earth.
To begin with, we choose armor: steel sheet will do, or at least diamond, in which case you will have a better chance of surviving.
The death staff, as well as the twilight staff, would also be ideal, since melee weapons, as you understand, are simply useless.
So, how to kill the Dark Ghast in Minecraft? To begin, choose a tactically convenient firing location for yourself: you should have a place at the top of a dark tower, where you can retreat at any moment, hiding from both the attacks of the Supreme Ghast and his guards.
In addition, look around carefully: somewhere nearby there should be a trap, but at the initial stage it will not help you in any way, but as you destroy the guards, the carminite trap will charge.
At the moment when it is fully charged, smoke will come from above it, and a characteristic squeak will also be heard. However, you need to activate it when the Dark Ghast himself is nearby, then it will not only destroy all the small minions, but also cause significant damage to the boss himself.

One of the castle guards on the way to the Dark Ghast: ifrit
However, you shouldn’t relax here: with a lot of damage, the boss instantly goes into tantrum, and then you can only deal one-fourth of the entire possible blow. But you shouldn’t wait out this state of Ghast, since while in the tantrum, the boss continuously creates more and more new armies of guards, with whom you will also have to fight.
Therefore, attack and only attack, until the last moment! Until complete victory!
Naga
Considered to be the easiest boss in the Dusk Forest.
How to find her?
Of course, using the magical map of the Twilight Forest, because the location of the “enemy” is clearly indicated there.
Typically, when approaching a Naga spawn location, you will see a fairly large area of territory covered with stylized Naga bricks, mossy cobblestones, and stone brick blocks.

Here it is - Naga's arena!
And inside there will be a strange green ribbon running around with a wild hiss - that’s our enemy! The boss's life indicator, which will appear on your screen, will also tell you about the presence of an enemy inside the fenced area.
The best weapon, if you are a beginner, will be a bow and arrows, since Naga is quite dangerous when approaching, but if you have a bow, you can place blocks under yourself and hit from a good position. However, you need to keep in mind that this boss can destroy blocks, so you need to always be on the alert - and if anything happens, immediately change your position, which can be done in time, since Naga moves in circles.
There is another option for fighting the enemy, which was proposed in one of the guides on the Internet: you need to dig one block under yourself, and then you will be out of reach of the attacks of Naga, who hits with her head, in which case it would be advisable to choose a diamond sword. Well, what can I say: the Naga with whom there was a battle was completely unaware that she could not hit, and if not for the armor, then the matter would have ended in tears. It’s a shame when recommendations are written by writers who have never seen this boss!
The tactics of the main battle with Naga are that you only need to hit her in the head, while dodging her tail.

And here is the boss himself - Naga!
The battle is complicated by the fact that this is a fairly fast mob, which, when it touches you, poisons you with infected mucus. In case of poisoning, the best medicine is a bucket of milk, so don’t forget to take it with you.
The snake can take damage from lava, so if you are not the best fighter yet, you can take a bucket of lava with you. For example, this boss cannot destroy blocks of water, but she can swim perfectly, although if she moves through water, her speed will still decrease.
As the fight progresses, the snake will lose one by one the blocks of its tail, however, having killed Naga, you should not relax, since immediately after her death, in most cases, the Taum slug will spawn, which, accordingly, also needs to be killed.
The most common loot from Naga is the Head - a trophy (it will be useful in the search for further treasures), vials of fiery blood (they are needed to create Fire Armor), Naga's Heart (they can be used to make very interesting armor, but crafting is only possible for leggings and bib), as well as directly - the meat of the snake.
Boss Naga. This place is surrounded by a fence made of mossy cobblestones and stone bricks of various types.
Peculiarities
As soon as you approach the fence at a certain distance, Naga will spawn, which you will know by the boss’s life indicator that appears. Naga cannot leave the arena, but she can break blocks and “look” over the fence. If you run away from Naga, she won't chase you.
Naga's body is “harmless” and is a kind of indicator of life: the more lives, the longer the tail; Only the head is “tangible”. When attacking, Naga will first circle around you, then make a peculiar sound and carry out a series (three or four) of attacks with his head. It is not recommended to take weak armor, such as iron, with you into battle: Naga will quickly kill you. In principle, no one forbids taking a bow and shooting Naga from afar.
If you die during the battle with Naga, you will be respawned in a random place in the Forest, so it is useful to have a Zan/Rei`s card. If you decide to return to the overworld for items, Naga will not spawn. She will maintain approximately the same level of health. However, you shouldn’t leave her alone for a long time: Naga is treated, and healed relatively quickly.
Naga takes lava damage. Water and webs slow Naga down. Naga destroys all blocks, except lava: she swims in them. From some blocks that occupy more than one block (bed), Naga “breaks off” one block. The second one will be destroyed either by Naga herself or by updating the block nearby. If Naga damages two parts of the same bed almost simultaneously, the bed will fall out normally. Naga can jump behind the player up to 4 blocks.
Bugs
- If you stand 1 block below Naga, she will not be able to attack you. This is because she only hits with the top of her head.
- Since all blocks broken by Naga fall out, you can even get a bedrock block.
Facts
With the Infernal Mobs mod, Naga can have over 750 lives and also create webs.
To install the Dark Forest in Minecraft, you must first download and install Minecraft Forge. Nothing will work without him. And then you download the mod and you need to copy the resulting file to the game folder where the mods are located (Mods). Many features will open up, for example, you can meet mobs that are peaceful, you will have a bunch of different achievements. You can watch cicadas or fireflies: if you stand and look at them for a long enough time, they will begin to move.
The new biomes are highlands, glaciers, mushroom places, swamps, both ordinary and fire, in which geysers are located. The place is, however, dark, but sometimes fireflies provide illumination. In the hills and ruins you can find various interesting things, not only ore, but also all sorts of amulets. Ghosts, spiders, goblins, skeletons walk here and there. There are also labyrinths that contain treasures. Bosses have been added that are quite difficult to pass. And the creators also came up with a new progression system, moreover, development occurs in a strict order - until you kill some boss, another biome will not open to you. The sun and moon always shine, so night and day do not replace each other. Therefore, you can sleep whenever you want.
A barrier in the form of a green grid, like rectangles, means a place where you cannot get to for some reason. To find out in what order you need to go through the location, press the Escape key, then find the achievements there, scroll through until you come across the Twilight Forest mod.
Warrior cats
Surely everyone already knows, or at least heard, about Erin Hunter’s books, which describe the adventures of warrior cats. It all started with a kitten who decided to become a wild cat and joined his brothers living in the forest. It turns out that there are four tribes in total, and he became a member of Grozovoy.
The Warrior Cats divide the Dark Forest into four parts, but sometimes they fight. In addition, various troubles await them, for example, dogs, cold and harsh winters, people poisoning fish, flooding, and others. Cats have their own prophecies, and they also believe in the Star Tribe (sometimes called the Heavenly Tribe), which patronizes them. According to legend, cats go there after their death to then watch and help their brothers from heaven.
Portal
In Minecraft, the Twilight Forest mod suggests a new, very mysterious place. Well, how do you get there? This is exactly what the portal is for. The actions will be as follows:
- You must dig a 2 by 2 hole.
- Next, the hole is filled with water.
- Planted with a number of plants of any kind. These can be dandelions, as well as reeds, even poppies.
- After which you need to throw a diamond, one piece, directly into this hole.
- Move some distance away.
- When lightning hits the pit, you can assume that the portal is activated.

Sometimes a portal can take you to a new world in 5 seconds, sometimes in 5 minutes, it all depends on the computer.
Naga, Lich, Labyrinth
You have to kill someone, who - it doesn't matter. Next you will be given the title "Forest Killer". And then you face the boss. It’s easy to kill a naga, the main thing is that you need to dodge her attacks. Naga is located in an area called accordingly: Naga Arena.

You will recognize the place because there is a fence made of stone, as well as cobblestones and various bricks. The boss has 200 health units, that is, 100 hearts, and deals 6 units of damage. All trophies need to be picked up, after which you go to kill the Lich.
The Lich has 100 health, deals 6 damage, you will recognize him because he is a tall skeleton, wearing a purple robe and a golden crown on his head. He is in his castle on the top floor. He has one eye red and the other burgundy. When he appears, he will have a staff in his hand and 5 shields around it. From it you get a head, pearls, also a staff and gold things.
You must kill him to get the “Killer of the Dead” achievement; to open the task you need to take his staff. Next you go to the minotaur in the labyrinth.
Actually, he is more of a centaur, but he is also called the mushroom minotaur. You will find him in the swamp, he has an ax in his hands, and in the room you will find four chests. The Minotaur deals a minimum of 5 damage and a maximum of 7. He himself has 120 health. You will find it on the second level of the maze, there are still many mushrooms there.
When you defeat the minotaur, take his ax and then repair it at the anvil using diamonds. After winning, you receive minotaur soup and complete tasks.
Hydra and the Underground City
Hydra is located near a cave, quite large, where there is a whole bunch of different ores. Location: Fire Swamp. Hydra itself is a blue dragon with three heads.

It's useless to attack the body, she doesn't care. Only the head is weak, the best tactic is to wait until she opens her mouth and shoot there. When you win, you will receive vials of fiery blood. After which you will be given two achievements at once. Keep in mind that the hydra breathes fire, like a real dragon, and it also throws projectiles that explode and can bite the character. She is in pretty good health. After winning, you can also find her head.
In Minecraft, mod 1.7.10 “Dark Forest” allows you to see the Underground City, which is located in the Dark Forest. To get there, you need the head of a Hydra, Naga, or Lich. Take a torch with you. When you go into the forest, you should keep in mind that the mobs here are quite bloodthirsty. Find the goblin city and find phantoms there. These are the ghosts of knights, there are 6 of them, they are wearing phantom armor.
The lower level is currently closed, so the fortress will have to be opened. Find the entrance where the trophy pedestal is located. Take the boss's head and place it on this pedestal. After this, the shields around the fortress will collapse, and you will be able to go down to the underground floors.
If you walk along the corridors, you will probably find a chest. And not alone. The phantoms have a total of 210 health units, they move around the room, but the whole joke is that only one of them is real. And if you look carefully, you will see that it has a physical shell. Kill the ghosts and you will win, after which you will receive the Wraith Armor, tools, and the chest contains the Wraith Armor. You receive both things and corresponding achievements. Next you need a Ghast.
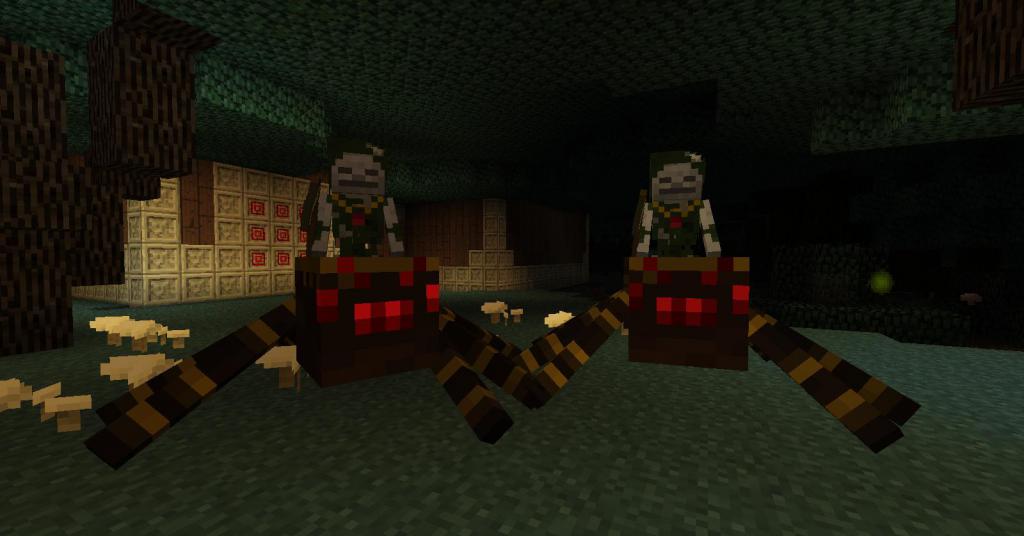
This mob is the leader of the Carmites and is located in the Dark Tower. The volume is 8 x 8 x 8, it has additional tentacles on the sides. Can shoot fireballs, 3 at a time. All the time it spawns cubs and, if it receives a lot of damage, it will come into a special state. He will start crying, his tears are gigantic, as a result it will rain, and the damage he receives from the boss will be 3/4 less.

After which he will create cubs constantly. He has 250 health units. Moreover, one tear can cause 3 units of damage. If you defeat him, you will find a chest with his head, fire blood and karmite. The last thing is a valuable resource; it can be used to make a mechanism block for the Dark Tower. And it is only found in chests in this place.
Almo Yeti and the Snow Queen
Location - lair, forest biome, covered with snow. There are 4 entrances, all of them natural. He is the Alpha Yeti and attacks with ice blocks. If such a block hits a character, he will be slowed down. If you hit Almo a couple of times, he will spin and the players behind will take damage. When you kill him, you will receive his fur, which can save you not only from the frost, but also from Aurora’s spell.
Aurora - Snow Queen, location - Aurora's palace, one of the towers, upper part. She has an Ice Cloud that she rides on. This cloud also acts as a shield, so either jump on this cloud to damage her, or wait until it reaches the floor.

There are 2 parts to the battle. In the 1st, it can cause ice crystals, as a result of which it restores its health. And when her health reaches 62.5 hearts, the second phase will begin. He will begin to stretch out his hands - and snow globes will fly out of them. Then she can fly and fall to the floor, directly on the player, causing him significant damage. If you win, you will receive a bow and a head, and you will also receive an achievement.
Giant Miner and Fire Lamp
You will find him on the cloud, and he is really big, just a copy of you. But he has a huge pickaxe that you get if you kill him. After which you must find a cave, this is quite difficult, since there are many caves, you will have to try hard.
On the map, find the cave mode, somewhere there should be a giant obsidian in the masonry (this is a box). No, you don’t need to take it, you need to break it. This is precisely what the pickaxe, taken from the miner, was intended for. After the obsidian is broken, you will see two chests. In one of them there is a fire lamp. When you find it, you will receive the achievement.
Items
Magic feather. Used to create a magic card. To create, you need to take a torch, glowing dust and a raven feather.
Magic core. Found in the Minotaur's Labyrinth. It is necessary so that you can create a map of the labyrinth and an Anti-workbench.
Metal of the ancients. Found in the Twilight Forest in some treasuries. If you have a mossy root, an iron ingot and a gold nugget, you can craft it.
Fiery blood and tears. When you kill the Hydra and Ghast, you will receive them. To create a Fire Ingot, these items are used. Ingots can be used to produce tools, as well as armor with automatic enchantment.
Staff of the Dead, you will receive it from the Lich. If you right-click on it, you will call yourself a zombie, it will attack your enemies. However, it can burn in the Sun. After he appears, exactly one minute later he dies. To recharge the staff, you need to take a potion of rage, rotten flesh and put it on the craft.
Lich's Death Staff. Hover your cursor over a mob, right-click and take away its health, it will be added to you.
Twilight Staff from Lich. Deals 5 damage. There are 99 shells in total, then you will have to reload using pearls.
Naga's Heart. In addition to killing this boss, you will find him in the dungeons. With its help you can craft armor.
Labyrinth Pickaxe. Found only in the labyrinth, she breaks the stones in this place, and only she can break them. The rest break, but slowly, reducing their strength. To find it, you need to go to the second floor and look for the secret room.
Anti-workbench. If you can assemble things on a workbench, then here you can both assemble and disassemble. However, to disassemble it, you need experience.
The Caterpillar Queen is located in the Twilight Forest in some treasury. If you right-click on it, it will place a glowing caterpillar. This way you can light your way.
Biomes
The thorn biome causes damage to you when touched, and you cannot break them either. But if you somehow overcome them, you will go out to the mountains and see the castle where the final boss lives. At the moment, this castle is still under development. But you can take a tour here.
The dark forest is where the druid's house is, he has a brick chimney and a wooden roof. A druid skeleton spawns in the house; sometimes you can find a skeleton sitting astride a spider. Spawn locations - Druid's house. Sometimes you can find it in the Dark Forest.
Illuminated forest. Similar to Twilight, but there are many colors, more beautiful and light. You will find pumpkins and friendly mobs there.
Dark forest. The place is creepy and completely dark. You will need either torches or a night vision potion. The Caterpillar Queen might also come in handy.
Here you will find 2 kings: wolves and spiders. They are quite large and if they spot you they will cause you a lot of trouble. You won't take anything from the wolf king. Can deal 6 damage and inflict blindness on you.
The spider king has a yellow-brown coloring and is visible because his eyes are red and glow. He is very fast and strong, does not like water, it is an obstacle for him, he will definitely get around it. Usually he appears not alone, but together with the skeleton of a druid, who acts as a rider for him.
From it you can get a spider's eye, as well as several other useful things. It is in the Dark Forest that the Tower of Ghast is located. There are trees covered with snow everywhere, and there is a glacier in the center. A Yeti cave can be found there, with a whole bunch of snow wolves around. If you kill them, you will receive Arctic Fur. The Snow Queen's castle is located in this forest.
Twilight Mountains. There are many, many fir trees, quite large, there are deer and wild boars, and ferns grow. And above the mountains there is an island of giants, in fact, these are the miners.
The Dark Forest mod also adds the Fire Swamp. This is where you will meet the hydra. There is lava, purple water, and steaming geysers everywhere. You can also find a flame and smoke generator. You won't get to these swamps unless you complete Twilight. It is not recommended to go here until the Lich is killed and you take his trophies for yourself.
The Mysterious Forest is sometimes called the Enchanted Forest. Unique, colorful trees grow there. This is how you find the ram. It's funny that the grass is blue.
Quest Rama is a peaceful lamb who can be found in the ruins. If you give him wool of 14 colors, he will give you 4 blocks: 1 gold, one diamond, one emerald, 1 iron. And the horn is a rather useful thing that allows you to clear a place from all existing blocks. However, it does not affect ore. The stone becomes cobblestone, the brick becomes cracked, the ground collapses, you can take these blocks for yourself. Please note that it is prohibited on some servers.
There are special trees in this forest. One of them is called the Miner's tree, which is similar to an ore magnet.
The transformation tree, which changes the color of the grass, attracts animals and fireflies. Magic symbols fall from its leaves.
The sorting tree, if you have chests nearby, sorts the contents and sorts things from all chests according to characteristics - seeds separately, ore separately, and so on.
Tree of time. If you plant something nearby, the growth of the planted thing will accelerate.
Treasures
In Minecraft, the Dark Forest mod introduces several interesting places. For example, a hedge maze.
This is the easiest maze. You can find a lot of wolves and spiders there. There are lamps and fireflies inside. The chests contain weapons and various items.
Destroyed houses.
This is usually either the walls or the floor, which is where the mossy cobblestones are located.
Hills can be found quite often: these are dome-shaped mountains. There are many chests there, the larger the hill, the more chests. You may find various useful things.
Mobs
You can meet many characters here. The inhabitants of the Dark Forest are quite diverse, such as cobalts. They are small and blue, their ears are big. Quite a cute, cute creature, but he is hostile.

It represents a weak opponent, but if it unites in a flock, the danger will be significant.
A grimorum is a book that can fly and throws leaves that slow down the player. In addition, paper can cause injury. You can find such a book either in the Lich’s castle in the library, or somewhere in the stairwells. She has a lot of health, so you need to have an enchanted sword. It drops a lot of useful things.
Firebug. Found in the labyrinth of the minotaur or in the dungeon of some hill. Throws fire, you need armor that has fire-resistant enchantments.
Slug. May be located in a labyrinth underground. You can get slime and tools from it.
The jackals are in the hedge maze. Very aggressive. There are also spiders there. In hollow hills and caves you can find a goblin, usually he laughs and has an iron pickaxe in his hands. In addition to the usual goblin, you can meet a suicide bomber who has explosives. He can blow you up.
The Twilight forest mod adds a new dimension to us that is filled with adventure, the world is huge, like the normal world, and almost all is covered with trees. This world is more mysterious and fantastic than the usual one. It is constantly dark here, which gives this world a unique, dark atmosphere. Large trees with their crowns cover the Twilight Forest from the sun's rays, forming a kind of dome. He is only occasionally pierced by huge trees, so huge that they stretch up to the sky. The terrain here is flatter than in the overworld, but sometimes you can find hills containing caves full of valuable ores, treasures, and dangerous monsters.
How to build a portal to the twilight forest:
In order to get into this world, we need to create a portal. For the portal we need to dig a 2x2 hole and fill it with water. To surround this pit with plants, any plants (dandelions, poppies, reeds, seedlings) will do. Next, we throw one diamond into the hole and lightning should hit our portal. Ready! Our portal is activated!

Since version 1.7.10, the author has added a progress system to us. What does it mean? This means that we need to complete achievements to reach this or that boss or dungeon. That is, we will not be able to immediately kill Hydra or the Snow Queen. Locations that we have not yet opened will not be available to us. In them, negative effects will be imposed on us. And there will be so-called barriers around us (Visual effects)

Bosses and Adventures:
First of all, we need to kill any creature. 
We can find Naga in the Naga Arena. Naga Arena is the area where the Naga boss spawns.
This place is surrounded by a fence made of Naga stone, mossy cobblestones and stone bricks of various types. Naga is the easiest boss. It drops 6-12 Naga hearts, as well as a large amount of experience. In order to complete the “Naga Killer” achievement, we need to pick up the Naga trophy.

The next task will be to kill the Lich.
The lich appears as a tall skeleton (about three blocks tall), wearing a purple robe and a golden crown on his head. Also, he has different eyes: one is red, the other is burgundy. After appearing, five shields rotate around him; in hand is a Twilight Staff that emits blue bubbles.

When a Lich dies, one of three staves drops: Twilight Staff, Zombie Staff, or Death Staff.
The following also drop out: a golden sword, a golden cuirass, golden leggings, or all together; two bones and an edge pearl. After we picked up the Lich trophy, we complete the “Assassin of the Dead” achievement. In order to open the next task we need to pick up the staff of the dead. 
After this, we need to find the Labyrinth of the Minotaur. He is in a swamp.


In the labyrinth we need to kill the mushroom centaur. This is a mini-boss. It is a hybrid of an ordinary minotaur and a mushroom cow. He spawns on the second level of the Minotaur Labyrinth in a room with large mushrooms. He deals damage with a powerful ax that drops when this boss dies. This ax can be repaired using diamonds on an anvil. The best way to fight this boss is to break the block of the large mushroom and just hit it. After we receive the soup from the Minotaur, we complete the task “The Mighty Stroganov.” 
Hydra. This boss can be found near a large cave with many ores. 
Hydra represents the three-headed blue dragon. She only takes damage to the head, the most damage can be done to her by shooting her in the mouth when she opens it. The Hydra is in a cut hollow hill in the fire swamp. When you kill her, you will receive several vials of fiery blood and a Hydra trophy. You also get two achievements! 

Now we can go to the Dark Forest!

To enter the main part of the fortress you will need a trophy - the head of a Hydra, Naga, Lich or Ghast, dropped from the corresponding bosses. Six ghostly knights who have emerged from their graves and are now trying to escape from their tomb, which is located in The underground city of goblins to take revenge on his enemies. They wear Phantom Armor and throw iron weapons. From the phantoms we get the royal pickaxe, axe, helmet and cuirass of the phantoms. All these things will be enchanted with quite good enchantments. Along with these things we get an achievement. 
After the battle with the phantoms, we can go to the ghast tower!

The High Ghast is the leader of all the Carminite Ghasts in the Dark Tower. It has a size of 8x8x8 blocks and several additional tentacles on the sides. Shoots 3 giant fireballs at a time. Constantly spawns baby carminite ghasts, and with a large amount of damage received, it can go into “Tantrum” - a state where this boss will cry giant ghast tears, it will rain, the boss will begin to receive 3/4 less damage and will continuously create cubs. Fortunately, in Tantrum, the High Ghast cannot attack. After death, a chest will spawn with fiery blood, carminite and a trophy - a small copy of the boss himself. For defeating him we get an achievement.

In order to complete the next achievement we need to kill the almo-yetti and get his fur.


The formidable Almo Yeti, much stronger than his brothers. After killing this boss, warm yeti fur falls out, which protects the player from the spell of the Snow Queen. Yetty will pick you up and throw you away, causing damage. Also, when he is angry, icicles will start falling from the ceiling, beware of them!
After the death of Almo-Yeti, we complete the achievement. 
After killing the yetti, we need to go to Aurora Castle, where the snow queen lives.


When killed, a head, a triple bow and several stacks of snowballs fall out. Congratulations! We received another achievement. 
To get the last achievement we need to find a fire lamp. She is located in a cave in this biome:

But before you go into the cave you need to find the giants! They are located above the same biome on a floating island
He kills the giant with a huge pickaxe and goes to the cave.

I will say right away that there are many caves on this mountain; it will be quite difficult for us to find the one we need. But using the cave mode on our map it is easy to figure it out. In the cave we find a huge masonry with giant obsidian. We break it with a giant pickaxe and see two chests. One of these chests will contain our lamp. And the achievement is completed.


- Magic feather. The item is needed to create a magic card. Craft crow feather, glow dust and torch.

- Magic core. An item that can be found in the Minotaur's Labyrinth. Needed to create an anti-workbench and a maze map

- Metal of the ancients. Can be found in treasuries in the Twilight Forest. You can also craft from an iron ingot, a gold nugget and a mossy root. Used to create armor and tools from ancient metal. In this case, things will be automatically enchanted.

— Fiery blood and tears. You can get it by killing Hydra and High Ghast. Used to create fire ingots which can be used to make armor and tools. In this case, things will be automatically enchanted.

- Staff of the dead. Dropped by Lich when pressed RMB spawns a green zombie minion, he is stronger than his fellows and attacks hostile mobs. Burns in the sun and dies a minute after spawning; to recharge, place the scepter in the crafting grid along with rotten flesh and a potion of rage.
- Staff of Death. Dropped by Lich when pressed RMB takes away health from the mob the cursor is hovering over and adds it to the player. To recharge, place it in the crafting grid along with the prepared spider eye.
- Twilight Staff. Dropped by Lich when pressed RMB Fires ender pearl-like projectiles that deal 5 damage each. Can fire 99 of these projectiles, then requires reloading by placing them in the crafting grid along with an Ender Pearl.
- Heart of Naga. Used to craft armor. Can be found in the Twilight Forest Dungeons and can be obtained as a reward for killing Naga.
- Fan of flight. When used, gives the player a jumping effect for several seconds. Also, if used on creatures, the fan will push them back several blocks. The fan can be found in treasuries in the Twilight Forest.
— Queen of the caterpillars. When pressed RMB She places a caterpillar on the block that will glow. The Caterpillar Queen can be found in treasuries in the Twilight Forest.
- Attracts ore if you press and hold RMB.
- Triple bow. The bow shoots 3 arrows at once. You can get it by killing the Snow Queen. Deals 10 damage.
- Ice bow. Obtained from Aurora Castle. Freezes its target, causing it some damage.
— Ender bow. If you shoot it at a mob, the player will switch places with the mob. In this case, the bow deals 8-10 damage.
- Seeker's bow. Deals 8-10 damage to the victim. Has homing properties.
 - Pickaxe of the labyrinth. This is a special pickaxe that can only be found in the labyrinths added by the Twilight Forest mod. The main feature of this pickaxe is that only it can quickly destroy the stones of the labyrinth; other pickaxes destroy the labyrinth stones very slowly, and their durability decreases 16 times faster than normal. It is also worth noting that this pickaxe is not found in ordinary chests in the labyrinth; it can only be found in a secret room on the second level of the labyrinth.
 — The fire set provides good protection; it sets the creature on fire during an attack. The fire pickaxe has the ability to automatically smelt ores. The flaming sword sets the creature on fire when it attacks.
 - Anti workbench. A block similar to a regular workbench, but allowing you to both assemble and disassemble things; the latter requires experience. If the disassembled tool has been used, then some of the ingredients will not be available for crafting.
Has easy crafting.

Biomes other:
The main biome of the Twilight Forest mod. In it, like in many others, you can find special trees, new mobs, structures and much more. There are also mushrooms, ferns, tall grass, and several passive mobs (rams, wild boars, deer). Not to be confused with the Illuminated Forest! In the Twilight Forest biome, flowers are not generated in such quantities, and there are no “lanterns” made of fence and glowstone on the trees.

 In the biome you can often find deer, rams and wild boars. These are ordinary pigs, cows and sheep. They can be turned into their prototypes by clicking on them with transformation powder, which can be found in chests.
You can also find a druid's house in this biome. It is a house made of cobblestones, mossy cobblestones, with a brick chimney and a wooden roof. There is a Skeleton Druid spawner in the house.


Druids spawn in the Druid's House, or the Dark Forest (they are sometimes found riding spiders there). They are very difficult to spot in the forest because of their clothing. They have 20 health units and deal 3-5 damage. As a drop you can get: 0-2 bones, 0-2 torches and as a rare drop a golden hoe.
Illuminated Forest— a new biome in the Twilight Forest modification from version 1.7.2. In general, the biome is similar to the Twilight Forest, but unlike it, this biome has many flowers, including the flowers from version 1.7.2, as well as firefly jars hanging on fences that are attached to trees.
 Monsters practically don’t spawn in this beautiful biome, because it’s always light there, but friendly mobs like the rams from Twilight Forest spawn. There are also a lot of pumpkins in this biome.
Dark forest- one of the biomes that the Twilight Forest mod adds.
The dark forest is a rather creepy place, since it is absolutely dark there: the dense cap does not allow light to pass through. In this regard, going there without torches or a potion of night vision, or the Queen of Caterpillars and any preparation is practically pointless, and the constantly flickering and densely growing trees can get confusing. Recently, this biome has been emitting a special blinding aura, making it very difficult to be there even on the foliage; Closer to the heart of the forest, the foliage turns fiery red.
The blindness effect will disappear when you kill the Hydra.
 You can walk along the top of this biome and not be afraid that you might fall through - there are no gaps in it. There are also sometimes lakes with water, sometimes lakes with lava; Perhaps this is a bug, perhaps a joke by the developer. An interesting fact is that the foliage of the trees in this forest does not burn in fire and lava.
In the dark forest biome, two unique mobs spawn - the wolf king and the spider king. Both of them are about twice the size of their prototypes and in absolute darkness will cause a fair amount of trouble if noticed.

 The Wolf King has 30 health and deals 6 HP damage to the player. It has no drops. It is twice as large as its counterpart from the ordinary world. The misty wolf itself has a scarlet color, but in the darkness of its “native” biome it is transparent. Sometimes inflicts blindness on the player
The Spider King is a huge yellow-brown spider. In the pitch darkness of the Dark Forest biome, he can be distinguished by his glowing red eyes.
The King of Spiders is twice the size, faster and stronger than a normal spider, however, if it sees the player, it will bypass water if it is an obstacle.
This spider spawns with a skeleton druid as its rider, which makes it a rather strong opponent, since the skeleton druid uses the “Poison” effect. Drop: Thread (1-2)
Spider Eye (0-2)
Skeleton Druid:
Bone (0-2)
Torch (1-2)
It is worth noting that the Dark Forest is a place where you are guaranteed to find the Dark Tower, with the boss mob High Ghast, and where there are guaranteed to be 3-4 goblin cities.


Snowy forest- one of the biomes of the Twilight Forest, similar to the taiga biome from the ordinary world. Consists mainly of spruce trees covered with snow; flowers, grass and ferns grow. There is always a glacier at the center of this biome; Only here can a yeti cave be generated. This biome is also home to snow wolves and yetis.


The prototype of the penguin is the chicken. She can be transformed into a penguin using transformation powder. The snow wolf is an inhabitant of the snowy forest. Has 30 health when killed and drops arctic fur.
On the glacier you can find Aurora Castle. In the castle we can meet a snow guard, stable and unstable cores. If the core is not stable it will explode upon death. Each of these mobs drops snowflakes. Everyone has 20 health.


Twilight Mountains – This is a biome in which large spruce trees grow. They are full of deer and wild boars. They are covered with podzol. Instead of flowers there are light mushrooms and ferns. You can find trollstein in the caves. Above the twilight mountains you can find the island of giants. They live on a cloud in a house made of giant cobblestones and oak.


In the house you will find two giants. By default they will have your skin. They have 80 xt health, and after killing them they drop a giant sword and pickaxe.
After the twilight mountains we find ourselves in the Thorns biome. Don't lean against them, it will hurt you. You shouldn't break them either. This can make everything worse, the fact is that if you break them, they grow even more.

After the spikes you can climb the central mountains. They are covered with wet stone. At the top you can find the druid houses and the castle. Unfortunately, the castle with the final boss has not yet been finalized.

Fire Swamp- this is one of the biomes of the Twilight Forest world; is a 100% Hydra spawn location. The terrain of this place is somewhat reminiscent of the Lower World: there is lava, the grass and foliage of the trees have a scarlet tint, the water is purple, and the smoke and fire coming from the ground only complement the image of not the most favorable place for both life and exploration . It makes sense to go here only to kill the Hydra and dig up two unique blocks: smoke and flame generators.
You cannot get to the fire swamps without passing through the twilight swamps - therefore, going here at the beginning of the game is not recommended: the twilight swamps impose a hunger effect, and the fire swamps set them on fire (until you kill the Lich).

Mysterious forest (enchanted forest)- A biome with unique trees - colorful trees, beautiful grass and a wonderful atmosphere. The chance of this biome spawning is extremely low! Sometimes you need to walk in front for hours to find it, and sometimes it happens that the portal spawns already in it.

Also, here you can meet Quest Rama. This is a unique mob, it lives in ruins. If you give him all 16 types of wool, he will give you gold, iron, diamond, and emerald blocks in return. He will also give you a Horn, but it is prohibited on our servers.

Interesting fact. In this biome, the grass is blue. It is painted in a circle, the circles get smaller closer to the ruins.

It is also very rare that you can find unique trees in the mysterious forest; there are four species in total.

You can also find treasures in the forests:
Hedge maze- is the easiest labyrinth, which will not be difficult to navigate. It consists of a thorny fence, breaking which or walking along it, the player receives damage, which makes passing such a labyrinth from above a rather difficult and dangerous task.
Also in this inhospitable place there are spawners of wild wolves, swamp and labyrinth spiders, located in small wastelands near 1-2 chests. The entire labyrinth is illuminated by fireflies and Jack-o-lanterns, that is, no additional lighting is required. Sprawling trees are often found at the borders, exits and in the labyrinth itself, and the area is additionally cleared to create a flat area.
Chests often contain some kind of food, as well as weapons and sometimes rare items, making them somewhat easier to obtain early in Twilight Forest; If you wish, you can make a mob farm out of the labyrinth.

Walking through the twilight forest, you can sometimes stumble upon destroyed houses, of which only the walls and a wooden floor made of oak planks remained, and even then some of the blocks had already become grass. They consist of mossy and ordinary cobblestones, which can serve as a place where you can dig up such a rare mossy cobblestone in the ordinary world.
These ruins come in two types: large and small - a kind of basement with treasures can be generated under them, regardless of size, with a 50% probability at a depth of two blocks under the floor.
Perhaps this structure was used by the ancient people of the Twilight Forest, who for unknown reasons disappeared. Perhaps they were driven out by hostile mobs and bosses.

This is a natural structure added by the Twilight Forest mod.
Hollow Hills are quite common on the surface of the Duskwood in the form of dome-shaped mountains that stand out strongly from the overall smooth landscape; This is especially noticeable in the Dark Forest, where the dense foliage grows in an even layer. Also, the hills rise slightly at the base by 2-3 blocks, as a result of which, without a magic card in hand, you can say that in front of you is a hollow hill (do not confuse it with the Highlands).

It is worth noting that in hollow hills - absolutely all of them - there are chests with various treasures (if other modifications are installed, things may appear from them), and their total number depends on the size of the hill. Since these structures contain rare and valuable things (ore magnet, fan of flight, conservation charms and others), the hills become not only a valuable source of resources, but also an opportunity to find some equally valuable tools and materials. On magic maps, hollow hills are indicated by white slides, and the size of such a slide corresponds to the size of the hill. The larger the hill, the more ore, chests, spawners and mobs it contains. Hills are divided into three types: small, medium and large.

Great Dusk Oak- you've probably seen large oak trees, as a rule, they have from 1 to 2 treasuries, you need to climb to the very top of the oak tree and break leaves and blocks, or listen - if you hear spiders, break the blocks where you heard.

In these treasuries you can find many items, but the rarest and most valuable you will find are seedlings of unique trees.
Guide editor: MissZymochka
Sincerely, Youvipas World Administration.
He is a very interesting and versatile hero, capable of fulfilling various roles and being part of a variety of strategies. In most cases, Naga acts as a carry hero, but this hero can even act as a kind of support. On the one hand, the hero is not very dependent on artifacts, but the presence of certain items can give Naga a huge advantage. For example, due to some artifacts, Naga can become an excellent pusher. Be that as it may, Naga is a fairly common choice of players in the professional arena, as she has very good potential.
| Performance gain | |||
|---|---|---|---|
| 1 lvl | 15 lvl | 25 lvl | |
| Health | 596 | 1298 | 1802 |
| Mana | 327 | 663 | 903 |
| Armor | 7.2 | 16.2 | 22.6 |
| Damage | 44-46 | 88-90 | 120-122 |
Pros:
Cons:
- Like most heroes who actively use illusions, Naga suffers greatly from powerful AOE abilities. In other words, Naga depends on how long her illusions last, and without them her effectiveness is significantly reduced.
- If you play the role of a carry hero on whom the team relies, then of course you will be required to have good farming and perhaps even at the beginning of the game you will have to spend a lot of time earning gold. Of course, you can play without items, but if you want to kill enemies and not be some kind of secondary support, then you will have to farm a lot.
- Naga has a relatively low base attack. This can become a serious problem in cases where you have to stand in the lane against an aggressive enemy who is constantly finishing off his creeps.
- Each ability of Naga is very important and necessary. Because of this, Naga is very dependent on experience and it is extremely important for her to gain experience and level up her abilities as quickly as possible, especially at the beginning of the game.
- Considering that Naga is a hero with the main characteristic of agility, and all her abilities require mana, the hero suffers greatly from a lack of mana. Constantly summoning illusions requires a good source of mana.
Mirror Image - the use of illusions is one of the key points in the game for Naga. Illusions can be used in various situations and for various purposes. Firstly, illusions can significantly speed up Naga's farming. Secondly, illusions allow you to increase the combat effectiveness of Naga in battle. Thirdly, activating illusions allows you to avoid being hit by a flying projectile and remove certain debuffs from Naga. In the fourth, illusions can be used as an effective means of pushing several lines at once, as well as reconnaissance units. I think it’s becoming clear how important illusions are and how much you can do with them. It is worth understanding that the damage of illusions depends as a percentage on the damage of Naga itself, and there is little point in immediately maxing out illusions until you have some artifacts for damage. Even the first level of the ability allows you to immediately summon 4 illusions, and increasing the level will only increase their damage and significantly increase survivability by reducing the damage they cause. It is worth understanding that the damage of illusions increases in the same way as all other illusions in Dota 2, that is, a percentage of Naga’s base attack and the main characteristic “agility” is taken. At the moment the ability is activated, Naga becomes invulnerable for 0.3 seconds and this small window can be used to dodge a flying projectile or avoid some powerful enemy skill. Also, activating the ability allows you to remove some debuffs. Essentially this is the same as activating an artifact. In addition, it is worth understanding that it will always be difficult for enemies to determine where the real Naga is. Of course, illusions take more damage, but quickly identifying the real Naga is not easy. As a last resort, when you start to run away, illusions can be used to block the enemy and prevent him from catching up with you. This is not easy to do and it will take some time to learn how to control both the hero and illusions at the same time. As a rule, if enemies see that one Naga is moving chaotically, and the other three are simply running together, then they choose the lone Naga and consider it the real one. In difficult times, you can confuse the enemy. That is, you take one of your illusions and control it as if it were you, and you yourself run along with two other illusions. This method does not always work, but the chance that the enemy will make a mistake is really good. During an attack, illusions are also one of Naga's main sources of damage. Essentially Naga can increase your damage by 2.5 times. Of course, during an attack, you shouldn’t stupidly select all the illusions and send them to one target. As a last resort, this can be done in such a way that all illusions run along different trajectories and from different directions, without interfering with each other. Separately, I would like to note that when Naga uses the Rip Tide ability, then every illusion also uses it. Of course the same target can't take damage more than once, but if you split up your illusions and let's say send neutrals to different spawns or to different lanes, then one use of Rip Tide can do a very good amount of total damage. If you do everything correctly and distribute your illusions wisely, then you can significantly increase the efficiency of Naga farming. If an artifact appears in your arsenal, then farming completely rises to a new level, since each illusion begins to cause damage using fire. For example, you can calmly farm the forest, and send illusions to the lanes and quickly kill creeps. Thanks to this approach, you will not only increase your farming speed, but you will also constantly push several lines at once and the enemy will need to be distracted by defending their towers.
Ensnare- Naga's network is very easy to use, but this does not mean that the skill is weak, rather the opposite. First of all, it is worth noting that, unlike most control skills, the network will work even on enemies with immunity to magic, including enemies who have activated BKB (). Of course, the net only immobilizes the target and the enemy can calmly attack or even use his abilities, but this disadvantage is compensated by a very long action. At its maximum level, the network is capable of holding a target for 5 seconds. It is worth choosing the right target for attack, since, for example, an enemy with a dagger () can run away from you. The same applies to similar skills, for example the hero’s Blink skill. The last but not least important thing you need to remember about the net is that using the net will throw off the enemy's skill cast. For example, if you see a hero sucking your allies into a black hole, Black Hole, then you can simply throw a net from a safe distance and stop the enemy’s cast.
Rip Tide- the most important thing that you must remember is that when using the skill, damage is caused not only by Naga, but also by all her illusions. It’s worth saying right away that the same target cannot take damage more than once, but Naga can use the skill without any risk. For example, you can simply send one of your illusions forward and when your copy approaches the enemies, simply activate the skill. An important advantage of the skill is that it has an instant cast, so it will be difficult for it to miss. The skill helps equally well during an attack or in order to simultaneously farm several neutral camps in the forest. It is also worth remembering that in addition to damage, the skill does a good job of reducing the armor of enemies, for as much as 8 seconds, and this is also very useful when attacking or farming. The skill has a short cooldown and average mana consumption, which allows you to use it quite often. The main thing is that you have some kind of source of mana.
Song of the Siren - in essence, activating an ult is a kind of pause for your enemies. Correct use of the ult allows you to save the lives of you and your allies, who in 7 seconds can easily activate a teleport or even simply run away. The ult can also be used during an attack. That is, you enchant your enemies with your song, your allies come up, activate the necessary skills, and you, having waited the moment, can calmly release your ult even ahead of time. Incorrect use of the ult can really turn the outcome of the battle, but not in your favor, so it is extremely important to see what your allies are doing and not be stupid. If you use an ult to save the life of yourself and your allies, then first of all you must remember that the song works in a radius around Naga and if, for example, you use teleport before your allies, you will put them in danger. In other words, you first wait a little, and then (but no later than 3 seconds before the end of the ult) you activate the teleport yourself. It is worth understanding that enemies (including towers) under the influence of the song not only cannot attack, but they themselves are essentially invulnerable, and if, say, you activate your ult at the moment when your allies are using powerful AOE abilities, you will simply save the enemy from damage. This is perhaps the most serious mistake in using the ult. It is also worth remembering that the ult will not work on enemies with immunity to magic, but this moment can be used to your advantage. For example, you see that at the beginning of the battle the enemy carry immediately activated his BKB and rushed into battle. You use your ult and the enemy finds himself in such a situation that all his allies are fascinated by the song, and he alone remains against your entire team. If you use this tactic, it is best to warn your allies in advance so that they do not activate their AOE abilities ahead of time. During an attack, using your ult is one of the key points. The most correct time to activate the ult is when enemies are close to each other. This way, your allies will be able to not only quickly run up to enemies, but also strategically use their abilities correctly. It is worth remembering that your ult can be deactivated in advance. For example, you turned on your ult and caught several enemies in a bunch, your allied hero runs up and uses his Black Hole ult on a crowd of enemies. At the moment the black hole is activated, you simply release Naga’s ult and the awakened enemies immediately fall under the effect of the new ult. In the same way, for example, you can adjust your attack to the hero’s Ravage ult. Finally, I would like to say that Naga’s ult can be improved with the help of. On the one hand, it may seem that it would be nice to be able to restore up to 70% of the health of your allies, but the fact is that Naga simply does not have the opportunity to spend an entire inventory slot on Aghanim, so this artifact is taken as an improvement to the ultimate rarely. And in general, you should strive to use your ult for attack, and not for defense, and in this case, restoring health will not help you much. The Aghanim upgrade is good if you play Naga as a support.
| 1 | 3 | 5 | 7 | ||||||||||||||||
| 9 | 13 | 14 | 16 | ||||||||||||||||
| 2 | 4 | 6 | 8 | ||||||||||||||||
| 11 | 12 | 18 | |||||||||||||||||
Naga is a fairly universal hero and can fit into various teams, but still the choice of this hero must be justified and you must immediately decide what role you will have and how exactly you will interact with other heroes. By the way, the role of a carry and the role of a support are very different from each other and require different team compositions. In general, there are a huge number of combinations of Naga with other heroes. The most important thing is to implement the ultimate as well as possible, since this ability has absolutely unique mechanics and provides a huge tactical advantage.
Below we will look at situations when it makes sense to take Naga.
Allies
Heroes whose abilities go well with Naga's long sleep:
The first group of allies includes such heroes as:, and. During the duration of the ult, enemies are naturally invulnerable, but with as much as 7 seconds of sleep, some heroes can perfectly prepare for battle. For example, it can use Tombstone and when you turn off the ult, all enemies will already be under the influence of a strong slowdown and attacked by a horde of zombies. The hero can activate his small March of the Machines robots several times (by recharging his ult), and when the ult is turned off, enemies will begin to receive huge damage. Well, he can safely throw his Weave ult at the maximum number of targets and give a good advantage to his team due to the difference in armor.
Heroes who can perfectly adapt to Naga's ult:
The second group of allies is somewhat similar to the first, but the main difference is that these heroes simply need good crowd control so that they can choose the right position and activate their skills. Such heroes include:, or. All these heroes, while turning off Naga’s ult, can activate their mass abilities and the enemy team simply will not have time to dodge them.
Heroes that can interact well with the Naga grid:
Dota 2 has a huge number of heroes that have abilities with good damage or control, but are very difficult to hit. Thanks to Naga's long grid control, these heroes can easily hit with their abilities. The most interesting combinations can happen with such heroes as:, or. The basic idea is that Naga is the first to use her grid, since it is a targeted ability that the enemy cannot dodge, and then your allies adapt to the control of the grid and calmly use their skills.
Separately, I would like to mention such a hero as. Firstly, it can heal a group of enemies with Shadow Wave and at the same time deal damage, and considering that Naga has 3 of her illusions almost from the very beginning of the game, this damage can be very good. For example, Naga can first throw his net and stop the enemy, then come close and use his Rip Tide wave. Dazzle then throws his Shadow Wave heal, which deals damage and let's say slows down the enemy with Poison Touch. This combo deals very good damage and the enemy has virtually no chance of escaping. Well, of course, the ults of these two heroes combine perfectly and provide a good tactical advantage due to a large reduction in armor.
Enemies
Naga can be very effective against certain types of heroes and below we will try to look at some of these types.
Carry heroes with magic immunity or BKB:
As mentioned above, Naga’s ult does not work on heroes with immunity to magic, and thus Naga can cut off the enemy team’s main damage dealer from his allies. For example, a timely activated ult will allow you to easily deal with heroes such as:, and others like them. Don't forget that the grid for these heroes will always work.
Heroes with melee attacks:
Firstly, against heroes with melee attacks, Naga can very easily stand in the lane and constantly use his Rip Tide skill. If you do everything correctly, you can achieve such a result that the enemy will simply be driven under his own tower and will not be able to get close to the creeps. It is also worth noting that during the fight, Naga can simply throw a net at the enemy and he will not be able to do anything, since he needs to be close to the enemy in order to deal damage. And even immunity to magic will not help in this case. For example, Nagu can easily resist such heroes as:, or.
Heroes who can't do anything against illusions (no good AoE skills):
When Naga begins to actively farm, buys key artifacts and her illusions become very durable, it becomes very difficult for enemies without normal AOE abilities. Not only does Naga begin to actively push several lines at once, but he also has a huge advantage in battle. For example, heroes such as: or simply cannot oppose you.
I would especially like to mention the hero. It’s difficult to classify him into any higher group, but Naga deals with this hero without any problems. Firstly, Naga, with the help of his illusions, can calmly clear mines, and secondly, having purchased each illusion, Naga will see all the installed mines and traps and calmly break them.
Of course, Naga is not a perfect hero and she has some shortcomings. Below we will look at a number of heroes who can greatly ruin Naga’s life and ruin her entire strategy.
Heroes with good AoE damage:
During combat, Naga relies heavily on her illusions, which can die very quickly under the barrage of enemy mass abilities. Accordingly, Naga has a hard time playing against heroes with powerful AOE abilities. Such heroes include:, or. In general, all heroes with good mass damage.
Anti pushers:
The second group of enemies consists mainly of supports, who have good mass skills and can easily resist Naga's push. Such heroes include:, or. Of course, during team battles, these heroes will also be very dangerous, since they will instantly kill Naga’s illusions.
Separately, I would like to mention such heroes as:, and. In general, they can be classified as mobile heroes. The main thing that all these heroes have in common is that they can easily avoid the effects of the grid and at the same time deal well with Naga.
If you play Naga as a classic carry hero, then you should take into account one important fact: you should buy items that give a bonus to the hero’s characteristics. This is due to the fact that illusions inherit the characteristics of the hero, such as strength and dexterity, respectively, by purchasing items for strength and dexterity, you simultaneously increase the effectiveness of your illusions. The main exception to this rule is the artifact. We'll talk about it a little lower. If you play Naked as a support, then the main items will be intended for your team, then standard support items. We will mainly talk about the carry Naga, since this is the main role of the hero, but we will also touch a little on items for the support role.
Initial purchase:
Although Naga has good initial armor and movement speed, this still will not protect you from the enemy’s harassment and you will need to restore your health with something. Such consumables as and will cope with this task perfectly. Considering that Naga constantly has difficulties with mana, it’s quite normal to take . If you play Naked as a carry, then items such as and are perfect at the beginning of the game. The shield will reduce the damage, and the hatchet will compensate for the lack of Naga's starting attack. For Naga support it is worth buying a courier and wards. The remaining money is best spent on twigs.
Main subjects:
Below we will look at the most commonly used items for Naga, which are the most effective for this hero.
Start of the game
Mid game
End of the game
Option 2:
Starting purchase
Start of the game
Mid game
Option 3 (support):
If you suddenly happen to play Naked as a support, then an approximate purchase could be like this:
Starting purchase
Start of the game
Mid game
End of the game
If the game drags on for a long time, then in each option the boots should be upgraded to level 2 and thereby be able to teleport not only to allied creeps, but also to heroes.
Start of the game:
In general, Naga is a more or less universal hero, as he can normally stand on a solo line or be part of a triple or dual line. In some cases, Naga can even be a good support, but this role for this hero is not obvious and is used much less often.
Naga's base attack for a melee hero is quite low and this can become a serious problem when finishing off creeps in the lane. This situation can be partially corrected by using the Rip Tide ability. It is worth understanding that often you will not be able to finish off creeps in this way, and besides, Naga constantly needs mana. This is good if, for example, you have a bottle (), but even for this item you need to farm gold. Even when you use Rip Tide to last hit creeps, you need to try to make sure that it hits the enemy hero. This way you will both farm and harass the enemy. It is also worth understanding that using Rip Tide for farming will cause you to start pushing the lane, and in some cases this is disadvantageous for Naga. Illusions can also help during initial farming. Even at level 1, illusions deal 30% damage and hitting all three illusions will roughly equal your damage. With the help of illusions, for example, you can finish off your creeps and thereby even out the line, preventing it from pushing. If the enemy plays aggressively and constantly harasses you, then illusions can also be used to attack or, for example, to safely approach creeps and use Rip Tide through illusions and not take damage again. Here I would like to draw your attention to the fact that when you summon illusions, it is most beneficial not to keep them all in one lane, especially if you are playing on the side lane. For example, you can leave one illusion next to you and use it in the lane, and send the other two illusions to the forest. Thus, when you activate Rip Tide, for example, you will finish off a creep in the lane, harass the enemy in the lane and deal damage to neutral monsters in the forest. A little later, you can go into the forest and kill neutrals there, and it will be easier to do this, since they will not have a full supply of health. As a last resort, at least one illusion should be sent for reconnaissance, especially if you do not observe anyone from the enemy team in the lane. It is worth understanding that at the early stage of the game, illusions take a lot of damage and can die quickly, so you shouldn’t just leave illusions on the line. It's best to use them to deliver the final blow. Illusions last 30 seconds, and the ability itself has a 40-second cooldown. With the correct use of illusion, you can have control over them almost all the time. The ability to manage several illusions at once is the first and most important thing that you should learn when you first meet the hero.
Naga has a melee attack, and not much. We have already talked about this above and more than once. Of course, this not only entails problems with farming, but also makes Naga not the best hero for harassing the enemy in the lane. Essentially, Naga can only properly harass an enemy with a melee attack and constant use of Rip Tide. It will be much more difficult to play against ranged heroes and even more difficult against mages. Summoning illusions against heroes with powerful AoE abilities is also a bad idea, as your illusions will literally die in a matter of seconds. How Naga will harass his opponent in the lane primarily depends on the opponent himself. There are situations when there is simply no way to harass the enemy, and in this case it is better to just farm and not try to attack the enemy.
Speaking about Naga as a balanced hero, it is worth noting that in solo, especially at the beginning of the game, Naga is unlikely to be able to kill anyone. Together with Naga, you can come up with a huge number of combinations with other heroes and it is better to kill enemies together with your allies. This way you can implement the network well and your illusions will deal damage rather than just chasing the enemy. Yes, you can constantly use Rip Tide and even drive the enemy under your own tower, but this ability alone is not enough to kill the enemy. Naga reveals her full potential when she interacts with her allies, which is why you need to build on their play, and not try to go solo on the enemy. If your allies play passively or simply cannot kill the enemy, then it is better to concentrate your efforts on farming rather than waste time. When playing on a lane with allies and especially against one enemy, Naga can be a very aggressive hero and already at the second level there is a chance to kill the enemy. This is due to the fact that Naga has a good control skill (mesh) and good damage Rip Tide in her arsenal. If at the same time your allies also have some kind of control skills, then the chance of killing the enemy increases significantly. It is important to note only one point here: the mesh can be used over a fairly large distance, but it does not work instantly, and flies for some time. Thus, if the enemy sees you, he will start to run away and the net will catch him when he runs a few meters. It is best to use the grid during an attack in such a way that the enemy does not expect it, otherwise you may end up trapping the enemy under your own tower and wasting mana.
Light lane (3 vs 1):
This position is the most popular for Naga. This is due to the fact that at the very beginning of the game, Naga needs some time to farm the first key artifacts and gain several levels. On the safe lane, Naga will be able to get all this, and then calmly go into the jungle or start actively ganking the lines. The main tasks for this position will be the following:
- Look for opportunities to kill the enemy
First of all, you need to take care of farming, since it is for this purpose that your allies put you on the safe line and protect you in every possible way. When finishing off creeps, you should not use Rip Tide, since in this case you will start pushing the line, and this will not be profitable. It is best to use your illusions and actively finish off your creeps. This way you will simplify your task and generally hold the line without pushing it. At the same time as farming on the lane, you should constantly send your illusions to the nearest forest and slowly beat the neutrals there. As soon as the neutrals' health decreases by at least half, you can quickly move away from the lane (after you have killed the creeps) and farm the neutrals. This way you can significantly increase your farming efficiency and buy key items earlier. When you have Radiance (), you should definitely send illusions into the forest, as they will deal good damage and accordingly speed up farming. Of course, you shouldn’t get carried away with farming. Yes, this is your main task, but it’s also worth keeping an eye on the enemy. Naga has an excellent net in her arsenal and the hero’s damage is quite good. Thus, with the help of your allies, you can kill almost any enemy on the line and this should also be used.
Center lane (solo 1v1):
When playing on the center line, you should understand that your main goal is experience and gold, and of course not to die. There is no need to strive to somehow hinder the enemy, since Naga is poorly suited for these purposes. It is also worth understanding that Naga is not easy to play in the center, especially against tough laners. In general, the ideal option is an enemy with a melee attack, for example. In this case, Naga will be able to farm more comfortably and once again not receive damage from the enemy. Throughout the beginning of the game, it is best to simply stand on your high ground and approach creeps only for the purpose of getting farm. As a last resort, you can use your illusions or the Rip Tide ability in order not to take unnecessary risks and receive less damage. Of course, spamming skills won’t work, since the mana will quickly run out, so you should immediately make sure that you have a bottle as soon as possible. You should not use illusions too often, since in case of a gank this ability can save your life. Starting from level 6, Naga can already play more aggressively and, for example, go for a gank on one of the lines. Ultimate will allow you to perfectly initiate a battle or, conversely, save the lives of your allies. You shouldn't count on killing your opponent in the mid lane solo. Naga simply doesn't have enough damage. At best, you can count on the help of your allies and the fact that the enemy will not have time to react to their approach.
Difficult line (3 vs 1):
The difficult lane is not the most popular place for Naga, but this hero can still hold his own in this position. The main thing that Naga gets from the line is a lot of experience and a little farm through the use of illusions and Rip Tide. Good armor and speed of movement allow you to once again avoid the enemy's harassment. The main thing that you must understand is that Naga has little health and no mechanisms for a quick escape, so one mistake of yours can cost your life. It's best to stay at a safe distance and just gain experience. Walking up and trying to finish off creeps can be very dangerous, especially if the enemy has a lot of control. Of course, the lack of farm will greatly affect the subsequent game, but even without them, Naga can be a very useful hero simply due to his set of abilities.
Dual line (2 on 2 or 2 on 1):
In general, this position is quite acceptable for Naga and, if played correctly, can be very profitable. If there is only one opponent against you, then you can act in the same way as in the case of the light line, that is, just farm and wait for the right moment to attack. The best allies are supports such as:, or. Lina and Leshrac can interact well with Naga's grid, and Dazzle and Visage simply fit Naga's playstyle well.
Mid and end game:
A naga can perform various tasks and does not have one strict goal. If you play Naga as a classic carry hero who actively farmed at the beginning of the game, then in the middle of the game you can continue farming, but add to it a constant push of the enemy lines with the help of illusions. The most important thing is to monitor the actions of your team and enter the battle on time. Don't stay too long in the forest and don't allow situations where your team is outnumbered in the battle. Better yet, from time to time it is your actions that initiate the battle, for example using an ult. This way you will be the most useful player for your team, who will farm, push and be a key figure in the battle. If you play Naked as a support, then it is best to stay close to your team and help them in every possible way. Of course, you also need to farm, but the priority will be to help your allies.
One of the key points in the game for Naga is levels 6, 11 and 16, that is, the levels at which the ultimate is unlocked and improved. It is thanks to her ult that Naga gives her allies a huge tactical advantage and the ability to control Roshan very well. Speaking of Roshan. You should always monitor the timing of Roshan's appearance and if you see that the enemy team has disappeared from sight, then you can first send your illusions for reconnaissance and check if the enemies are killing Roshan, and if so, then you can start a battle using the ult. Another important moment is when BKB appears on the enemy team. In this case, Naga has the opportunity to isolate the enemy with BKB from his allies and quickly kill him with a numerical advantage. Otherwise, Naga’s game directly depends on what artifacts she buys. For example, Radiance appeared and you begin to actively farm and push lines. A heart has appeared and now you can live calmly in battle, and it is no longer so easy to kill all your illusions.
When pushing, it is best not to take risks and not climb the tower. It is much more effective to send illusions into battle over and over again, which will quickly kill creeps and tank the tower. The enemy will have to choose: lose the tower or accept an unfavorable battle. It’s not worth standing and auto-attacking the tower with Naga herself, because it’s too risky. It is best to enter the battle a little later, for example using an ult. Of course, if the enemy heroes are dead, then it’s worth summoning illusions and going to destroy the tower. Naga is more interesting during split pushing. In this case, you can simply stay in the forest and constantly send your illusions to different lanes. This way you will push several directions at once and not particularly risk your own life. This approach leads to the fact that the enemy team will be constantly distracted by defense and will not be able to constantly stick together, as it will suffer greatly from a lack of farm. If, for example, you see that one of the enemy’s supports has gone to defense, then you can catch him near your own tower or attack the main team and kill it, having a numerical advantage. The presence of actively pushing Naga is always a big headache for the enemy.
During team battles, Naga can also act in different scenarios. For example, if the enemy is playing extremely aggressively and your allies are not yet ready for major battles, then the best option in this case would be to split push one of the lines. If the enemy delays his attack, then someone will still have to teleport to the base for defense and you will give time to your allies. It is also worth remembering that in any, even the most difficult, situation, Naga can activate her ult and allow her allies to calmly retreat back. Another good option in defense would be to constantly use illusions in a combo with the Rip Tide skill. By sending illusions in this way you will deal damage over and over again and in the end this will greatly help during the battle. If you attack yourself, then in this case there are also various options. Firstly, you should immediately determine how you will use your ult. For example, you can isolate an enemy with BKB and kill him quickly, or use your ult to customize the skills of your allies. Secondly, it is worth determining whether the enemy has powerful AOE abilities, and if so, then illusions should be sent to different targets so that they do not die at once under the enemy’s powerful skills. You can also use the grid in battle for different purposes, but usually priority is given to enemies with melee attacks, since with the help of the grid you can take them out of the fight for a long time and deal with other opponents. In general, it is most beneficial for Naga to simply push enemy lines and constantly push directions through illusions, and engage in battle only when necessary. That is, you seem to wear down the enemy and wait for the most advantageous moment to attack.
Naga naturally has to farm every free minute between battles; it is very important to fill out the entire inventory as soon as possible and, if possible, before enemies. This will significantly increase the power of your illusions and, accordingly, significantly increase your pushing potential.
I can't say that playing as Naga is easy. Firstly, you will need the ability to manage several illusions at once. Secondly, quickly understand the situation and use your ult correctly. And in general, when playing as Naga, you should constantly monitor the entire map, and not stupidly farm one of your lines or the forest. If you play as Naga as an ordinary carry hero and use illusions, sending them in a crowd just to one target, then most likely you will not reveal the hero’s potential and you will not like Naga.