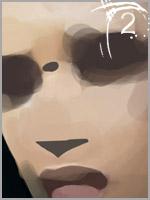
While drawing human face it is very important to depict all its parts correctly and proportionally: eyes, eyebrows, nose, lips, ears. The integral perception of the future portrait depends on this skill. The nose is the most important part of the face. Often it is drawn disproportionately long or short, sometimes thick, sometimes thin. But there are certain rules step by step drawing this part of the human face. You need to learn how to draw it correctly in profile and full face, that is, from the side and straight on. Do you want to learn how to draw a nose step by step using a simple pencil, then follow our tips.
Method 1. Here we will draw the nose—the “straight” view. First you need to draw auxiliary lines. They are shown in blue. These lines are constructed in such a way that their shape resembles a flower vase. The upper part of the lines is narrowed, then widens downward and connects there in the form of an angle.
Then, limiting ourselves to these lines, we will draw the features of the nose itself. In the middle, we begin to draw one side of the nose from the bridge of the nose with a small hump; at the bottom there is a slight expansion where we have the tip of the nose, from which the nostrils extend. On the other hand, there is also an expansion.
In the third picture we make two features above the bridge of the nose, which usually turn into the brow ridges. And at the bottom we frame the tip of the nose on both sides with widened nostrils.

Then we will show shadows on the bridge of the nose on both sides with strokes. At the bottom we will mark the tip of the nose with another line. Then we erase the auxiliary lines, leaving only the main features of the drawing. The result is a nose from the front.

Method 2. Here you need to draw the nose from the side. To begin with, as usual, we make lines to help our future drawing. These are the blue lines. They are drawn using a ruler. Next, we begin to outline them, making the outline of the nose: the line of the nose with a hump, the tip of the nose and a small line under it. The third picture shows that you also need to make a small line above and a curl indicating the nostril.

Then, using the helper lines, we use strokes to show the features of the nose, make shadow areas and also add a curl line at the bottom, where the nostril is. Erase all unnecessary lines. We leave the actual drawing of the nose, which should be the final result.

First of all, I want to say that I usually draw noses differently. For me this is a normal process and I don’t even think about how it’s done. I usually draw, change, redraw several noses until I choose one I like. Besides, I never draw lines, I just imagine them. I'm just trying to explain how it can be done differently.
Step 1 – Placement and Angle
One way or another, let's start by drawing the main features of the face - the most important thing is to decide such nuances as the light source, and what kind of nose you want to draw. Don't try too hard, leave the drawing raw. Usually when I draw the nose, I draw out the rest of the facial features at the same time, but for now I'll leave them as they are.
Step 2 – decide on the shape
On a separate layer draw an oval dot exactly between the eyes. . Then follow the slightly curved line down and draw a triangle like in the picture. Adjust the triangle to the shape and angle of your face. If it is not shown in profile, or in full face, it will be slightly smaller on the side of the face, and as if turned away from us. As shown in the picture below.

Let's draw two a little curved lines from the top point. The end of one line should touch the point directly opposite the vertex of the triangle, the end of the other should touch its left corner. . When you did this, you sort of separated the top of the nose. The most common mistake here is to draw this part very flat, as if the nose is made of pieces of plastic glued together. The borders should be smooth and there won't be any rough dark lines left when we're done. Never leave dark lines unless you are drawing some kind of drawing.
Step 3 – developing the form
The next thing you need to do is understand that the tip of the nose should not be sharp and flat as in the sketch. It should be rounded. Moreover, the shadow under the nose will by and large not look like a triangle. Therefore, you need to soften its shape, outline it as a wave on top, as in the figure (you don’t need to draw a red line, you just need to give the upper border of the triangle the shape of such a wave). When you have done this, flip the image horizontally to check that everything is done correctly.


Now fill in the point you drew before. It's better to make this area brighter than the entire nose. Also, soften the dark lines a little with more light color, and draw a semicircle from the right corner of your former triangle to the middle right line, as in the picture. .
Now you have already drawn the bridge of your nose and top part nostrils (usually this part is not so noticeable, but we will work on it later).

Now you need to draw side nose To prevent this area from looking flat, draw a line from the top of the dark line at a slightly downward angle, and then straight down to the triangle, as shown in the example. Do not draw red lines!! Only black ones.
Step 4 – create a nose from lines.
Now we need to sketch the area that we outlined in the previous step. Don't be afraid to sketch in the outline of the nostril or other lines - paint this area with a lightly shaded shade. In this picture the shadow is not too obvious - I advise you to make the shadow soft. As you can see in the picture, I did not completely paint over the outline of the nostril; they are visible, but only slightly.


Enlarge the image and paint over the dark lines. You also need to work on the triangle. The right nostril should follow the shape of the top line of the triangle. Also make a smooth transition from dark to light. . Don't change anything except the area of the triangle and the area you painted.

Continue doing the same until you have completely filled in the dark lines. And instead of a sketch, you will get a completely realistic nose. Instead of defining the boundaries of our nose by lines, we define them by changes in color and shadow. You will also see the second nostril, it will look like a shadow on the side of the nose farthest from us.
Step 5 – Light and Shadow


In the previous step, our nose still looks a little flat. To fix this, carefully distribute light and shadows throughout light nose tones. Define the highlight on the tip of the nose - but don't make it too noticeable, then define the line of the nostril and the angle of the tip of the nose, not with lines, but with colors. I chose the color for the highlights from the area on the bridge of the nose - since it is surrounded by shaded areas , it should be brighter.
At this stage, the appearance of the tip of the nose is determined - depending on where you marked the highlight on it, the shape of the nose will change. It's very interesting to watch. Try changing its position until you find a place where the nose shape is exactly what you want.
An enlarged picture of our changes shows a nose with a fairly clear shape and outline. The difference between the color and brightness of the cheeks and nose allows you to see where the nose “rises” from the face.
To correctly draw a person’s head, you need to know its proportions.
The head has an oval shape, which is divided by the eye line into two approximately equal parts, that is, the eye line is located approximately in the middle of the face.
Drawing a face is quite difficult. Conventionally, it can be divided into three parts: from the beginning of the hair to the eyebrow line, from the eyebrow line to the end of the nose and from the end of the nose to the chin.
The upper edge of the ear is located at the level of the eyebrows, the lower - at the level of the base of the nose. The eye line can be divided into five identical parts, of which the second and fourth are occupied by the eyes.
The width of the nose is equal to the length of the eyes, and the mouth is slightly wider than the nose.
The distance between the eyes is equal to the width of the eyes or the width of the base of the nose. The ears are located from the line of the eyebrows to the line of the base of the nose, the cut of the mouth is one third of the distance from the base of the nose to the end of the chin.
The head is symmetrical, and you can draw it on the basis of a conventional line that starts at the back of the head, runs in the middle of the forehead between the eyes, along the nose, in the middle of the mouth and chin. This line is called median and serves to construct paired symmetrical forms.
Knowing these proportions will help a novice artist in working on a portrait.

Head shapes come in different types.

Now look at how to sketch different facial expressions on a person.

Drawing of the head begins with the construction of its ovoid shape, while it must be remembered that the shape of the head must be outlined so that its horizontal middle passes just above the middle of the sheet and so that the head is not too shifted to the right or left. Only after this the parts of the face are outlined. They need to be studied very carefully: the similarity of the portrait to nature depends on this.
The main parts of the face include the eyes, nose, lips and ears. Of course, each person has their own unique eyes, nose and lips. But this only seems, in fact they can be generalized and their form simplified.
The human head is drawn in full face(when he looks straight)

in profile (with the head turned sideways),

and half a turn.

Drawing the eyes
Eyes play a very important role in the resemblance of a portrait to life. You can start drawing an eye with its generalized shape - a ball inserted into a horizontally located oval (eye socket). Therefore, when starting to draw the eyes, you need to outline the eye sockets, while remembering that they are not located very close to the nose. The distance between the eyes is equal to the length of the eye itself. Next, having outlined the pupil, we begin to draw the eyelids.


R  When drawing the profile, you need to remember that the upper eyelid is pushed forward a little more than the lower one. And the pupil turns from round into a flattened oval.

When drawing the face in half a turn, notice how the upper eyelid of the eye rises.
The authenticity of the portrait depends on the greater or lesser intensification of the shadows, and not on the direction of the strokes, so first of all you need to try to place the shadows correctly and engage in shading only when the skills have already been acquired.

Draw a line passing through the eye, carefully observing its direction. Find the length of the eye, which is indicated by two vertical lines. Draw the contours of the eye, remembering that the front convexity or roundness of the eye is visible in eyes drawn in profile or half-turn.

Drawing lips
Before you start drawing the lips, you need to mark the midline of the mouth (this is the line where the upper lip meets the lower), then determine the length and thickness of the lips on this line (usually the lower lip is thicker than the upper, but it happens that they are equal in thickness ). You also need to remember that the mouth is below the base of the nose. Next, you need to start outlining the outlines of the lips, trying to convey their characteristic shape (thin, thick, medium, even along the contour or with a curve on the upper lip).

When drawing lips in profile or in half a turn, you need to outline the size of the mouth section, its slope, as well as the degree of thickness (that is, the protrusion of one of the lips).

The mouth opening is located one third of the distance from the base of the nose to the end of the chin.

We draw mouths from the front and in profile. First, we draw a line crossing the mouth, then we determine the length of this line with two lines,

Then we find the middle of the mouth and mark it with a line parallel to the lines indicating the length of the mouth.

Then we will designate the thickness of the lips and designate the teeth if the mouth is slightly open.

Drawing the nose
When drawing a nose, you must first carefully study its characteristic features: noses can be straight (1), snub (2) and with a hump (3).

Also, noses can be long, short, narrow and wide. The base of the nose is equal to the width of the eye. When outlining the nose, you need to remember that the middle of the facial line of the nose passes through the middle of its base and tip.

When drawing a profile or half-turn, we must not forget that the stronger the turn of the head, the further the tip of the nose is from the midline.

Now let's try to draw the mouth and nose together.

Now we draw the nose and eye.

Drawing ears
The ears are usually located at a level from the eyebrows to the base of the nose. In order to correctly outline the ears, you need to draw an imaginary axis of the ear, which runs parallel to the line of the nose. Next they plan general shape ear and draw the details.

Draw an oblong quadrilateral and divide it crosswise into two equal parts. Trace the outer circumference of the ear, then outline its thickness and draw the middle (ear cavity).

Drawing hair
The hair beautifully frames the head and starts midway from the eye line to the crown (the top point of the head). All hairstyles can be reduced to the most typical.


Drawing the neck
The neck is a support for the head and is firmly supported by the shoulders. Before you start drawing, you need to determine the height of the neck and its relationship to the height and width of the head. First, mark the midline of the neck, running from the lower part of the jaw to the cervical cavity. The neck itself consists of three conventional figures: a rectangle and two triangles.


To draw a nose, it is not necessary to delve into its anatomical features. I suggest starting from simple geometric shapes, which are useful in drawing any complex and obscure shapes. And then gradually complicate these forms.
Drawing a nose using a simple shape
The average nose is a symmetrical part of the human face, located in the middle. And it can be schematically depicted in the form of such a trapezoidal shape.
This is such a figure, similar to a prism with an isosceles trapezoid at the base. The lines that form such a figure along the nose are not exact, they are arbitrary, but they will help to draw the nose symmetrically, find its size relative to the entire face, and catch the inclination of the nose.
As an example, I'll take this nose, located about three-quarters on the face. 
That is, the trapezoidal shape in which the nose is placed also rotates three-quarters. I outline this shape along the most prominent points of the rounded surface of the nose. 
What dimensions and inclinations should we estimate so that our nose corresponds to nature:
- the midline relative to which the nose is symmetrical, its slope and length 
- dimensions of the front edge of the lower and upper trapezoid 

- the width and inclination of the lower trapezoid, that is, how visible it is to us, how much the nose is turned up or down. 
- width of the rear edge of the lower trapezoid 

For this nose, this length coincides with the height of the nose from the tip to the forehead.
The directions highlighted in red practically coincide with each other (I will not mention the perspective, which slightly brings them together - that is, they are not strictly parallel, but slightly converge, but in this figure there is practically no such effect). That is, the direction of the nose coincides with the direction of the lips, eyes and face as a whole. 
Once you have decided on this simple form, you can begin to refine the details.
There may be a hump on the upper edge, the nose can narrow and widen along this upper edge, it all depends on individual characteristics bones in the nose. The place where the bone passes into cartilage may be quite clearly expressed, or may not be expressed at all. 
The wings of the nose usually cause the most difficulty for students. We make sure that both wings, both above and below, are at the same level, and most importantly, we follow the nature: how the wings are rounded, what size they are, how visible the far wing is, or maybe it is not visible at all. 
Under the wings of the nose there are nasal passages in the form of two holes. They are located symmetrically relative to the middle line and also at the same level. The nasal passage under the far wing may not be visible depending on how far the head is turned and how much it is obscured by the tip of the nose. 
I outline the tip of the nose. 
The sides of the nose blend smoothly into the cheeks. 
We cover the nose with tone using shading
I cover the nose with tone using classic shading, which I apply according to the shape of the nose.
I start with the brightest and most contrasting place - with the falling shadow under the nose. Do not immediately apply the darkest areas with the full force of the pencil; when other elements are covered with tone, you can thicken them a little more if necessary. 
The wings of the nose are characteristically rounded; I apply the stroke in the direction in which they are rounded. I leave the reflex. 
Where the nose smoothly meets the cheeks, I also smoothly stretch the stroke from the side to the cheek.
The tip of the nose is rounded, I kind of round the stroke from one side of the tip to the other. 
Drawing tutorials went pretty easy this weekend and for today I have prepared for you a new part in drawing a person - nose. We will look at the task of drawing noses in a very simple form. These tips and steps are very easy to follow. It's as easy as getting a ready-made result. Here you will see very different noses, looking at which you can even choose shapes in general and nostrils in particular. If you've ever struggled with drawing a nose, you'll find this tutorial very helpful. That's all for the introduction and now I still have time to think about some other parts of the face and body in order to learn how to draw a person completely. There will be something new soon, but for now let’s draw the nose and remember. and even we have already learned. Let's start digging deeper.

Step 1.
There are a huge variety of nose types and each one creates a unique effect. Note that each nose is different from each other except in the main angles. Again, looking at women's noses, note that they are much softer than those of a man.

Step 2.
First we will start drawing the nose from the front (straight view). Start by making a circle for the tip of the nose. You can outline the tip of the nose, then draw the sides that will be the nostrils and then add the bridge of the nose. Paint over the nostril holes.

Step 3.
Now try drawing a circle for the nose again, draw a slightly different shape for the tip, nostrils and bridge of the nose and add shadow lines for the openings of the nostrils.

Step 4.
A little more experimentation. Let's make a circle, the tip of the nose, the nostrils and the bridge for the bridge of the nose, then add details and shade.

Step 5.
Now let's draw the nose from the side (side view). Draw an angle for the nose shape you want and then sketch out the nostrils or one visible nostril, then add detailing on and around the tip of each nose.