Everyone perceives rain differently. It makes some people sad, others have fun jumping in puddles, and others even begin to write poetry, inspired by the gloomy atmosphere. Have you ever wanted to depict this natural phenomenon on paper? Let's look at how to draw rain with a simple pencil And
Preparing materials
First, let's lay out on the table in front of us everything that may be useful in the drawing process. Workplace should be well lit and free from unnecessary things.
So, what tools will you need:
- Sheets of paper.
- Simple pencils.
- Eraser.
- Colored crayons, pencils, markers or
- Tassels.
- Glass of water.
- Palette (small board for mixing paints).
- A picture of rain (if necessary).
Learning what rain looks like
Before you draw rain, you need to get to know it better. This will help make the drawing more realistic. Find different pictures depicting rain, drizzle and look at them carefully. If possible, catch a drop of rain with your hand or clothing. Take a good look at the trail of fallen water. Look what the drop looks like. Is it big or small, round or elongated, transparent or colored? Rain is especially beautiful in sunny weather, when it shimmers with all the colors of the rainbow.
When you draw rain or drizzle, remember what drops you saw. This will make it easier to concentrate and complete the landscape.
What is characteristic of rain?
Be sure to take into account all the details that need to be drawn. It rains in cloudy or sunny weather, in a wooded area or in an urban area, whether it is strong or not. All this will affect the drawing. If you want to make it realistic, of course.

So, what features are important to consider when depicting rain:
- Overcast and dominance gray.
Usually, when it rains, the sky becomes cloudy so that the sun is no longer visible. In this case, the painting should be done in a restrained color with a predominance of gray. Darker paints should be applied to all painted horizontal surfaces, thus simulating moisture.
- Contrast.
Nearby objects must be clearly reflected in the picture. And background objects will be hidden by the rain, and therefore they will be practically invisible.
- How to draw rain depending on the terrain.
Puddles accumulate faster on asphalt or concrete surfaces. The soil absorbs moisture well. But this does not mean that there is no need to draw puddles in the forest and field at all.
- Reflections.
In puddles, even the smallest ones, nearby objects will always be visible. How to depict this on paper? Simply duplicate the mirrored objects with elongated vertical spots.
- Additional attributes.
Rain may be accompanied by lightning, the appearance of circles on the water and people running under umbrellas.
How to draw rain with a pencil in 10 steps
- Step one. First, think about what you want to draw. For example, a person walking in the rain.
- Step two. Mark the horizon line with a pencil.
- Step three. Sketch the silhouette of a man or woman. The head may not be visible because the person is covering himself with a newspaper or umbrella.
- Step four. Sketch an umbrella or newspaper.
- Step five. Mark the background objects (road, houses, clouds, trees, lanterns, and so on).
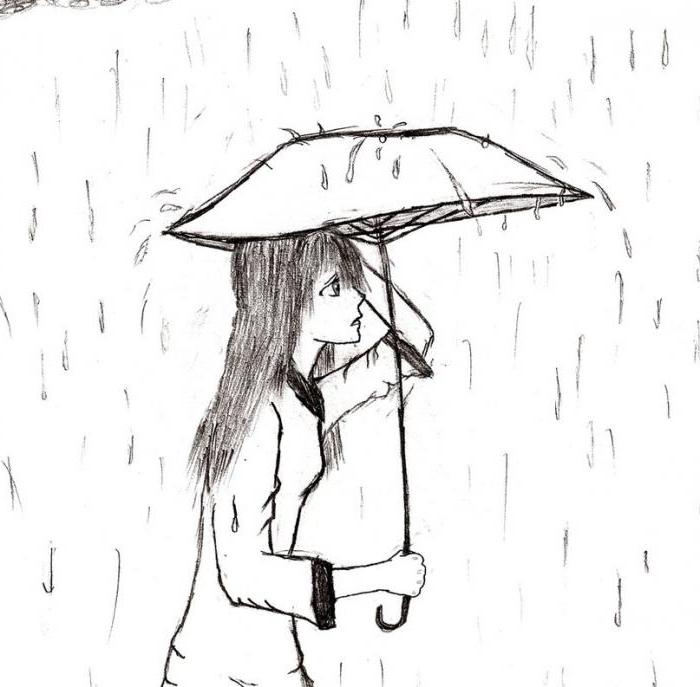
- Step six. Now draw in detail the person with an umbrella (or newspaper).
- Step seven. Use an eraser to erase unnecessary lines.
- Step eight. Draw background objects.
- Step nine. Add shading and shadows.
- Step ten. Draw the rain itself. It can be depicted with frequent hatching, long lines, dashes with curved tips, or ordinary drops. In all the pictures in the article, the rain is drawn differently, pay attention to this.
The pencil drawing is ready. If you wish, you can give it color. By painting only individual objects, you will convey a special atmosphere in the picture.
How to paint rain step by step with watercolors
Let's start painting with paints right away. Don't be afraid to work without a simple pencil! So let's get started.
- Step one. Use gray paint to paint a cloud. This will make it clear where the rain will come from.
- Step two. blue paint Dilute a little with water on the palette. You should get a liquid consistency, a little runny.
- Step three. Dip the brush into the resulting paint and draw the contours of small drops. Draw in rows in a vertical order, preferably moving from top to bottom.
- Step four. Draw medium sized drops.

- Step five. And then the biggest ones.
- Step six. Now fill the drops with blue paint, slightly diluted with water. This will give a transparent effect.
- Step seven. Let the drawing dry.
- Step eight. For large and medium drops, add white highlights with a light movement. The rain turned out to be real.
How to draw torrential rain? Decide on the slope of the drops. Draw them with thin vertical lines, one oblique at a time.
As you can see, rainy landscapes are not as difficult as they seem.
IN this lesson rain will be created using the pen tool and brush, as well as using various styles layers.
Note: Medium level of difficulty. Requires knowledge of correction techniques and layer masks.
Required Note: The shades given in this tutorial may vary depending on your drawing and its size.
Last but not least, I worked on Photoshop Extended. I can't guarantee that you will be able to follow this tutorial in GIMP, MURO, or wherever you want to draw.
Introduction
Hello everyone and welcome to my fifth lesson! In this tutorial I will show you how to create beautiful and realistic effects rain in Photoshop using brushes, layers and lighting effects.
STEP 1
1. Create a new file. But don't make it too big, we only need it to create a sketch.
2. Fill the background with white (code #FFFFFF).
3. Create a new layer on top of the background by clicking Layer – New layer (Layer – New layer) in the main menu.
STEP 2
1. On the left in the tools menu, select Brush.

Note: The size of the brush will depend on the file size; mine is only 3 pixels thick.
2. Select a hard brush with 100% opaque (Opaque), adjusting its size in its menu. Make sure it's in the foreground white.
3. Press the F5 key to open the Brushes menu and select Shape dynamics.

4. In the Shape dynamics column, find the drop-down menu for the Size jitter control and select Fade from the list, inserting the appropriate shade data. Remember, the larger your brush, the higher the fade level you need to set. I set my 3 pixel brush to 30.
STEP 3
1. Great, now let's leave the Brush and select the Pen tool from the tools menu on the left.

2. Make sure that you have the Path parameter, no Shape mode, as shown in the picture.
3. Now on your transparent layer make a path of the following type.

You can change the inclination slightly.
STEP 4
1. Right-click and select “Stroke path”.
2. Take a brush and select “Simulate pressure”.
3. Now you can hide our background by clicking on the eye icon on the plate with layers.
4. Select the layer with our dark droplet and, holding down the Ctrl key, click on it in the menu with layers. So we will select its content.
5. While still selected, click Image – Crop, and Photoshop will automatically crop the document to the size of the brush.

6. Press Ctrl + D to remove the selection and do the following: Edit – Define brush preset. Give the brush a name and click OK, thus adding it to the list of brushes.
STEP 5
1. Let's open the Brushes menu again by pressing F5.
*Brush tip shape: Change the angle of the brush if necessary.
*Shape dynamics: Size jitter 100%, Pen pressure mode.
*Scattering: both axes, 400% (or more), Count 2.
*Transfer: Opacity jitter 100%, Pen pressure mode.

Your preview should look like this.
STEP 6

1. Choose white for your foreground.
2. Open the file you want to apply the rain effect to (I'll just use a black canvas so you can clearly see all the changes, I'll remove it at the end).
3. Create a layer on top of it, and carefully go over it with a brush, holding down the Shift key and dragging the mouse cursor to the bottom of the layer.
STEP 7
There is nothing realistic here yet. Because the rain never falls like this - like a wall. It usually flows in free streams; so we'll make a few more adjustments.
1. Add a Layer mask to the rain layer (the button in the form of a circle inside a rectangle at the very bottom of the layers menu).
2. Select a mask and do the following: Filter – Render – Clouds (Filter – Render – Clouds). This will create a loose pattern on our mask, hiding some parts.
3. For an additional effect, apply Filter – Render – Clouds with overlay (Filter – Render – Difference clouds).

4. It looks a little too rough, so we'll have to soften the picture a little. Click Filter – Blur – Gaussian blur and select the values that suit your image. Increase contrast if necessary.
STEP 8
So much better! Let's add a few more details.
1. Right-click on the layers panel and select Blending options from the list that appears.


Choose the color yourself, it will depend on the colors of your base image, so you don't have to use the same color as I have shown here. Experiment with this. Also, you may want to decrease or increase the Opacity.
STEP 9

1. Apply Filter – Sharpen – Unsharp mask (Filter – Sharpen – Unsharp mask) on the rain layer. Amount 180%, Radius 0.2 pixels and Levels threshold 16. Repeat the procedure if necessary.
2. Now you can add more layers with the rain using the same effect with layers if you think it is not strong enough.
STEP 10

Apply a Gradient map (Layer – New adjustment layer – Gradient map) to the entire image and select a blending mode if you want to play with color!
FINAL STAGE

Merge your image (Flatten image) and create a duplicate background. Select the duplicated layer and select Filter – Render – Lightening effect. Select “default type” from the list and select the direction and brightness. Adjust the layers' Opacity and/or blending modes if necessary. If you want, you can change the tones again.
RESULT

In this tutorial you learned how to create rain using standard brushes. Hope you enjoyed it!
In this lesson I will show and tell you how to draw rain with a pencil step by step for beginners.
I chose typical picture rain, cold, probably autumn. By the way, if you are wondering what to draw on the theme of autumn, you can safely start drawing according to this lesson. So, what did I write there, oh yes, rain, cold and silhouettes of people who are trying to hide from the downpour, one has an umbrella in the foreground, the second does not have an umbrella in the background and is covered with some kind of folder, nothing is visible because very heavy rain.
First we draw a sketch. First of all, the sidewalk, which is located in the middle of the picture.

Now with the skeleton we show the position of the men’s bodies, as well as their belongings.

We draw the silhouette of the man’s head, hat and coat in the foreground.


We draw straight lines close to each other, not very long and not very short straight lines at an angle at which it rains, so that they create uniformity. If you don’t understand how, then look, the principle is shown there, but we don’t need a gradient, let everything be monochromatic.

At the same angle as the rain, we paint over the silhouettes of men using the same principle, only the straight lines will be located more closely to each other so that the tone is darker. Take a harder pencil or barely press on the existing one if there is only one and start shading the bottom.

Now you can press the pencil a little harder or take a softer one and, in the direction of the rain, apply even more straight lines on the silhouettes, on the umbrella, on the sidewalk and road, draw shadows from people.

Take a eraser and make some areas light, look at the drawing.

We shade the white areas with curls, curls away from each other. This will add foam and from above we go through lines in the direction of the rain, because it's raining, he does not bypass these areas. Now, where we should have a city, a building, there is nothing there, because it is raining very heavily. Apply medium-tone shadows to several areas in the direction of the rain to add realism. If it’s not clear, look at the original (they use yellowish and purple colors), I just don’t know how to convey it more accurately in words. Of course, you can perfect the drawing for a long time, use an eraser, shading, etc. , but I'll stop there. You can achieve a more realistic rain pattern.
Drawing water drops that look like real ones is not difficult. To do this, you need to remember a few rules that professional artists use. The image of the object is formed in human eye is formed due to different colors and amount of light. To get a three-dimensional figure like a drop, you need to create an image on which an imitation of light and shadow will be made.
To begin, cover a sheet of paper with a plain background and draw a circle on it with a simple pencil. The circle should not be too smooth for the drop to look natural. The pictures show the drop from above, from the side and in flight.
.jpg)
.jpg)
.jpg)
.jpg)
.jpg)
Take more dark color than the background of the picture and draw a shadow under the drop in the shape of a crescent. Add some dark paint to top part drops from the opposite side. Add a blue tint to the drop to make it look more like water. For this, use very pale paint, thickly diluted in water. Add the same blue tint to the shadow piece that touches the drop on top. Emphasize the outline of the drop using brown paint. At the end of the work, add a highlight inside the drop using white paint.
.jpg)
How are droplets formed?
Clouds are made up of microparticles of water and tiny ice crystals. One cloud can contain several tons of moisture, but the water inside it does not necessarily combine. Not even a single drop may fall from such a cloud. As the cloud moves and rises, the temperature changes. Warm air cools and water vapor condenses. The droplets gather around dust grains and other particles called condensation nuclei. Microparticles of moisture interact with each other and connect. When the connection becomes heavy and gains weight, it falls to the ground. Most do not reach the ground, but dissolve directly into the air. Large drops reach 6 millimeters in diameter and fall at a speed of about 7 meters per second. Small drops are called drizzle. They fall to the ground very slowly and in winter they can turn into snow as they move. This process was observed by modern scientists using cameras raised in the air at aircraft and carried out macro photography.
Summer rain brings with it the coolness that is so lacking in the heat. Many painters like to depict various weather phenomena in their paintings, including thunderstorms, snowfall and rain. It is sometimes very difficult for novice artists to learn how to depict a variety of precipitation, for example, summer rain. But if you want, you can achieve success even in this difficult task.
Before drawing a summer landscape, you need to prepare:
A sheet of thick paper;
- watercolor paints;
- pencil;
- eraser;
- watercolor pencils;
- a container filled with clean water;
- round brush with synthetic bristles No. 3;
- black gel pen.

After this you can start drawing:


4. Draw two human figures walking along the path. In the background, draw the outline of another house and trees. Draw the outlines of a cloud in the sky. In the foreground, depict a dog and a flower bed;


8. Then paint the flowerbed and grass;


11. When the painting is dry, paint over the clothes and umbrellas of the people, the dog and the flowerbed. watercolor pencils to make colors more vibrant and expressive;
Summer landscape with rain is completely ready. If you wish, you can draw lightning, and make the clouds a little darker, and then the picture will no longer be just summer rain, but a real thunderstorm.