To make the image complete and complete, any woman needs to take care of a suitable nail design. Many people are satisfied with a regular manicure and a plain nail polish, but it is much more interesting to do something original and thereby emphasize your individuality. Even if you have never made designs on the surface of your nails, it is not at all difficult to learn. Some of the most simple tools for drawing on nails - ordinary pens with gel rods of various colors.
No need to be an artist
You don't have to be a manicurist or have experience as an artist. Even an inexperienced person can make drawings and patterns on nails with gel rods. To do this, you need to be patient, perseverance, inspiration and, of course, pens. Often the work of novice nail art masters cannot be distinguished from work performed by professionals. But first it’s better to practice doing the most simple drawings, trying to keep the nails of the left and right hand they looked the same. If you are right-handed, drawing with gel sticks with your left hand will require some skill.
 This tool is recommended for beginners because unsuccessful drawings are very easy to wash off with water. And to consolidate a successful result, you need to wait for the pattern to dry, and then cover the nail with colorless varnish. This manicure is also loved by experienced masters, since the texture of the gel pen has a noble shine, and the rod has an optimal thickness. With such a pen you can even depict very complex drawings with many small details.
Background and fixer for patterns
An ideal and unique manicure can be done at home with ordinary gel pens. This process has several stages. To make the designs on your nails look neat, you need to do a classic trimmed manicure or push back the cuticle, after softening it. Next you need to paint the nail plates with varnish. It is better if the nails have varnish of one or two colors. An ombre manicure would also look great – one color gradually transitioning into another. French manicure as a basis for drawing with a colored gel pen is also perfect.
Novice artists may not have enough experience to perform these types of manicures, so you can simply paint your nails one color. It should be a shade that contrasts and harmonizes with gel pen. For example, silver patterns look great on a black or dark purple background, and red patterns look great on a yellow or white background. The base can also be transparent. Transparent varnish can also act as a fixative. Before painting on your nails, you need to wait for the base polish to dry.
What patterns to depict
 Before making patterns on your nails, draw with a pen on paper. Invent your own ornament or find ready-made samples. Usually beginners have few ideas, but later they become more and more. Here are the most simple ways nail decorations:
- Stripes. They can be longitudinal, diagonal or transverse. Choose ones that will highlight the beauty of your nails. Longitudinal lines will make your fingers visually longer. Blue or red lines on a white background will “tell” about your love for marine style. This design can be complemented with a sticker in the form of an anchor or a steering wheel on one nail. Stripes of rainbow colors are appropriate in spring and summer, they are combined with bright outfits.
- Lines. Straight, curved, wavy, zigzag - whatever. They are easy to draw even for beginners. The main thing is to maintain the distance between the lines and make sure that the pattern is the same on all nails. Longitudinal and transverse lines intersecting each other will look like cells.
- Dots. It’s easy to draw dots or small circles, but you need to try to make sure that the distance between them is equal - this way the pattern will look more neat.
- Geometric shapes. Squares, rhombuses, triangles, ovals and circles give a lot of scope for imagination. These figures are depicted not only separately, but also together with others, for example, a rhombus in an oval or a square in a circle. You can draw the same stripes or dots inside the figure.
- Floral ornament. Branches, leaves and flowers are the most popular drawings on women's nails. And this is not surprising - the fair sex loves nature. Depict plant patterns not difficult. Start, for example, with an image of a chamomile, dandelion or tree branch.
Using a stencil it is easy to draw more complex patterns. Convenient adhesive-based stencils are sold in specialized stores. Nails will look even more beautiful and elegant if you combine a gel pen with polish, stickers, rhinestones and other materials. Give free rein to your imagination, draw and enjoy the result! 
Zentangle - simple and interesting way creating beautiful graphic images using repeating elements and patterns. Almost anyone can use it. This activity develops attention and creativity, and also improves your mood. Zentangle is a method known throughout the world, people use it of different ages and with different interests.
This technique does not require complex materials. For work you will need paper, pencil (for the initial drawing) and black gel pen (liner).
Liners - these are pens, but with water-based ink, so they can draw fine, beautiful line. They are convenient because there are liners of different thicknesses on sale. Thin lines are suitable for detailed drawings, bold ones for large planes. Liners are sold at any office supply store.
The advantage of the Zentangle technique is that you don’t have to be afraid of making a mistake and making an uneven line. So you have a great opportunity to draw right away without a pencil.
To make it easier for you to learn the Zentangle technique, I will add several ornaments that you can use in your drawings. I came up with most of them myself.

Do you want to create small masterpiece using zentangle technique? Then let's go! Today we are drawing animals.
How to draw a fish using the Zentangle technique
1. First of all, let's think about placing the fish on the paper. We use light planes (ovals) to denote the body, tail and fins of the future fish.

2. Now we clarify the contour of the fish’s body, draw the fins and tail. At this stage, you can finish drawing the fish’s face: plump lips and eyes.

3. The fish is ready! Isn't it so difficult? Now use lines to divide the body, fins and tail of the fish into strips. Why, you ask? Each of these strips will have a special ornament - you can come up with it yourself, or choose it from my examples.

4. When the pencil drawing is completely ready, trace the outline with a black pen or liner. After this, you can safely start coloring the fish using the Zentangle technique. Let's start with the smallest fin. Decorate each strip with a different original ornament.
Pay attention! It is not at all necessary to exactly repeat the ornaments that I drew. Add originality and your own personality to the drawing. You can change the order of ornaments, come up with your own, etc.


Important to know! Some patterns may be repeated several times-that's even good.
Pay attention! Some patterns can be made darker, while others-lighter. This difference is possible due to different densities, or line thicknesses. It is important to alternate light and dark patterns for contrast so that the design does not turn out too light or dark.


6. If the fins and tail are ready, proceed to drawing the body of the fish. Decorate each strip with an exclusive ornament!
Advice. Don’t be afraid to fantasize and make mistakes, this gives your work a special personality. Try to draw all the ornaments without a pencil, just with a black pen, so you will gain courage in drawing and quickly develop your creative abilities.


7. At this stage we move on to the face. Make it a little lighter than the body and fins - then the border of the body and face will be clearly visible.


8. Congratulations! You have mastered Zentangle for beginners perfectly. The fish is ready! Now you can complete the details of the environment: air bubbles in the water, algae, sand and stones. Don’t forget that the background must also be made using this technique for the picture to look harmonious.

How to draw an owl using the Zentangle technique step by step
1. First of all, on clean paper, lightly mark a circle that will be the owl’s body. Divide the circle with two auxiliary lines: midline body and eye line. These lines will help you better navigate the drawing.

2. Draw the outline of the bird’s body: slightly narrowed at the top, wide in the middle and very narrow at the bottom. Draw a triangular tail with a rounded tip at the bottom and small ears on the head, a little like horns.

3. At this stage we move on to drawing the face. Draw the owl huge round eyes so that she can see well at night, and a triangular beak between the eyes. Don't forget the wings. Mark lightly where they will be located on the right and left sides.

4. At this stage, draw the wings in detail, highlighting three planes in them, similar to feathers. Also add feathers on the tail and ears. Don't forget about little paws. Draw a twig for the owl so that she has something to sit on.

5. Now all that's left to do is add the details. Select the area of the face around the eyes and beak. And in the other part of the body, which will be the body, draw semicircular feathers.

6. Now trace the outline with a black pen or liner and move on to the ornaments. I started drawing the owl from its wings and ears.

7. Now you can draw feathers on the tail and eyes. Make the small pupil darker and add a light ornament around it. For example, for the eyes I chose lines with a circle at the end - such an ornament is somewhat reminiscent of natural ornaments in human eyes.
Make the lines near the pupils a little thicker and darker to highlight your eyes well. And the closer to the edge, the more you leave the paper white. Also paint the beak.


8. At this stage, paint the feathers of the body. There are a lot of them, so you will have to try. But the result is worth it. Don't forget that you can use your own ornaments.


9. The drawing is almost ready! All that remains is to finish the ornaments near the eyes. Make them lighter than the body feathers. However, near the eyes, let the lines be thicker and darker, this will highlight their outline well.

Congratulations! The owl is completely ready! All that remains is to decorate the branch and draw fantastic leaves.
We are used to painting in black and white... Perhaps that is why white drawing on black or colored paper it looks especially impressive: breaking patterns and impressing. Although the same drawing, in black and white, will not seem as striking.
I fell in love with painting with white paints on a black background as a child. And thus she “hacked” a couple of drawing competitions - this decision was so unexpected for the audience. And now, when I’m carried away, I prefer unusual combinations when choosing colors :)
Mandala gold on black:
Doodling silver on red

Zentangle white and black on orange:
But the most impressive thing still remains white on a black background - regardless of whether you draw mandalas, zentangles or are just learning:
 Today I have 4 white pens in my “arsenal”. They are different and appearance, and a line that can be left on paper. This:

 In Minsk you can more or less easily buy Crown Hi-Jell Roller is a familiar gel pen, but with white ink.
Handles production Sakura are rightfully considered one of (if not the) best white pens for drawing on black paper. Masters all over the world, from the USA to New Zealand, draw mandalas and zentangles with their pens. For some time now, Sakura pens can be found in Belarusian stores. And once upon a time Gelly Roll I brought from Ukraine and Russia, Decorese They actually sent it to me from the USA...
Uni-Ball They are famous for their wide range of pens and liners, but I haven’t seen them in Belarus either. But with some luck, you can find them on AliExpress (if it’s difficult to bring from other countries).
Crown and Gelly Roll have a thinner line (meaning you can draw more graceful mandalas or zentangles):  But thanks to the thickness of the line, Uni-Ball and Decorese produce a more saturated and bright color. There is no need, for example, to draw a pen twice along the same line. Moreover, you can draw with them almost anywhere. For example, on stones:
Now you have a better understanding of white pens for drawing on black paper, which means you can already navigate a little in the range of these products yourself. Of course, there is much more choice on the same AliExpress: a simple search reveals dozens of types of white gel pens for drawing, in different price categories, individually or in sets. Choose, order - and draw!
If you have questions, feel free to ask in the comments or send by email.
If you are interested in what I am drawing with all this, you can look in my Instagram @bygirl, and if you want to quickly learn yourself, I collect pictures on Pinterest, and on Youtube videos with lessons and examples.
A tattoo is a special image on a person’s body, often conveying his thoughts, principles of life and desires.
To choose a tattoo, just look at hundreds of examples and come to the artist with a sketch. Before making a permanent drawing on the body, it is recommended to conduct an experiment.
A pen tattoo on a hand or other part of the body is used to understand how the drawn symbol and picture affect a person.
If, after spending a week with the drawing, the person’s condition has improved, you can safely apply the drawing forever.
Pen tattoos are widespread among children and teenagers. They are done quickly and easily.
All that is necessary is to redraw the selected picture onto the skin, maintaining the similarity with the source. Even a small child can draw easy and simple drawings.
A temporary tattoo can be done with a black pen; for this it is important to choose the right quality of the tool. A gel or ballpoint pen is suitable for this work.
In some cases, you can get a permanent tattoo using a needle and gel pen.
Let's look at how to draw with a pen, as well as the duration of this procedure:
- Prepare materials: a gel pen of the desired shade, a simple pencil, scissors, paper or tracing paper, cotton swabs, talc alcohol and a solution for treating wounds.
- Select a sketch or stencil. Before starting work, it is recommended to select a drawing.
Depending on the purpose of the tattoo, these can be inscriptions, pictures, photos famous people. The main thing is to have sufficient artistic drawing skills.
- Translation. Draw a picture on tracing paper and carefully shade along the outline with a gel pen.
In the future, this blank will be needed for a temporary tattoo, which needs to be done quickly.
- Choose a location. For girls, the designs look good on the wrist; for boys, the tattoos look impressive on the shoulder.
- Translation of the drawing. Place the prepared template with the pattern down on the skin. Take a cloth soaked in water and apply it to the tracing paper for 1 minute.
Carefully removing the paper, check to see if the tattoo has transferred.
You can make a tattoo with a needle, by making holes in the skin and filling them with paint from a pen. This method is considered painful, but less traumatic than applying it with a machine.
The work will take no more than 15 minutes, depending on the complexity of the drawing.
Simple Sketches for Beginners
In order to apply a drawing for the first time, experienced craftsmen recommend choosing the most simple sketches for beginners.
You should not assume that drawing a tattoo with a pen takes a long time - this process takes no more than half an hour with proper skill.
Pay attention! The simplest sketches are considered to be options without detailed details of the picture. The inscriptions will also be interesting as a primary application to the skin.
Small pictures are good for the first time. When your hand is full, you can move on to more complex types medium-sized and large sketches.

Let's consider several options for pictures for self-application at home:
| Sketch | Description |
| Geometric patterns | You don't have to be a professional artist to draw beautiful patterns. Just look at the sample and draw it onto leather or parchment. Popular geometric patterns include Greek, Roman and Scandinavian patterns. |
| Flowers | Drawings of flowers can be applied with a blue pen, and the stem itself can be painted black. It is better to choose simple versions of roses, peonies, orchids, daisies - they are well suited for images on the lower part of the leg |
| Natural drawings | Tree branches and leaves are patterns that any beginning artist can handle. Acorns, chestnuts, nuts, and berries - all these pictures are made in half an hour, because they do not have detailed details |
| Insects | The easiest insect to draw is a butterfly. Two wings, an insect body in the middle - the drawing is ready. A good image of a wasp, beetle or snake is obtained |
| Skulls | Guys often choose brutal body designs: invite them to apply an image of a stylized skull. There may be red roses with leaves on the sides: such a sketch always causes delight |
Beautiful pictures for girls and boys
To test the pen, the artist always chooses mini-images that can easily be hidden behind clothes.
Tattoos with a black gel pen are no exception, which, if unsuccessful, can be hidden behind textiles.

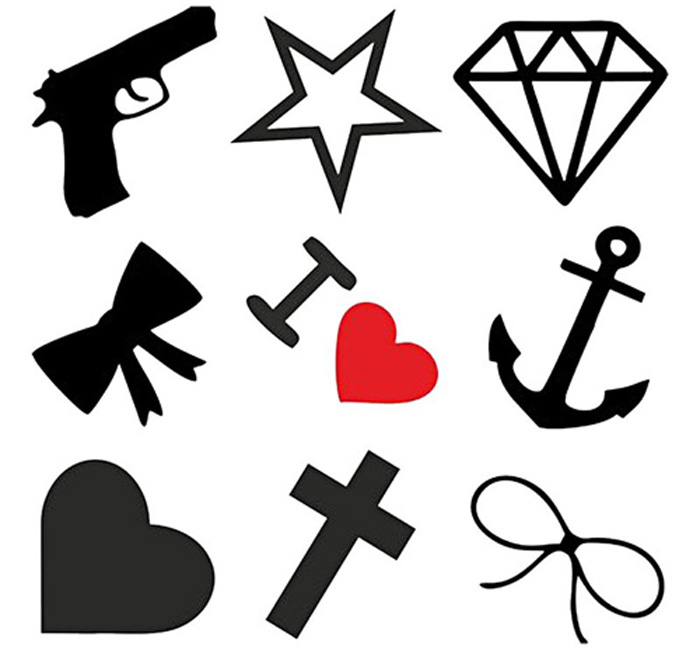
A selection of several beautiful, but simple options will allow you to decide on the choice for girls and men:
- Bow. The image is perfect for teenage girls.
It is better to apply it on the back of the neck - that is where it looks attractive and romantic.
- Animal faces. Cool but cute sketches are always a delight: try drawing a funny cat's face on one of your fingers.
The tattoo will look great when paired with a stylish ring.
- Sheet music or treble clef. This option is relevant for female music lovers, as well as for those people who play music. It is recommended to apply the pattern on the wrist.
- Marine theme. Well suited as men's or women's tattoos.
- A flock of bats. The drawing is relevant for real boys: it is simple to execute, but looks amazing.
We draw all the images in stages: first we visually highlight the main parts of the picture, after which we move on to painting the sections. Small elements draw carefully on last stage work.
Drawing techniques Zentangle, Doodling and Zendoodling.Let's get acquainted with drawing techniques like Zentangle, Doodling and Zendoodling
I really liked the drawing technique; it is especially good (in my opinion) for those creative people who want to express themselves in drawing, but do not have classical skills.
Here, to achieve success, you need a lot of imagination and creativity and a minimum of drawing techniques, although spatial imagination will still be useful to us. The pictures are unusual and exciting; you can look at them and study them for a long time.
Unfortunately, I didn’t find information about these techniques in Russian, so I translated it from English sources (don’t judge my translation too harshly).

Zentangle is a small piece of art made with a fine tip pen and graphite to highlight light and shadow. It is compiled in a certain order. Take a square of watercolor paper and use a pencil to place 4 dots in each corner about half an inch from the border of the paper. Connect these points with a pencil border, which can be either smooth or curved (irregular). Inside the resulting frame, “lines” are drawn with a pencil, the so-called crazy lines. This divides the drawing area into sectors of different sizes and specific profiles. Take a thin one fountain pen and fill the form with a variety of repeating patterns. Once you've filled in the gaps, the pencil lines are erased and then shading is added to give the Zentangle its shape.
If your drawing doesn't follow these guidelines, then it's not a Zentangle. Zentangle is an abstract design and can be viewed from any angle. If it has a recognizable image, such as a face or eyes or an animal, it is not Zentangle. However, it may well be stylized Zentangle or ZIA.


Doodle (translated as scribble) is a focused drawing made while a person's attention is occupied with something else. Doodles are simple drawings that may have specific representational meanings or may simply be abstract shapes.
Stereotypical examples of drawing are found in school notebooks, often in the margins, made by students when they are daydreaming or losing interest during class. Other common examples of painting done over long periods of time telephone conversations, if you have a pen and paper at hand.
Popular types include cartoon versions, images of teachers or schoolmates, famous television or comic characters, fictional creatures, landscapes, geometric shapes and patterns, textures, banners with legends and animation scenes made in sequence on various pages of a book or laptop.


Zendoodling is a hybrid of Zentangle art with Doodling. Zendoodles often free form and has an abstract look sometimes with splashes of color.
It is not strictly called Zentangling because it does not use the "line" method, nor does it require black and white execution.
Zendoodles are created using black ink on any type of colored background, not necessarily white paper. The use of watercolors, pencils, chalk, markers, etc. is also allowed. at your discretion.


