Almost every woman has a fur item in her wardrobe. During prolonged wear, natural fur loses its attractiveness and becomes faded. Some fashionistas dream of changing the color, making it more fashionable and bright. It is quite possible to dye fur at home, the main thing is to adhere to the basic rules given below.
Preparing for coloring
Before you begin the dyeing process, you need to clean the item. This will allow you to paint the product evenly without leaving pale areas on it. A solution prepared from the following ingredients will allow you to carry out this procedure well:
- salt (2 tbsp);
- ammonia (1 tbsp);
- baking soda (2 tablespoons);
- washing powder (1 tbsp);
- warm water in the amount of two liters.
The components are thoroughly mixed, then the mixture is applied to the fur with a brush, evenly distributing it over the entire surface. For effective cleaning, use a damp cloth or clean cloth to rinse the soap solution several times. In order for the core (skin) on the back side of the product not to shrink, it must be moist, so it should be wetted.
Interesting! You can clean the item with regular shampoo intended for hair or dishwashing detergent.
Some use aggressive substances: kerosene or lighter refill. With this method, you must always remember that their use can significantly worsen the appearance of the products.
Dry fur collar or a fur coat on hangers in natural conditions, away from heating devices and sunlight on the street or in a room with good ventilation.
Types of fur
Before you paint this or that thing at home, you need to understand the characteristics of the material. Only in this case can you achieve the desired result and get the desired color or shade. The easiest items to dye are those made from rabbit, mink, and chinchilla. But the procedure should be carried out carefully, since these materials, especially rabbit fur, are highly sensitive to chemicals.
Important! Dying thick fur will require a lot of paint and time. But the result will please the owner of the wardrobe item good color, which will last for quite a long time.
If the fur coat is made from beaver, you should not even try to lighten it, as it will acquire a yellow tint. The muskrat can behave very unpredictably, since not everyone may like the pinkish shades with whitish areas. After some time, the paint will fade and the product will take on a completely different appearance.
Arctic fox coloring
You can paint the arctic fox product in specialized workshops. The cost of such a service is quite high, and not every person can afford to pay a certain amount. There is a way out - you can perform the procedure at home yourself. To do this you need to do the following:
- Choose suitable paint. It is sold in hardware stores. If you can’t find a suitable color, there is another option - dyeing the fur at home with hair dye. Similar dyes are sold in large quantities. color palette: black, red, golden, brown, red and other shades, choosing will not be a problem.
- Strictly following the instructions, dilute the dye.
- Put a mask or respirator on your face and gloves on your hands.
- It is recommended to treat the flesh with Vaseline, baby cream or glycerin. This will prevent the skin from getting too wet and protect it from drying out.
- Dyeing can be done on both wet and dry arctic fox fur. In the first case, the paint lays on the surface quite softly. Apply the substance quickly using a hairdressing brush. This should be done carefully so that there are no unpainted areas left.
- If you want to get a leopard color, use a stencil and several colored paints. Holes of different diameters are cut out of thick cardboard, applied to the surface of the product and painted with black and brown paints.
- The Arctic fox can get a beautiful, rich shade if only the ends of the pile are painted. Typically, light-colored coloring compounds are used for this.
- You can refresh a fur wardrobe item with a spray, painting only the ends. You need to purchase paint intended for suede, which comes in an aerosol. Holding the can at a great distance, you need to make uniform movements. This is a simple and fast way.
After completing the procedure, the arctic fox fur is left for several minutes to obtain the desired shade. The time is indicated on the package. Now you should treat the product by preparing the following solution: dilute 5 tbsp in 2 liters of water. spoons of vinegar. As soon as it is ready, immerse the item in it.

Vinegar perfectly fixes the color, gives the fur additional shine and softness, significantly improving the appearance of a fox fur coat or collar. To prevent the item from becoming deformed, the flesh is stretched on the table, secured with clothespins.
To give the Arctic fox a lighter tone, use a hair lightener, which is diluted in accordance with the instructions. You can use hydrogen peroxide, diluting it with water in a ratio of 1 to 3. The prepared product is applied to the product and left for no more than 15-20 minutes, otherwise the villi will become brittle. After the time has passed, the fur is rinsed and sent to dry.
Dyeing a mink coat
Faded mink fur spoils the appearance of a fur coat. In order to restore color and shine, a simple procedure is performed - painting a mink coat. It is necessary to purchase in advance the desired shade of paint, a spray bottle, a comb with thick teeth, rich cream or glycerin, shampoo and hair conditioner. Now you need to do the following steps:
- clean the item from dust, dirt, grease;
- treat the skin (inner space) with a greasy substance;
- prepare the coloring composition in accordance with the instructions;
- moisten the surface of the product;
- apply a dye to the pile using a spray bottle;
- comb hairs;
- wash off the paint with shampoo diluted with water;
- treat the surface with balm.
The procedure is completed, all that remains is to dry the product, after applying the cream to the inside and combing the hairs.

In the same way you can dye silver fox fur, products made from mouton and any other material. For silver fox, the paint chosen is mainly black or brown. For a mouton fur coat, dark reddish shades and chestnut color are best suited.
Dyeing a fur collar
It is not always necessary to completely paint an item. In some cases, it is enough to dye a fur collar at home. This is quite easy to do using regular hair dye. First, the collar is cleaned of dust and dirt, dried, and then the dyeing process begins:
- Using the instructions, you need to dilute the paint.
- For uniform coloring, the collar is slightly moistened with water.
- The coloring composition is applied by hand (you should first put on gloves). The process should be done quickly, distributing the paint well throughout the pile.
After completing the procedure, the collar is washed well with water and rinsed in a vinegar solution or hair conditioner. It should be dried on a flat surface, stretched and pinned to the base with needles.
Faux fur
Some people prefer to buy faux fur products. In many characteristics it is not inferior to natural raw materials and sometimes even surpasses them. It can also be colored using hair dye. First, you need to select the tone of the dye, clean the product, removing dirt, dust, and grease from it, using a soap solution. After this, remove the remaining soap solution with a damp swab.
Treatment should be carried out one day before staining.
However, you should know that faux fur is dyed in dark colors. You should buy high-quality paint, so as not to spoil the thing.
The coloring composition is obtained by strictly following the instructions. After this, it is applied to the artificial fur with a brush, making movements in the direction of the pile, evenly distributing it. The brush should be pressed so that it touches the fabric base. The paint is left for the time recommended in the instructions, then the material is washed with water, and if necessary, excess paint is removed with cotton swabs. After this, the still damp fibers are combed with a sparse comb and the product is sent to dry.
Reading time: 5 minutes
The fur coat already looks worn, but it’s still a shame to throw it away. To improve its appearance, you can paint it. At detailed study information, this process will not be difficult. How to dye fur, what you need for this, how to prepare, is described below.
Preparation for the process

Before painting, the product must be prepared. How to clean fur:
- a teaspoon of dish soap;
- 2 teaspoons salt;
- 10 g soda;
- 5 g of ammonia;
- liter of water.
The components are made into a homogeneous liquid. Clothes are hung on hangers or placed on the table. Apply the cleanser with a brush and leave for a few minutes. Wash off with running water so that it does not get on the lower part.
What else is suitable for cleaning:
- mix water, vinegar, alcohol in equal proportions;
- distribute over product, rinse.
Afterwards the item is dried outside or in a ventilated room. Do not hang it next to a stove or radiator.

These methods are suitable for cleaning mink, rabbit, silver fox, arctic fox fur - any natural fur.
Cleaning is necessary to ensure even paint application. Dirt and dust will not allow this to happen.
The leather part of the clothing is treated with ordinary hand cream. It will not dry out or crack.
Types of fur

Useful tips for coloring fur depending on the type:
- White wool is the easiest to dye. Chinchilla and rabbit fur coats are easy to dye. This is done carefully so as not to damage the delicate fur. If the white fibers turn yellow, they are lightened with hydrogen peroxide. Then any color will lie flat.
- The arctic fox's hair is dense and will take a lot of time and paint. It is easier to work with arctic fox, the paint applies easily, and the color remains for a long time.
- Dyeing a mink coat is not easy. It is difficult to paint.
- Items made from nutria are easier to paint than mink. It is similar to mink, but lighter. She has three types of hair in thickness and length, so her fur is close-fitting.
- The painted muskrat turns out pinkish with white spots. After a short time it fades.
- The fur of a sheared beaver cannot be lightened beautifully. It will turn yellow. It is worth using darker paints to match the original color.
- It is not easy to dye a mouton fur coat due to its high density. It is necessary to carefully distribute the dye and carefully monitor the uniformity of application. Otherwise you will get stains.
- When dyeing silver fox fur, the new color is usually given to the longest fibers.
Hair dye should not be applied to faux fur. Aggressive substances will ruin it.
A new product should not be painted, as this will shorten its service life. Only an old, worn-out item is subject to this process in order to serve its owner a little longer.
Before painting, check the readiness of the leather. Tear off a little of the lining and moisten the skin with plenty of water. If you pull too hard and it tears, you cannot paint it, otherwise the finished item will fall apart into pieces. If it stretches, painting is allowed.
Where do they paint?

Where can you dye a fur coat or fur item:
- In a studio specializing in fur processing. They will repair and paint it there.
- Some dry cleaners offer a fur dyeing service.
- They paint in factories, but usually in large quantities. If you wish, you can find a company to dye your fur coat.
- It’s easy to do it yourself at home.
Dyeing process
- hair dye;
- tint shampoo/balm;
- aerosol paint for suede;
- spray dyes for fur;
- clarifier
Bleaching agents damage hair. After bleaching, a fur coat will last less than originally planned. It's worth considering whether drastic changes are needed or whether it should be painted a darker color.
Applying hair dye
Animal fur and human hair are similar in structure. This product is ideal for dyeing fur. Before use, you should test the effect on a small, inconspicuous area of the item. If necessary, first remove yellowness from clothes. After this, they begin painting. High quality ammonia paint is recommended.
How to use hair dye correctly:
- Wear gloves. Dilute the product according to the instructions.
- Apply to the product with uniform, quick movements. Rub it all over the fur - no stains should remain. Movements must be careful so that the hairs do not break.

After staining, the cream is applied to the skin again. The item is blotted with a towel and dried. To prevent clothes from shrinking, they are pinned to hard surface fur side up.
To paint it black, one procedure is not enough. This is done 2-3 times.

You should not do complex dyeing or highlighting of wool yourself. This kind of work should be entrusted to professionals. If you have experience in dyeing your hair this way, you can try:
- apply paint to the ends;
- wrap in foil and leave for the required time;
- wash off carefully.
If you dye a natural fur coat at home correctly, it will last for a long time. The color will begin to fade after 7-9 months. After this time, it is recommended to update the color.
Aerosol

Suede product is suitable for dyeing part of the product. The ends of the Arctic fox's coat may turn yellow over time. How to spray paint fur:
- spray at a distance of 70 cm from the item;
- Move the spray all the time so as not to stick the hairs together;
- After spraying, comb through, then they will not stick together.
There is a special paint for natural fur in the form of an aerosol. A small area is dyed with it, for example, a fur collar. This part should not come into contact with the bag; constant interaction will leave a mark. How to do:
- spray the desired area on a jacket or fur coat;
- massage for distribution;
- dry naturally.
You won't be able to paint it a completely different color with a spray. You can enhance the shade, make it richer and deeper.
Other options

You can recolor fur items in the following ways:
- A yellowed mink hat is lightened with the following composition: combine a couple of tablespoons of hydrogen peroxide and 10 drops of ammonia. Wet the ends of the fibers so that the liquid does not get on the skin.
- You can paint a red fur coat with a manganese solution. It must be concentrated. Apply the solution with a new dish sponge and make sure that the skin does not get wet.
- Tinting with a tinted shampoo will help make the color deeper and richer. This is true if your fur coat, hat or vest was previously dyed with hair dye. The tint maintains the color to delay the time of the next hair dye application.

- To soften an old fur coat and give it shine, you should use hair balm. This is done after dyeing or mixed with a tint. Finish the staining by rinsing in a vinegar solution.
- Rabbit fur is dyed at home only in extreme cases with delicate dyes. It is very gentle and thin.
- Fur inserts on coats are painted carefully so as not to stain the main material. If the fabric allows it, sew a piece of fabric onto the main part with a few stitches. You can wrap a piece of unnecessary fabric and secure it with a pin.
How to dye faux fur with your own hands:

- remove dirt and dust with a cotton pad and shampoo, rinse with water;
- To update the color, use a toning shampoo;
- use dye for faux fur, but not for hair;
- To ensure uniform distribution of color, the item is pulled and fixed;
- brush along the fibers without missing the fabric;
- After the required time has passed, wash it, comb the fur, and leave it to dry.
How to care

Proper care to preserve color and newness:
- sometimes comb your hair with a special brush;
- dry clothes if it’s snowing outside;
- clean contaminated, worn-out areas in a timely manner;
- Before storing, remove stains and dust;
- Use a cover for storage after winter.
Painting a fur product is not a difficult task if you approach the process correctly and follow all the instructions. If the item is badly damaged, you need to dye the entire fur coat, or you are afraid that it won’t work, it is better to contact a studio.
In order for the paint to apply evenly and reliably color the fur, the product must be prepared for painting. To do this, the fur surface must be cleaned of grease and dirt using special means.
Before painting it is necessary to prepare the fur
To clean you need:
- Before that, you need to prepare an alkaline solution of ammonia, salt, soda and dishwashing detergent (you can use washing powder).
- The resulting slurry should be spread in an even layer on the surface to be treated using a clothes brush.
- After some time, rinse off the product with running water.
An alternative cleaning solution can be a liquid made from alcohol, vinegar and water, which is applied in the same way as the first option.
Such cleaning products are suitable for processing the fur of arctic fox, mink, silver fox and rabbit.
Typically, standard hair dye is used to refresh the Arctic fox. The fur is quite dense, and therefore you will need several packages to ensure that the resulting color is rich and uniform.

Use hair dye
In this case, you need to choose a paint one or two shades darker than the original. This will avoid unpainted areas and make the item brighter.
Before covering the entire area with paint, you should try to treat a small area. This will allow you to see how the color changes under the influence of chemicals.

Before full dyeing, check how the fur reacts to the dye.
In case of color fading (especially the tips of the pile), it is better not to dye the fur, but to lighten it. The main thing in this procedure is to choose the right composition for coloring. For this, hydrogen peroxide and ammonia, taken in different proportions, are used.
Tinted hair balm is an alternative to permanent dye.

Toning with tint balms
It will help to gently color the pile, providing the necessary care for fur products. However, this method of solving the problem is not durable, since the balm is gradually washed off when precipitation occurs in the form of snow and rain, and can also contaminate light-colored items located in close proximity to the fur.
Items made from arctic fox fur often lose their attractiveness due to yellowing of the ends of the pile. In this case, there is no need to paint the entire product. It is enough to apply aerosol can for processing suede.

Aerosol spray for painting
Before you dye arctic fox fur at home, you need to choose a suitable shade and spray it on the surface at a distance of about 70cm. To prevent the pile from sticking together, you need to constantly move the can. After applying the paint, the fur should be combed with a special brush for suede. Moreover, this must be done immediately.
IN specialized stores It is fashionable to purchase special paint in cans for caring for fur. With their help, you can quickly update the shade, making the product brighter.

Professional paint for fur
However, it also has some disadvantages: when it comes into contact with white items or a light fur coat, the dye can be transferred to lighter items. And the color itself will lose its shine and brightness within a few months.
Since mink products are considered quite expensive, dyeing of such fur should be done as delicately as possible.
Before that, you need to check the degree of contamination of the pile. A regular hairdryer will do for this. The air stream should be directed at the pile: if the fibers fall apart, cleaning is unnecessary. However, if the lint moves from one side to the other and clumps together, cleaning may be necessary.

Mink fur is dyed with hair dye
Step by step procedure
The sequence of actions in both cases is identical:
- To start painting, you need to put on gloves and take a brush. After this, apply paint to the surface and smear it so that there are no bright spots left.
- After waiting the time indicated on the packaging of the product, the product should be rinsed with water at room temperature and vinegar. To fix the pigments and make the pile shiny and soft, you need to use the balm that comes with the paint.
- Then it needs to be washed off and dried.
- Only a cleaned product can be dyed so that dirt and grease do not prevent the pigment from penetrating into the villi.
- When preparing a product for dyeing, the underside of the leather should be covered with cream (or Vaseline) to prevent the surface from drying out.
- Fur can only be dyed if it is not too old. Otherwise, it may be damaged during color change. In addition, the risk of mechanical damage to the product will increase significantly.
- You should choose a dye tone darker than the natural pile. This will help hide minor defects in the skin and give a natural shade.
- To renew fox fur, you can use a solution of manganese, diluted to dark brown tint. You need to apply it to the pile with a sponge, without touching the inner layer (skin). If you neglect to be careful, you can damage the base of the fur, which will lead to rapid wear of the item.
- Since the skins may shrink after dyeing, you need to place the product on a flat surface and secure it before applying the dye using pins or thin nails.
By using some fur care tricks, you can ensure an attractive look to the product and extend its wear life.
Happy owners of fur items know that they fade over time. To restore color, you don’t have to turn to professionals for help - you can do it at home. Knowing how to dye fur, you will give the product a second life at minimal cost.
Preparation
Before proceeding directly to painting, the fur must be prepared. Clean it thoroughly from dust and dirt so that the paint adheres well. For these purposes, you can use an alkaline solution.
For a liter of water you need to take the following components:
- approximately 15 grams of salt;
- two teaspoons of baking soda;
- 7 ml detergent;
- 5 grams of ammonia.
Mix all ingredients to obtain a homogeneous mass. It is convenient to apply it with a brush. Be sure to wash off the product. You can also use another composition: combine water, vinegar, and alcohol in equal proportions.
The wrong side, the inner side, also needs to be processed. It is necessary to apply glycerin or fatty cream to it.
This will prevent skin deformation. The fur must be pinned to a board so that the item does not lose its shape during the process of dyeing and drying.
If the interior is poorly painted, it will “shine”, creating the effect of sparse fibers. It can be tinted from the inside out. How to paint the inside of the fur? You can use a special product or apply hair dye after testing it on an inconspicuous area.
Using hair dye
It is often used to color arctic foxes. It is quite dense, so it is better to buy two or three packages so that the color is rich and uniform.

Before applying the composition to the entire surface, test it on a small piece.
You can see how he “behaves” when interacting with chemicals. Choose a paint one or two shades darker than the natural color - it will make its color richer.
If a thing has turned yellow, it is better not to paint it, but to lighten it. This can be done using hydrogen peroxide. Only after this is it necessary to apply the coloring composition of the appropriate shade.
How to apply paint?
Owners of stylish things often think about how to dye natural fur at home. This must be done with quick, even movements. Leave the paint on for the time indicated on the package.

After applying the paint, it must be rubbed over the surface so that there are no bright spots left. This must be done carefully, without twisting the fibers; before doing this, you should wear gloves.
After the period indicated on the package has expired, rinse in warm water and vinegar. To make it soft and shiny, after drying, you can apply the balm that comes with the paint.
Rinse it thoroughly and dry the fur. After such manipulations, the item will look like new.
Spray paint
Owners of items made from arctic fox fur sometimes notice that the tips begin to turn yellow. To restore the original appearance, it is not necessary to paint the entire product; it is enough to use suede paint from an aerosol can.

Pick up desired color and spray at a distance of at least 70 cm from the product. To prevent the hairs from sticking together, the can must be constantly moved, and after spraying, immediately comb them with a special brush.
If you want to dye your Arctic fox fur a different color at home, you will need regular hair dye. To get desired result, you need to follow the instructions. But it is worth remembering that the color will last no more than 8-9 months, and then it will gradually begin to wash off. To restore the original appearance, the item will have to be painted again.
Is it possible to dye mink products?
Real fur is always in fashion. But over time, stylish mink items lose their rich color and shine. How to dye fur at home? There is nothing difficult about this if you follow the basic rules.
Often women dye their mink with regular hair dye. Before applying the composition, mink fur must be prepared in the same way as arctic fox fur. To make the procedure easier, you can use an aerosol or spray bottle. Spray the product at a distance of approximately 70 cm. Do not forget to comb the hairs with a brush or at least rub them with your hands. To dry, you can use a hairdryer or allow it to dry naturally. Hair balm applied to the surface will give shine and softness. Be sure to rinse it off thoroughly.
How to dye faux fur

Products made from it are very popular due to their attractive appearance and reasonable cost. But over time, faux fur needs painting.
Dyeing fur with hair dye at home is now widespread. The fur of mink, khanorika, kolinsky, marten, muskrat and other animals can be painted with durable household cream paints. Currently, there are a large number of different cream paints on the market, prices range from several hundred to tens of rubles.
To dye fur, it is advisable to choose a paint that is not expensive, light-resistant and resistant to the aquatic environment. It is very convenient to paint small skins, pieces and ready-made fur caps for hats with such paints. One or two packs are required for one skin, depending on the size of the fur and the fur. Paint consists of the contents of two tubes: a tube of paint and a tube of oxidizing agent (peroxide). After mixing the contents of two tubes in a separate container, the paint is applied as a spread and rubbed into the fur with a swab.
When dyeing fur with oxidizing or acidic dyes, many inconveniences arise. For example, when painting with oxidizing dyes, it is not advisable to paint one or two skins or a sewn fur cap for a hat, since several components are required: black urzol for fur D, pyrocatechin or resorcinol, ammonia 25%, salt and oxidizing agent (perhydrol 30%). Before painting, the fur must be etched in a chromium paint in an acidic environment. The etching and painting processes are lengthy and take up almost the entire daylight hours; painting is carried out using the dip method in separate baths at a temperature of 35 -38 degrees.
When dyeing fur with acid dyes, the skins must be tanned with an increased amount of chrome tanning agent so that the skins do not cook. The temperature of the dye solution is 60 - 65 degrees.
It is not advisable to dye fur in small quantities; it is more economical to prepare a batch of skins and spend the entire daylight hours on dyeing.
When dyeing fur with hair dyes, everything is much simpler; you can dye one or two skins in 1 - 2 hours, using a spread method, rubbing the dye into the fur. This wastes one or two packs of paint. The costs are small.
What hair dyes can you use?
From large quantity When using household cream paints, you need to choose paints that provide the dyed fur with good resistance to light, water and mechanical stress. When painting mink fur, depending on whether the fur is old or new, the paint consumption is small. If we need to dye skins with long-haired fur (Arctic fox, fox, silver fox or sable), paint consumption increases significantly, especially when dyeing light skins in dark colors and new fur. In this case, the issue of price is acute.
For dyeing mink, muskrat and other fur skins, the following stable household cream hair dyes have proven themselves to be effective: FARA, IMPRESION +, PRESTIGE. Dyed items retain their color for 2–3 years, are not washed off with water, and are almost indistinguishable in color from natural, undyed skins.  Paints Fara, Impression, Prestige
Selection of shades for different fur colors
You need to dye the fur in a tone that will be an order of magnitude darker than the existing one. For example, if you need to dye brown mink fur, be sure to use a darker dye. FARA paint – dark brown No. 502 is suitable for natural brown mink. Mink fur, like any other fur, is dyed differently. New fur that has not been exposed to sunlight (new skins) dyes very poorly; you have to increase the concentration of dye by adding a darker one.
So, for example: you can add half a tube of black paint No. 501 to dark brown paint FARA No. 502. You can increase the concentration even more by adding half a tube of dark brown paint No. 502 to a tube of black No. 501.
New mink or muskrat fur does not dye well, so often after drying you have to re-dye it in the same way to achieve dark shades. Old (worn) fur of mink, muskrat and other animals, which has been exposed to sunlight, dyes much better and the longer the fur is worn, the more intense the color. Within 30 minutes to an hour, the skin is completely painted with dark brown FARA dye No. 502 or No. 501.  Tinted shampoo IRIDA
Light tones of fur, for example: gray or blue mink, are best tinted in the same tone with hair dye - IRIDA. For yellow or white mink it is also better to choose paint to match. After dyeing, the fur is renewed, the color becomes brighter and more saturated. Light new skins are difficult to dye in dark colors; it is often necessary to repaint them, increasing the concentration according to the method described above. There are no such problems with old light fur; it can be easily dyed black or brown.
It is better to tint long-haired fur (arctic fox, fox) in a natural color, choosing paint according to color. When painting in dark colors, and even when the skins are new, much more paint is used.
Preparing the product for painting
 Worn and moth-eaten areas
 Fur skins, individual pieces or a finished sewn fur cap for a hat need to be prepared for painting. Fur pelts must first be tested for exposure to water. Fur, before dyeing, must be degreased and cleaned of dirt by washing. Then it is thoroughly washed in water, dyed, washed and washed again. Skins, due to long-term storage or socks, new skins due to improper dressing may lose their strength and, when exposed to water, swell and tear. That's why all skins need to be tested for water before painting. Separate pieces or thin places of the skin are soaked or thrown into a bowl with warm water and observed for 10 - 15 minutes; if nothing happens to the skins, they remain strong, such skins can be dyed. It happens the other way around: the skins swell, tear when stretched a little, and even worse, they become limp, like blotting paper. Such skins must be discarded, otherwise big problems will arise.
Before painting, defects on the skins are eliminated: bald spots, worn out and moth-eaten areas, bites and tears. These places are cut out in the shape of a fish, inserts are sewn in, or simply cut out and stitched. Weak skins, especially at the seams, are strengthened by gluing strips of spunbond non-woven material or non-woven material with MOMENT 1 glue. MOMENT 1 glue is ideal for skins.
The process of dyeing natural fur with hair dye
Before dyeing, a fur skin or a fur cap for a hat, which you have cut out and sewn from whole skins or worn fur (an old hat or collar), must be degreased by washing, since oily and dirty hair does not dye well. Unpainted areas and stains appear.
Prepare water at room temperature in a cup, add washing powder in a small amount and wash gently. The skins should already be tested for water, as sometimes the skins swell and tear from water. To prevent the skins from tearing, wash them without sudden movements and try not to twist them when squeezing. After washing, the skin is rinsed in clean warm water, lightly wrung out and prepared for painting. 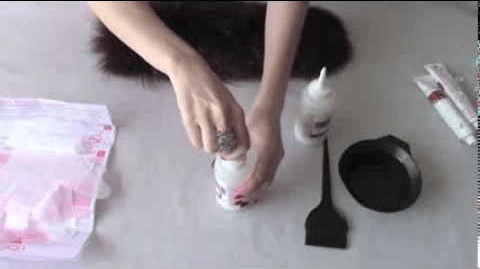 Paint preparation process
The paint is prepared according to the instructions included in the box. Squeeze the hair dye and oxidizing agent (peroxide) out of the tube into a separate bowl and mix everything well. The paint is spread onto the skin or a sewn fur cap using a sponge and rubbed into the fur. The skin is rolled up and placed in a cup. After 10 – 15 minutes they come up and rub the paint well into the fur again. They constantly watch how the skin is dyed. After half an hour, darkening of the fur appears (if the mink is dyed brown), the longer the dyeing, the darker the color. Worn fur dyes faster.
At the end of painting, the skin is rinsed in clean warm water, and then washed with powder in warm water, rinsed several times until clean water. The skin is wrapped in a towel and gently squeezed without twisting, so as not to tear. Then the skin needs to be dried.
How to dry fur properly

To dry dyed fur, you need to use a hair dryer; it is best and more effective to use an old-style vacuum cleaner with reverse draft. Under the influence of an air stream, the fur quickly dries and fluffs up. If these are new skins and have not been cut along the belly, they can be pulled over the rules with the fur facing out and dried. The cut ones are stretched with nails on the shield with the fur facing out, after drying they are removed and crumpled. Such dyed skins can later be used to sew new hats or repair fur coats. Finished sewn and dyed fur caps for hats made by molding are dried with an air stream and, half-baked, pulled onto the block.
When repairing mink coats, it is sometimes necessary to tint the brown fur directly on the coats. The paint is rubbed with a swab into the faded area, after painting it is quickly washed off with water and dried with an air stream.
A little about secrets...
When making fur hats using the mold method, when sewing fur caps, sometimes it is necessary to insert light fur. After dyeing, pulling a fur cap over the block and drying, it turns out that light fur has a different color. In this case, you can tint the skin directly on the deck by removing the nails. High concentration paint is applied a second time to the unpainted area. After dyeing, the paint is washed off and the fur is quickly dried with an air stream.
As a result of prolonged wear and strong impact sun rays, mink fur becomes hard to the touch, such fur needs to be checked before cutting. A piece of such fur is dyed separately, after drying the fur is dyed disgustingly, the ends of the hair turn grey, the color is very bad. Sometimes, in a hurry, such fur appears on the finished cap, then you need to cut out this piece and replace it with a good one.
Often relying on the quality of the skin, it turns out that after dyeing the skin begins to tear. You can get out of this situation, pull the dried cap onto the finished block and glue the entire cap with pieces of spunbond using MOMENT 1 glue. When pulled onto the finished block, the skin will no longer tear.
When sewing a fur cap for a hat made by molding, you need to remember that the skins after dyeing and drying decrease in size, so the cap is cut out larger in the beat.
Other dyeing methods
Fur can be dyed in many ways. For these purposes, there are oxidative, direct, active, acidic and other a whole series dyes, including natural preparations. When painting, the dipping method is mainly used and, less often, the spreading method. All these methods are labor-intensive and require, in addition to the use of basic dyes, a whole range of additional preparations. 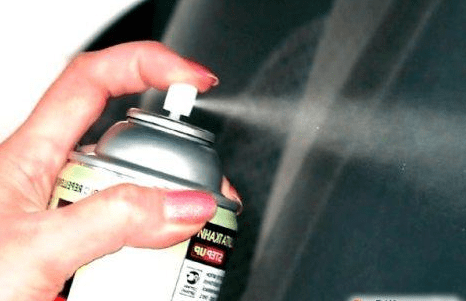
When dyeing fur at home, it takes all daylight hours. A finished fur product (hat, fur coat, vest) cannot be dyed using the dipping method; it is necessary to separate the fur skin from the lining material, and during painting the skins may shrink, and the skins decrease in size when drying. You can tint some defective areas (worn or faded), for example, on a fur coat or hat, by rubbing the paint into the fur using a spread method, and then quickly rinse with water and dry. With this method, household cream hair dyes have proven themselves to be excellent. Sometimes such problem areas are tinted with aerosols by spraying paint.
Spray for coloring fur
Often finished fur products (hats, fur coats) look excellent when worn for a long time, but faded spots appear in some places. In this case, there is no need to paint the entire thing; it is enough to touch up the problem areas with a spray.
To dye fur, you can use aerosol paint for caring for suede. It consists of metal cans of spray paint. 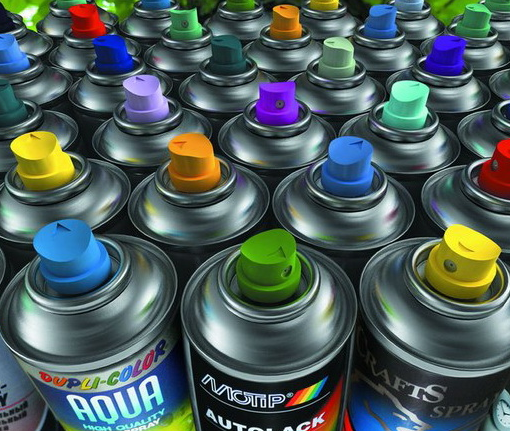 Aerosol for suede care
You need to choose the right shade correctly, otherwise the dyed fur will differ sharply from the main one. The area that needs to be tinted is cleaned of dirt and can be degreased with alcohol and wiped with a swab. It is advisable to cover the fur with any material, except for tinted spots. We spray the paint at a distance of 30 -40 cm so that the fur does not stick together and a uniform color is obtained. In this way you can get an excellent result, the painted areas will not differ much from natural fur, the paint will last for several months.
Caring for dyed fur
 As a result of painting fur skins, individual pieces, fur caps for hats with persistent household cream hair dyes, carried out using the spread method, by rubbing the paint into the fur, we obtain a stable color. Dye long time When worn, the fur is resistant to light, water and mechanical stress. Such items do not require special care; the requirements are the same as for any fur product.
The requirements for fur dyed by spraying are completely different. The color is not particularly durable, so it is better to protect such a product from the influence of light, water, mechanical stress and elevated temperature. 
In order for the dye to stick better and the fur to shine, it can be treated with a special balm for the care of dyed hair. After this treatment, the fur becomes softer and fluffier.
Fur products require daily care, combing more often, and require thorough cleaning. Much depends on proper storage. Fur should be covered and stored in a dark place.