Can you draw? Or maybe you want to try how this is done and learn the basics of this exciting activity? Don't know how to take the first step? It's not so easy, but if you want to try, then read on, and together we'll figure out how to draw a human figure. To work, we will need a sheet of thick, moderately sized paper, several pencils, soft and medium hard, and a white soft eraser for erasing erroneous lines.
General Considerations
The question of that occupies everyone who has picked up a pencil. It is not uncommon for a beginning artist to be disappointed when he looks at the results of his efforts. Usually they are very different from what we would like to achieve. Many people give up trying to learn to draw at this stage. But if you still have not abandoned your intention, you should change your approach to business. When asked about full height, should be answered on a systematic basis. First of all, consistency and phasing are important in drawing. For many this will sound unexpected, but before you draw something, you should think carefully. And this applies primarily to such a complex subject as the human figure.
How to draw a full-length person so that it looks convincing?
Any drawing begins with the correct layout, that is, placing the future image on a plane. This is done with light pencil strokes, indicating the extreme points of the depicted figure. In any drawing, a certain semantic compositional center should be highlighted. One of the main rules of composition is that this compositional center should under no circumstances coincide with the geometric one. The image on the plane should occupy approximately three-quarters of the surface, leaving free space around the edges. Further, in order for the answer to the question of how to draw a full-length person to look convincing, his figure must be built in compliance with the proportions and laws of anatomy. And just as important, she must stand firmly on her feet or sit on some kind of support - so that this does not violate the laws of balance. The proportions of the figure vary depending on age; in an adult, the head is about a seventh of the height.

We build a figure step by step
Professional artists have been working on this for many years. In art universities, it is studied in detail. The course is specially adapted for artists, and when studying it, they study in detail all the bones and muscles present in the human body, their articulation and interaction. This knowledge and skills are necessary for competent construction of the human figure. But when faced with the problem of how to draw a person in full height for the first time, it will be enough to correctly take the proportional relationships between in separate parts body to the figure as a whole. And understand the general structural and muscular systems. When constructing the torso of the figure, we outline the axial lines, shoulder and hip girdle, and joints. When constructing a figure, first of all we remember balance. The figure must stand firmly on its feet. To ensure this requirement, artists have a proven technique - a vertical line from the jugular cavity (the depression between the collarbones under the chin), drawn onto a plane, should not extend beyond the plane of the feet. And then the most important thing - we carefully check the proportions of the limbs, torso and head, gradually building the entire figure.

Generalization of the drawing
When constructing and working out the details, it is very important to stop in time and observe the measure. From the analysis of individual details, one should gradually move on to a generalization of the figure as a whole. As a rule, this is done with wide, sweeping strokes. Nudity does not have to be depicted too often. But basic knowledge plastic anatomy necessary for the artist in any case. Without them, it is impossible to correctly figure out how to draw a dressed person. When drawing a figure from any spatial perspective, you need to see and imagine it through and through. Particular attention should be paid to the patterns in which folds form on clothing. This is a very essential element in the depiction of a figure. They can emphasize movement or stability. Having outlined general outlines, gradually giving all the details volume. We model the shape with chiaroscuro. Special attention When constructing, attention should be paid to shading. The stroke is the most important element in the arsenal of a graphic artist. A lot depends on the force of its pressure, length and direction. The culture of shading is developed gradually, with practice.

Perspective
Correct construction of any spatial figure, in particular a person, on a plane is impossible without understanding the laws. You should understand it and understand that all parallel lines and planes have a vanishing point on the horizon. They are absent from the human figure, but she easily fits into them. And in order to convincingly answer the question of how to draw a person in full growth, the perspective construction of the figure should be carried out only after its position in relation to the horizon is understood. The horizon line should be drawn first in the drawing.

Let's sum it up
Let's try to critically analyze our creativity. What happened in the end? It rarely happens that a novice artist is satisfied with the results of his labors. It is possible to achieve something worthwhile only if the correct conclusion is drawn from the almost inevitable first failure and the work is continued. With each new drawing there will be fewer and fewer errors. This is the process of gradual improvement. Everyone who has achieved anything in the art of drawing has passed it before you. You should also carefully and systematically study the heritage of recognized masters of drawing. At your disposal are albums of reproductions and many art sites on the Internet. And in addition to long staged drawings, short sketches should be performed. In them you should catch the movement of the figure and, without fixating on the little things, achieve maximum expressiveness of the lines.
Olga Nagornyuk
How to draw a person step by step - for beginners
The image of a person is considered the most complex look drawing. Artists have been learning for years to convey people's feelings and moods using facial expressions and eye expressions. But we do not set such goals for ourselves. We just need to learn how to draw a person without disturbing the proportions of the body and making it as similar as possible to the original.
How to draw a person: full-length man
When drawing a human figure, it is important to maintain correct proportions.
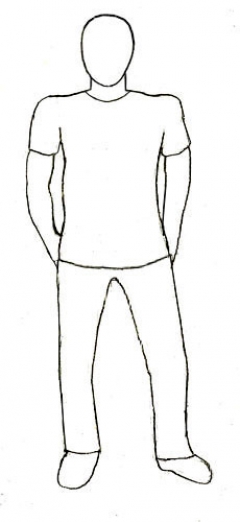
1. We start drawing with a rectangle: draw a quadrilateral with sides whose ratio is 3:4. We draw a straight vertical line through its center, the length of which slightly exceeds the height of the quadrangle, multiplied by two. The arc at the top is the outline of the shoulders, the bottom curve will become the outline of the clothing.
2. Mark the body parts. Draw an oval at the top - it will serve as the outline of the head. The two ovals in the upper corners of the rectangle will indicate the position of the shoulders, and the lower ones will indicate the position of the knees. The correct oval shape should be observed only in relation to the head. The rest are shown schematically.

3. The next stage is drawing the outlines of the body. First, at the level of the middle of the body, draw two circles of a not very regular shape, indicating the place of the elbow bends, and then, using the same circles, draw the location of the feet. Then, using smooth lines, connect the top of the body with the line of the pelvis and extend it to the circles located in the area of the knees.

4. Let's start drawing the limbs. Using smooth lines, draw the arms and legs, guided by the image in the picture. Please note: the feet are turned in different directions.

5. Draw the sleeves of the T-shirt, the bottom line of the trousers and the neckline. Then we carefully erase the extra strokes with an eraser and draw the main lines of the drawing.
It is done!
How to draw a person: ballerina
Drawing a slender and graceful ballerina requires some skill, but we will try to describe this process in detail, simplifying your task.
1. Start drawing the dancer with a tutu. The oval, slightly pointed on the left and raised on the right, will later become part of the concert dress. Add two adjacent straight lines from below, indicating the legs, and at the top - a curved line - the girl's body, an oval - the head and a smooth line at an angle - the arms.

2. Draw the contours of the body. We start with the neck and shoulders, then draw the outlines of the back and waist, then with light strokes we designate the shape of the legs. The ballerina should be slender, so don't overdo it when drawing her body.

3. Holding an image of a ballerina before your eyes, draw the contours of the legs and arms. Use smooth lines and pay close attention to the dimensions: the dancer should be thin. Drawing feet will not cause any difficulties: the girl stands on pointe shoes, which are quite easy to depict.

4. Draw the hands, use short strokes to indicate the locations of the eyes, nose and mouth and give the skirt a more realistic shape. After this, erase the unnecessary lines, leaving the outline of the figure.

5. The most difficult stage is drawing facial features. The picture shows one of the most simple ways, allowing you to depict the eyes, nose and lips of a girl. Drawing the dress and hair will be easy. Using just two arched lines, you can outline the line of smoothly combed hair and bun.

6. Color the drawing and apply light and shade. We used a blue pencil, you can use a simple one. The main thing is to scrupulously repeat the strokes applied in our photo.

We hope everything worked out for you.
How to draw a person: girl
1. Let's start drawing the image of the girl with a circle indicating the head and a smaller oval located vertically. It will later turn into the torso of a little lady.

2. Using slightly rounded lines, draw the location of the chin and eyes. Use stick lines to indicate the girl’s arms and legs.

3. At this stage we draw the contours of the eyes: top part The ovals designating them should touch the first horizontal line, the lower part should lie on the lower one.

4. Next up is hair. We depict the bangs using arched lines, and draw the hair at the back with teeth, choosing a shoulder-length length.

5. We dress the baby in a dress, the role of which is played by a trapezoid, we complete the mouth using a small arc, and hands with feet, the role of which in our case will be played by small ovals.


7. It's time to draw the details. Pupils, eyelashes, eyebrows, ears - draw them following our drawing. Little fingers and little shoes on your feet will complete the picture.

8. Erase the unnecessary strokes, and draw the necessary ones well, and at the same time draw additional details: buttons on the dress, a shadow on the cheeks and a small neat nose.

9. Now all that remains is to paint the figure.

Take it for yourself and tell your friends!
Read also on our website:
show more
Head:
We draw a figure that resembles an egg turned upside down. This figure is called OVOID.
Divide it vertically and horizontally exactly in half with thin lines.

Vertical
line is the axis of symmetry (it is needed so that the right and left parts
turned out to be equal in size and the image elements were not on
at different levels).
Horizontal - the line where the eyes are located. We divide it into five equal parts.
The second and fourth parts contain the eyes. The distance between the eyes is also equal to one eye.
The figure below shows how to draw an eye (the iris and pupil will be
are not completely visible - they are partially covered by the upper eyelid), but we are in no hurry
to do this, first let's finish our sketch. 
Divide the part from the eye line to the chin into two - this is the line on which the nose will be located.
We divide the part from the eye line to the crown into three equal parts. The top mark is the line where the hair grows) 
We also divide the part from the nose to the chin into three parts. The top mark is the lip line.
Distance from upper eyelid to the tip of the nose is equal to the distance from the top edge of the ear to the bottom. 
Now we make our standard preparation cry in three streams.
Lines,
drawn from the outer edges of the eyes will indicate to us the place where to draw the neck.
Lines from the inner edges of the eyes - the width of the nose. Lines drawn in an arc from
the center of the pupils is the width of the mouth.

When you color the image, notice that the convex parts of it
parts (forehead, cheeks, nose and chin) will be lighter, and the eye sockets, cheekbones,
the contour of the face and the area under the lower lip are darker.

The shape of the face, eyes, eyebrows, lips, nose, ears and
etc. Every person is different. Therefore, when drawing someone's portrait, try
see these features and apply them to a standard workpiece.
Another example of how everyone's facial features are different.

Well, here we see how to draw a face in profile and half a turn - the so-called “three quarters”
At
When drawing a face in half a turn, you need to take into account the rules
perspective - the far eye and the far side of the lip will appear smaller.
Let's go to the image human figures.
In order to depict the body as correctly as possible, you need, as when drawing portraits, to know a few secrets:

The unit of measurement for the human body is “head length”.
- The average height of a person is 7.5 times the length of his head.
- Men, naturally, are usually a little taller than women.
-
We, of course, begin to draw the body from the very head that we will be
measure everything. Did you draw it? Now we put its length down another seven times.
This will be the growth of the person depicted.
- The width of the shoulders is equal to two head lengths for men and one and a half lengths for women.
- At the place where the third head ends :), there will be a navel and the arm will bend at the elbow.
- The fourth is the place where the legs grow.
- Fifth - mid-thigh. This is where the arm length ends.
- Sixth - bottom of the knee.
-
You may not believe me, but the length of the arms is equal to the length of the legs, the length of the arm is from the shoulder
to the elbow will be slightly less than the length from the elbow to the fingertips.
- The length of the hand is equal to the height of the face (note, not the head - the distance from the chin to the top of the forehead), the length of the foot is equal to the length of the head.
Knowing all this, you can quite plausibly depict a human figure.
Taken from a group dedicated to graffiti on VKontakte.

Lip shapes 

nose shape 


Eye shapes 
Women's brochure shapes

(c) Book "How to Draw the Head and Human Figure" by Jack Hamm


The proportions of a child's figure differ from
adult proportions. The fewer times the length of the head interferes with growth
child, the younger he is.

IN children's portrait everything is a little different.
The child's face is more rounded, the forehead is larger. If we draw a horizontal
line through the middle baby face, then it won't be an eye line like
was in the portrait of an adult.

To learn how to draw a person not only
standing like a pillar, we will temporarily simplify our image. Let's leave
just the head, chest, spine, pelvis and we’ll screw it all together
arms and legs. The main thing is to maintain all proportions.

Having such a simplified version of the human figure, we can easily give him any pose.


When we have decided on the pose, we can
add meat to our simplified skeleton. Do not forget that the body, it is not
angular and does not consist of rectangles - we try to draw smooth ones
lines. The body gradually tapers at the waist, as well as at the knees and elbows.


To make the image more alive, character and expression must be given not only to the face, but also to the pose.
Hands:

The fingers, with their board-like joints, are the widest parts of the bones in the entire skeleton.


(c) book "Anatomy for Artists: It's Simple" Christopher Hart
This method is by no means the best, much less the fastest, but from the point of view of most artists it is correct. He slowly but surely helps you draw a person with a pencil step by step.
At the end of the article you can watch the video About,
This method of drawing is aimed at stimulating the imagination and forming an idea of the human body in three-dimensional space; it is well suited for beginners and for people who are diligent and patient.
Almost all beginning draftsmen begin drawing a human figure from the head, thereby making a serious mistake. And they are quite surprised when, as a result, it turns out that there is absolutely no room left on the paper for the feet - this method will save you from such an unpleasant situation.
Consider the ideal proportions of the human body:
So head fits in tall people along the length of the body 8 times, in people of average height – 7.5 times, in people of short stature - 6-7 times.
Head fits 2.5 times the length of the body, in leg length – 3-4 times.
Stretched along the body hand should concern mid thigh.
Shoulder width in an adult male it is usually equal two head lengths and more than hip width.
Thigh length corresponds length of the lower leg with the foot, A lower leg - two foot lengths.
The female figure, unlike the male figure, has a lower average height and shorter limbs.
Hip Width women usually have more shoulder width.
A woman's head is relatively and absolutely smaller than a man's.

Schematic representation of a person:
Every child knows the song from the cartoon "Octopussy": "Stick, stick, cucumber, it turned out to be a little man..."
And don't underestimate this phrase.
Schematic men display a very important characteristic - the proportions of body parts. And in order to avoid logical discord in our stick-shaped men, it is necessary to comply with the so-called “artistic canon”.
Now let's take a closer look at our sketchy people:
Sketchy Man No. 1
Everyone has drawn such a man at least once in their life.
This is the so-called basic man.
But there's not much you can do about it.
Just practice maintaining the proportions of the head, torso, arms and legs.
Schematic Man No. 2
Here the proportions of the forearm, thigh, lower leg and foot are additionally outlined.
Schematic man No. 3
The perfect stick man!
I'm sure you've hardly seen any child draw a little man exactly like that.
The shoulders and pelvis of this figure already have a certain width.
Exercise:
In order to understand how accurately you observe proportions in your works, draw a few schematic men.
Thus, simply and quickly, without being distracted by details (clothes, hair, etc.), you can assess how well you know the proportions of the human body.
In addition, you can immediately determine whether the figure will fit on the sheet.
I think now you understand how important it is to master proportions. And what an important role the sketchy men play in the future picture.
Human Pose:
It's time to revive and make our hero do something. So before you start working on a character, with the help of schematic drawings you can try out many poses and choose one.
Below are some examples of the stick figures in action.
The picture shows a man walking.
Notice the movement of the hip joints. Typically, the shoulders move in the opposite direction.
A person lies on his side with support on one arm. Thus, the chest “hangs” on the shoulder and the spine, bending, draws a curved line.
In order to draw the human body, you need to know the features of its structure.
The skeleton is the basis
head
rib cage
spine
pelvis
joints
hands
brushes
legs
feet

Notice the curve of the spine
(to make it easier to see, we won’t draw the hand).
The skeleton can be drawn in a simplified form:
Having an idea about the structural features of the skeleton, moving on to muscle and/or fat
, if we get lucky…).
We will use all sorts of shapes to display body parts: cylinders, ellipses, etc.
Now you can clearly evaluate
The whole process from sketching (creating a schematic man) to three-dimensional drawing based on a schematic drawing:


Also this method will help you work with details. For example, in drawing the hands and feet:
That's all!
main idea this lesson - important for drawing the right basis.
And to achieve this goal, it is necessary to discard everything unnecessary and present it in schematic form.
And the sketchy people will help you with this!
The main advantage of this method is that you can easily and quickly try on many poses for your character.
Choose the most suitable pose and decide on the composition at the first stage.
This article is suitable for those who want to learn how to draw a full-length person or, in general, how to draw with a pencil step by step
Thank you for your attention.
Proportions of the human figure have interested artists, philosophers and educators over the past 20 centuries and more. The Roman architect Vitruvius wrote at the beginning of the 1st century AD: “Nature has shaped the human figure so well that the face, from the chin to the roots of the hair, is a tenth of the whole body.” He also argued that the navel is the center of the body, so a circle drawn around this point would touch the outstretched fingers and toes of a person lying on his back. It was this theory that was illustrated in famous drawing by Leonardo da Vinci presented below.
Unfortunately, theory only works in practice if the hands are at a very specific angle. However, you can notice that when the arms are extended to the sides, the distance between the tips of the fingers is approximately the same as between the top of the head and the soles of the feet. This useful rule when determining arm length.
During the Renaissance, human anatomy became the subject of detailed study, and artists began to participate in the search for meaningful mathematical relationships between dimensions different parts bodies. Were invented integrated approaches for determining " perfect figure". Since then, hundreds of such approaches have been developed using various parts body as units of measurement, including head, face, legs, forearms, forefinger, nose, spine and so on. But, since no one approach was universal, because There is no denying the obvious fact that all people are different, these approaches are of interest only to the classics. Accepted ideal figure proportions Also are changing from one generation to another. Therefore we must in general observe a wide range of sizes and shapes of people that we see around us.

For our purposes, however, useful to study an average-sized figure, as this gives us a base on which to build proportions.
The most common method- using head height as a unit of measurement for relative measurements of different parts of the body. The average figure is seven goals, but a range between six and eight heads is also considered normal. In fact, most often in drawing tutorials the "ideal" figure is depicted eight heads tall- mostly, I suspect, because the body can then be divided vertically into eight convenient sections: chin, nipples, navel, crotch, mid-thigh, knees, calves and feet, making life easier for the instructor!


However, rules are made to be broken! We can admire the remarkable achievements of Roman architects and Renaissance artists/mathematicians, all of which should offer us a convenient test of proportions, but it would be foolish to limit ourselves to just this method.
Children's proportions
When drawing children, you will find that my head takes up a lot a large share from the entire height. The head of a newborn baby is about a quarter of the total height, and the length of the legs is much less. But as the child grows, the legs increase in length much more than other parts of the body in relation to the overall height of the body, so that the head becomes proportionately smaller.

Distribution of subcutaneous fat
During childhood, male and female body shapes are very similar. The shape of the average adult male body is largely dictated by size muscle mass, while the figure of the average woman depends mainly on the size of the fat masses. When girls reach puberty, there is an increase in fat deposits in very specific places to give the roundness of the breasts and hips of an adult woman.

Below are illustrations of where it is deposited. subcutaneous fat in women and men. Both sexes have reserves high on the back between the shoulder blades, which show up in obese people of both sexes with hunched shoulders and a short neck. However, other places where fat accumulates are different between the sexes. A man's excess weight is more characteristic of the waist than the hips. Excess fat in men stored above the hip bone at the back on either side of the spine and on the upper abdomen. Overweight women, on the contrary, tend to gain more on the hips than on the waist. Their main fat storage areas are the lower abdomen, buttocks and thighs, as well as the chest and back between the shoulder blades, just like men.
 Fat distribution in women
Proportions of elderly people
In old age flexor muscles, usually, are being reduced, become shorter. This makes the body bent, when it is in a normal standing position. Shoulders are rounded in thoracic region The natural curve of the spine increases and the neck pushes the face forward. Even when the body is relaxed, the arms and legs remain slightly bent.
The skin and subcutaneous fat become thinner and the muscles contract. Elbows and wrists appear larger, and veins may become visible and protrude from the skin. All fat deposits on the body and face become softer and tend to sag at the elbows and under the chin.

From the next lesson we move on to practice of drawing a person.
I hope you enjoyed this tutorial! Leave your comments and remarks about the course.
The article used materials from the books:
— Ron Tiner “Figure Drawing without a model”;
— Loomis E. Nude. Drawing Guide.