In this article we will show you how to draw Father Frost and the Snow Maiden correctly step by step.
New Year is rapidly approaching, and in order not to lose face, it is better to prepare a gift in advance. One of the most simple gifts still considered a postcard. The card is quite simple to make, it is beautiful in its original design.
In fact, a postcard is a huge space for creativity. You can draw and decorate it with whatever and however you like. The main limitations here are your imagination and real possibilities.
Postcard - a pleasant surprise
A postcard is especially good when you don’t know what to give to a person. In any case, it will be nice to receive a beautiful homemade card as a gift. You can also use a postcard instead of an envelope when you give certificates or money.
IN New Year's card It is customary to use the most recognizable symbols of the New Year: Father Frost, Snow Maiden, Christmas tree, gifts, snow, chimes.
In this article we will tell you how to draw beautiful Santa Claus and Snow Maiden for a New Year's card step by step.
How to draw Santa Claus with a pencil step by step for beginners and children?
So, now we will present a diagram for drawing two Santa Clauses, which even a small child can repeat.
You will need:
- eraser
- simple pencil
- colored pencils, markers or paints
- patience and perseverance
 We will try to draw such Santa Clauses!
 Let's draw the first Santa Claus on the right. It's easier to draw.
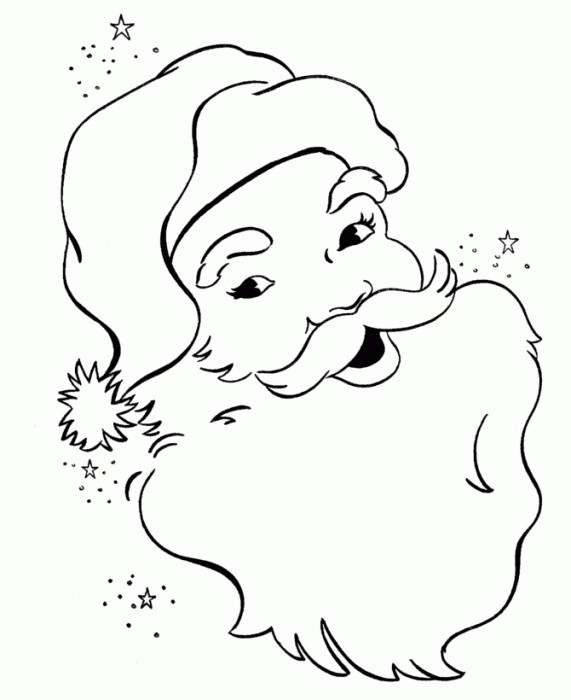
Step 1. Let's start drawing Santa Claus from the head. We draw a face that initially looks like a diving mask or a cloud (or rather, that part of it that is not hidden by the hat and beard). Then we draw the nose and eyes. We immediately add a hat on top.
Step 2. The hat is ready, let's move on to the eyebrows and mouth. The eyebrows are partially covered by the cap, so don't draw them too low. We draw the mouth strictly under the nose, retreating a very small distance.

 Face and hat of Santa Claus
 Step 3. We draw the beard, tilting it slightly to the side to make the drawing more realistic. Mentally draw a straight invisible line from your nose perpendicularly downwards. Where the beard ends, the line becomes visible. Draw an even horizontal line from it in both directions below.
Step 4. Complete the trapezoid from the sides of the beard to the bottom horizontal line. Now draw the fur: step back from the vertical line in the center about one centimeter in both directions, draw two parallel lines, as in the picture. Also draw fur from the bottom in a semicircle, as shown in the picture.

 Santa Claus's beard and fur coat
 Step 5. As shown in the picture, draw the arms and collar of Santa Claus. Keep in mind that your arms will be on top of your body, so have an eraser ready to erase any extra lines.
Step 6. Now we draw a bag with gifts and mittens. To draw a bag, draw an irregular circle with a sharp curl at the top. Draw your hands as shown in the picture.

 Let's draw a bag with gifts!
 Step 7 It remains to draw the details. We make the beard more realistic by adding additional vertical lines, similar to non-sharp teeth. We make several folds near the bag in the place where Santa Claus's hand is.
Santa Claus is almost ready!
Step 8 Now we color the grandfather and decorate his fur coat with stars.
 The drawing is ready!
 Now we draw Santa Claus in a red fur coat, the one on the left. It's a little more difficult to draw.
Step 1. We draw a “sleep mask”, that is, the face of Santa Claus. We don't draw the eyes and the hat yet.
Step 2. We begin to draw the face: outline the nose, it should be slightly flattened, like a potato. From the nose we draw a mustache, in the upper part we place the eyes. directly above the eyes are the eyebrows.
Step 3. Draw a hat. First, we make a voluminous semicircle at the top of the head, then draw on the top of the hat.

 The face of Santa Claus
 Step 4. We begin to draw the body of Santa Claus. It should be quite voluminous. We repeat the lines shown in the picture. We don’t draw the hands yet, leaving just circles instead.
Step 5. Now we draw the beard and bag well. The beard should be quite realistic, so we give it a “sharp” contour, drawing some hairs. Don't overdo it at this stage. After the beard, we begin to draw the bag that Santa Claus holds on his shoulder. At the same time, do not forget about the folds on this very bag. Make the hand that holds the bag more oblong and add a thumb.
 Draw a beard and a bag
 Step 6. To the left of the head we finish drawing part of the bag. Drawing left hand and sleeve. Draw a staff consisting of a long stick and a snowflake at the top. Note that the staff widens towards the bottom, so do not make it the same in all places.
Step 7. Now you need to give the bottom of the fur coat a normal look. We draw fur, drawing it inside the outline of the fur coat. We make the lines slightly smooth so that there are no sharp transitions.
 Drawing a fur coat
 Step 8 Santa Claus is almost ready. Using an eraser to get rid of invisible lines and make the outline of the fairy-tale character clearer.
Step 9 We take colored pencils, felt-tip pens or paints and work out the entire drawing in color. We leave the fur on the fur coat, on the grandfather’s hat and his beard unpainted.

 Santa Claus is ready!
 Here are a few more options for drawing Santa Claus that will look great on a New Year's card!

 Using this diagram you can very quickly draw Santa Claus
 Two different Santa Clauses
 Beautiful and simple drawing of Santa Claus
 Now we’ll show you a few postcards with Santa Claus, which may serve as a source of inspiration for you.

 Option for a New Year's card with Santa Claus and sleigh
  Santa Claus in the Motherland - postcard
 DIY postcard with Santa Claus
 How to draw the Snow Maiden with a pencil step by step for beginners and children?
Snow Maiden - important character Russian fairy tales, granddaughter of Santa Claus. He is young, tender and beautiful. He always accompanies his formidable grandfather, helps animals in the forest and gives out gifts.
Drawing the Snow Maiden is not very difficult. In this part of the article we will give examples of drawing the Snow Maiden step by step in two versions: childish and more realistic.
OPTION 1:
Step 1. Let's draw the head. To do this, draw a head - a ball, draw eyes, nose and mouth. This is the very beginning.
Step 2. Now we make the Snow Maiden more realistic. Add a cap, not forgetting that all lines should be smooth. Draw the chin so that it stands out against the background of the cheeks.


Step 3. At this stage we draw eyebrows, ears and jewelry. The Snow Maiden's jewelry will include earrings in the shape of snowflakes, as well as a brooch on her hat. Don't forget to draw the eyebrows.
Step 4. Let's start drawing a fur coat. First, draw the collar from the ears down. Each side of the collar consists of two perpendicular lines. Right in the center, draw a straight vertical line from the chin to the end, and below, a horizontal line perpendicular to it. This will be the basis for the future fur coat.
Step 5. Again we draw a trapezoid from the collar - two straight lines, going to the hem of the fur coat.
Step 6. On the fur coat we draw fur frills running along the bottom and vertically. The fur should be drawn with smooth lines; do not try to draw it using a ruler. Keep perspective.
Step 7 We outline the middle of the fur coat. This can be done by eye, or you can measure it with a ruler. We draw a horizontal line in this place, which will serve as a guide for the hands. Now we draw the hands. They start from the collar and end exactly on the horizontal line that we just drew. Draw fur on the sleeves a few centimeters above the line.
Step 8 Now we draw mittens of the same shape as in the picture.
Step 9. We finish drawing stars or curls on the sleeves and the fur coat itself. If you want to achieve minimalism, then simply skip this step.
Step 10 We finish drawing the Snow Maiden by adding blue color to the drawing.
OPTION 2:
Step 1. We draw the contours of the Snow Maiden, as in the photo. We start with the head, gradually adding a few smooth lines for the decorations on the head and the silhouette of the body.


Step 2. Now we draw a “frame” - in the upper part of the body we designate a circle - there will be a waist and chest. From this circle we draw two sticks - these are future hands. We begin to draw the lower part of the body (where the hem will be) more clearly.
Step 3. We begin to detail the drawing: add sleeves and mittens to the arms. Don't forget to add fur on the sleeves. At the same stage we draw the face - the Snow Maiden’s facial expression is always kind, with a smile.
Step 4. Now it's time to draw the collar on the fur coat, which is located between top part body and head. Also draw a kokoshnik hat as shown in the picture.
Step 5. At this stage, the image of the Snow Maiden is almost ready. We draw a braid with a bow for the granddaughter of Santa Claus, as in the picture, and draw the lower part of the fur coat (fur, dress and hem of the fur coat). We erase all unnecessary lines with an eraser; in some places you can draw folds.
Step 6. Let's color what we got. This option is black and white, but you, of course, can use colored pencils, markers, and paints. Traditionally, the Snow Maiden's clothes are blue or white and her hair is golden.
How to easily draw Santa Claus by cells?
It's very easy to draw Santa Claus in cells. Even a preschooler or a first or second grade student can complete this task.
Be careful - you will need it in this task!
Choose one of the pictures below, take notebook sheet in a checkered pattern, markers and draw!

 option 1
 Option 2
  Option 3
 Drawing of Santa Claus and Snow Maiden for copying
If you already know how to draw Father Frost and the Snow Maiden, start improving your skills. One of the most effective ways learn to draw better - start sketching. While sketching, you remember some elements and techniques.
You can use the following pictures for sketching.


 Drawing option 2
  Drawing option 3
 Video: Drawing lessons. How to draw Santa Claus?
In anticipation New Year's holidays everyone is expecting a miracle. Why not create a little magic at home with your children? Parents will agree that time spent with their kids is priceless. And decorating your home for the holidays is doubly fun. Children will get a lot positive emotions from this have a fun activity. How to draw Santa Claus and his granddaughter on different surfaces?
Drawing Santa Claus
How to draw Santa Claus with a pencil? This is the simplest drawing in design. Eat various ways images of a fairy-tale character using a pencil. Technique pencil sketch Even children can master it. After this, the drawing can be colored, and the bright fairy-tale character is ready.
Let's look at the most easy way Images :
- Outline the head and body. The head drawing should be divided horizontally.
- In the center we draw a large nose, from which lines go. They will serve as the top contour of the beard.
- We draw a line of eyebrows to the bottom contour of the hat. Let's draw the eyes.
- We draw the edge of the hat and complete the outline of the beard. Draw the upper contour of the headdress.
- In the middle of the body we draw a wide belt.
- We depict hands. One will be thrown back with a bag, the second grandfather will wave to the guys.
- Let's draw boots.
- Erase the extra lines and trace the outline again.
When we draw Father Frost and the Snow Maiden, the main stages are repeated. Don't forget to color your creation.
Step by step drawing
Do you want to please your children with a new lesson? After all, kids love to draw, and the ability to portray fairy-tale characters will always be useful to them (at school or when teaching their children). And if you add a little magic to this activity, the children will simply be delighted. Tell the kids that their Grandfather Frost will do the very best and watch their eyes light up.

How to draw Santa Claus step by step:
- You will need a sheet of paper, a pencil, and an eraser.
- Let's draw something similar to a snowman.
- Carefully sketch out the arms, legs, beard, eyes, and hat.
- Draw the lips and erase the extra lines.
- Draw a bag of gifts behind the character’s back.
- We carefully depict the remaining details.
- Erase the extra sketches and color the drawing.
This is how, during the game, the children learn how to draw Santa Claus. Time spent with parents will be remembered for a long time by everyone, without exception.
Gouache drawing
A more difficult way is to draw with paints, felt-tip pens and other things. How to draw Santa Claus without any skills? Using stencils makes the task easier. Even a child can handle it. After all, you just need to dip the sponge into paint or gouache and fill the stencil space. By removing it, you can see the result of your efforts. You can use glitter and
Stages of drawing the Snow Maiden
When we draw Santa Claus and Snow Maiden, the main stages will be similar. But there are minor differences.

- For the Snow Maiden's body, you need to draw a cone-shaped figure.
- At the top we depict a circle, which in the future will become the head of a snow girl.
- The resulting diagram must be divided vertically in half. We draw the details symmetrically.
- We lower our hands from our shoulders, which should connect in the center of the figure.
- There is no need to connect the lines. Instead, let's draw a muff in which the Snow Maiden hid her hands.
- Draw a headband on the head. It then needs to be drawn up to the fur trim.
- We complete the headdress.
- Don't forget about the braid, which should reach the waist or below.
- We complete the details: the trim of the fur coat, the braiding, the bangs.
- Erase the extra lines with an eraser.
Color the drawing as desired. Thus, you can schematically draw any fairy-tale character. You don't have to be an artist, though. If you follow simple schematic calculations, the drawing will always come out great.
Decorating windows for the holiday
Before the New Year, everyone is busy with exciting chores. The main one is home decoration. In order for the apartment to please not only the owners, but also passers-by, you need to decorate the windows. As a rule, many people paint them or glue stencils on them.

Drawing Santa Claus on glass
To do this, you can use “artificial snow” in cans. To decorate the windows with painted fairy-tale characters, you will need stencils or suitable drawings. With a slight movement of the hand, an interesting winter landscape is formed on the glass, which will delight everyone for a long time. You can paint with a dry sponge, which is dipped into paint. These strokes are made on strokes previously applied with a wide brush.
Stages of drawing on glass
In order to apply a design to glass, you will need the following materials:
- gouache or ;
- stencils;
- postcards;
- markers for outline;
- brushes and sponge;
- shine;
- artificial snow.
Let's get down to the drawing process itself. First you need to think about the plot of the drawing. The background, characters and their placement - everything should be in its place. For windows, it is preferable to use a blue-blue or red and white palette. These shades look the most festive and elegant.
Those who have basic painting skills will not worry about the question of how to draw Santa Claus. If you have no experience, then you can simply copy it or use a ready-made stencil. Many people simply glue a large finished drawing and redraw the contours on the back of the glass. Then all that remains is to color the shapes.
When applying a picture to glass, it is important to remember a few recommendations:
- glass must be degreased first;
- paints and gouache should be easily washed off with water;
- For brightness, you can mix gouache and watercolors.
The finished contours are carefully painted over in an even layer. You can use ready-made snowflakes and splashes as a frame. artificial snow. Sparkles of different shades will help to add a festive touch.
This is how you can easily, joyfully and interestingly spend time with your children, while teaching them to use their skills to decorate the apartment on the eve of the holiday. Thanks to this, the house will become colorful and unique.
Coming very soon New year's night, and Grandfather Frost will travel around his vast winter domain on his sleigh, checking if everyone is ready for the New Year 2020. It’s time to decorate the house with a Christmas tree with toys, you can also draw a beautiful New Year’s poster. It's hard to imagine such a poster without Santa Claus drawn on it. This wonderful character in many fairy tales personifies goodness, and, of course, the source cherished gifts under the tree for those who behaved well throughout the year. We bring to your attention a small master class on how to draw Santa Claus step by step with a pencil, easily and beautifully. Everything is quite simple, even small children can master such a drawing.
Materials:
- Paper
- Simple and colored pencils
- Paints (watercolor, acrylic or gouache)
- Palette
- Brushes (No. 1/2, 5/6)
- Napkins
- Glass of water
- Eraser
Draw with a pencil


- Draw the outlines of the main parts of the character: a circle for the head, for the chest (larger), the hem of the fur coat.
- Draw the arm joints in the form of small circles. Where you plan to thicken the arm, make a larger circle. Place your elbow at waist level.
- We outline the contours of the arms and fur coat so that the thickness of the arms is the same. IN right hand draw a staff. Extra lines remove with an eraser.
- Now mark the places where the eyes, eyebrows, nose and mouth will be located, then draw a hat with a brush, and then a beard and mustache.
- Pay a lot of attention to a fur coat with an ornament, fur trim and a wide hem, mittens, a belt, a staff with a tip in the shape of a sun or a star, a bag and felt boots.
- Color Santa Claus with colored pencils.
We paint with paints: watercolor, acrylic or gouache

It’s easy to draw Santa Claus for the New Year 2020 using various paints:
1. You can dress him in a fur coat of blue, light blue, red or burgundy colors. The hat and mittens can be made in the color of the fur coat, but a little darker or in a different color. Don't forget about the ornament.
2. Cheeks are pink.
3. Eyebrows, beard, mustache, hair, fur trim – snow-white (use white).
4. Leather – beige colour(add white to ocher or mixture yellow color with brown).
5. Draw wrinkles around the eyes and corners of the lips, along the eyelash line with thin brown lines.
6. Eye irises – blue, brown or green color. The pupil is a black dot in the center. Leave a white spot on the irises next to the pupil.
7. Draw the contours of the beard, mustache, hair, and fur trim with a light gray shade.
8. Paint the staff with light ocher and decorate it with stripes in the color of the bag.
I also recommend watching a master class on drawing Santa Claus
As you can see, drawing Santa Claus for the New Year 2020 is not difficult, and this activity will bring pleasure to both children and adults. Grab your paints, brushes, pencils - and celebrate the New Year in the company of a good-natured portrait of Santa Claus! Well, our article and the master class in it will answer the question of how to beautifully draw Santa Claus step by step with a pencil; the most important thing is to show imagination and your fairy tale hero will be the best.
New Year is just around the corner - it's time to draw Santa Claus! It is more complex than giraffes and hedgehogs, so today's lesson turned out to be long. At first glance, it may seem strange that we will draw the arms first and then the body, but believe me, it’s easier to make it proportional. In general, first just repeat, and then draw as you feel most comfortable.
UPD-2012: NEW SANTA CLAUS has been posted, he is prettier - like this (click on the picture):
(A small digression from the topic: have you already found a New Year's gift?)
So, I took Santa Claus from Irina and Visha’s blog as the basis for the drawing (why should they Thanks a lot) - be sure to take a look, they have it a little different, but in color!
We draw a horizontal oval, more precisely, a loaf:

We add a cap to the loaf, this will be our hat:

Right under the hat we draw eyebrows that look like half a cloud...

...and the eyes - two lines sticking out straight from the eyebrows:

Draw a strongly flattened nose, approximately the same width as the distance between the eyes. The nose is located almost immediately under the eyes:

Now let's take care of the beard. From the nose to the hat there are two lines like this in an arc, on the left and on the right. Please note: they do not extend from the nose exactly from the side or from below, but at half past four and half past seven. They fit the “loaf” of the hat exactly opposite the cap:

Well, now from the same points where the “sideburns” approach the hat, we draw a beard. Her “curls” are larger than her “sideburns”:

So far, Santa Claus looks like a gloomy forest man. Let's add a smile! :)

We're done with the head, now the body. Estimate by eye where the chin is hidden under the beard - at this level we will draw the shoulder. More precisely, its upper edge. We draw a hand: first an outer arc, then an inner one, and then another loaf, only smaller:

And a glove:

With this hand, Santa Claus holds a bag of gifts. According to our plan, the bag stands on the ground, so figure out in advance how tall Santa Claus is.

Opposite the first hand we draw the second. Santa Claus will have a magic staff in this hand, so we draw the hand at an angle (about 45 degrees):

We’ll leave the palm for later, but for now we’ll finish drawing the body. Now you have to rely on your eye: draw the edge of the fur coat and the lower edge (a long loaf). Under the fur coat we will also draw felt boots, so the bottom edge of the fur coat should be slightly higher than the bottom edge of the bag - our bag is on the ground. Take a closer look - the edge of a fur coat is also visible on Grandfather’s right hand (for us it’s on the left).
THE MOST IMPORTANT thing is that it may turn out a little differently for you: your hand is to the left or to the right, the bag is wider, Santa Claus is thicker or taller. Naturally, this won’t make the drawing any worse :)

Drawing felt boots...

...a wide strip in the center of the fur coat and a small bar - the edging of the pocket. My second pocket is covered with a bag, yours may be visible.

Now let's return to the palm in which the staff is clutched. Let's start with the thumb...

...and all the other fingers are bent like this. Actually, I didn’t get the dimensions right, but it turned out good too:

We stick a staff into the resulting fist - almost perpendicular to the palm. One end of it stands on the ground. For me it is not visible because of my felt boots, but for you it may be visible - decorate it to your taste.

Finally, we draw some kind of knob and paint the staff itself - Happy New Year!
On New Year's Eve, many people are faced with the question of how to draw Santa Claus? A drawing of Santa Claus and the Snow Maiden will be needed for the New Year's wall newspaper and for greeting card original, " self made"But drawing a person is not easy, you need to maintain the proportions exactly, and most importantly, draw the face correctly so that your drawing of Santa Claus does not look like very childish pictures. However, drawing Santa Claus is easier to do, since he is dressed in a long fur coat and hat and has a long a beard, and even more so if you draw him step by step. Let's try to draw Santa Claus together step by step with a simple pencil.
1. Initial contours of the drawing

Any artist, before drawing, first makes general sketch future drawing. Marks where certain parts of the drawing will be located and only after that draws the details, carefully checking the proportions. Let's go before draw Santa Claus, we will do the same. First, let's draw very approximate outlines of the drawing of Santa Claus in three parts. Namely: head circumference, big circle for the chest and outline with light lines a simple pencil fur coat floors.
2. Add contours for the arms

You see that in my drawings the first steps always resemble the drawings of prehistoric people. But let's not pay attention to this and continue to draw step by step after me. Now draw the hands of Santa Claus. It is very convenient to draw the joints of the arms and legs using “balls”. Where there will be a thickening, draw a larger circle and vice versa. This method allows you to accurately maintain the proportions of the shape and thickness of the arms and legs. Pay attention to the length of the arm from the elbow and its position. The elbow should be at waist (belt) level.
3. General outline of the fur coat and hands

See how easy it is to circle now general outline fur coats and hands focusing on the “balls”. Make sure that the thickness of both hands is the same, and draw a magic staff in your right hand. Add additional details to the drawing and now delete the extra contours. In practice, Santa Claus is almost drawn, all that remains is to draw the head and beard in detail.
4. Head and beard of Santa Claus

First, you just need to outline where the eyes, nose and mouth will be located, and then, in detail, draw Santa Claus in a hat with a tassel. Drawing a beard at this stage of the drawing will not be difficult for you, as well as other small details of the face and clothing.
5. How to draw a face

Since the main attention in the drawing of Santa Claus is still attracted by his clothes, the face can only be drawn in general outline without drawing details. But the fur coat and staff need to be drawn carefully so that Santa Claus is elegant and handsome. Don't forget to draw the felt boots peeking out at the bottom of the fur coat.
6. Drawing of Santa Claus. The final stage

New Year drawing of Santa Claus It must be bright and colorful, so the drawing must be colored with colored pencils. If you know how to use paints, then it is advisable to draw Santa Claus larger, on large sheet paper. Bright and rich paint colors will greatly decorate New Year's drawing. If your drawing should include Father Frost and the Snow Maiden, leave some space on a piece of whatman paper in advance and draw the Snow Maiden before you begin coloring the entire drawing with colored pencils or paints.
The Snow Maiden's drawing is made on graphics tablet step by step. You can use this lesson to draw the Snow Maiden with a regular pencil.
To draw beautiful Christmas tree, you need to decorate its crown with a star and draw a lot of bright toys on the needles. To create the mood for the upcoming New Year holiday in a picture with a Christmas tree, draw Santa Claus and the Snow Maiden side by side.
Any snowflake drawing has the correct geometric shape and therefore it is better to draw with a ruler. Are there any patterns for drawing snowflakes? No, of course, each snowflake is unique and has one single crystalline form.