Good afternoon, the holidays continue, we have already celebrated the New Year, and now the equally important holiday of Christmas is ahead. And we invite everyone who likes to draw to depict this wonderful holiday. Today we are drawing Christmas.
This warm, bright home holiday will be drawn step by step according to our instructions. Looking at this drawing you immediately feel warm and cozy. After all, there is nothing more beautiful than a home where you are loved and waited for. Merry Christmas!
Step 1
Since there are several objects in the picture, we will draw different shapes. Let's start with the table, which is located at the bottom of the picture. Let's draw auxiliary lines for the fireplace, it looks like a triple candlestick. Then we will draw a round shape for the tree.

Step 2
Now let's start sketching out the long needles of our Christmas tree. Next, draw lines crosswise, as shown in the figure.

Step 3
Let's make the table line thicker, and then draw a plate of cookies on it. Now let's draw Christmas gifts under the tree in a beautiful wrapper with bows.

Step 4
We'll decorate the fireplace with bricks, and then draw Christmas stockings hanging on the edge of the fireplace. Let's draw logs and flames in the fireplace and add a couple more gifts.

Step 5
Now let's draw a festive picture on the fireplace. Let's draw a chair by the fireplace. Decorate the Christmas tree with toys and garlands and remove the auxiliary lines.

Step 6
The drawing should look something like this. Now you can color it.

We wish you goodness, love and a merry Christmas. If you liked our lesson , then you can add our website to your bookmarks, or better yet, subscribe to our new lessons and we ourselves will send news of new lessons directly to your email. Good luck!
Christmas is one of the most favorite holidays in many countries of the world, including Russia. To understand how to draw Christmas, you should familiarize yourself with the history of this wonderful celebration. It can be found in a regular Bible or in a children's Bible. You can also find out how to draw Christmas by looking at greeting cards and paintings with the corresponding plot.
Before you draw Christmas step by step, you need to prepare the following stationery:
1). Liner;
2). Paper;
3). Multi-colored pencils;
4). Pencil;
5). Eraser;
6). A sharpener to periodically sharpen pencils.
Now that all of the above items are ready, you can move on to learning how to draw Christmas with pencils, and then color the finished sketch with colored pencils:
1. First, using light lines, outline the outline of the manger in which the baby lies. And also outline the outlines of the donkey standing next to the manger;

2. Without detailing the drawing, outline the outlines of the lamb lying near the manger, as well as the rabbits. Draw the outlines of the stable roof;

3. Draw the child’s head and hand. Draw the straw under his head and the blanket with which he is covered. Draw a manger that is made from boards;

4. Start drawing the donkey;

5. Draw the donkey, not forgetting that it has long ears and a lush mane with bangs. Draw a large striped blanket on the back of the animal;

6. Draw a sheep lying near the manger;

7. Draw both rabbits;

8. On the ground, mark the places where the straw lies. On the wall, mark the outlines of individual stones. Draw the roof, as well as the beams on which it rests;

9. Now you know how to draw Christmas with a pencil step by step. In order for the drawing to look complete in the end, it should be colored. To do this, outline it with a liner;

10. Using an eraser, carefully remove extra lines;

11. Paint the wall with silver-gray and golden-brown pencils;

12. Paint the roof red and the beams brown. Color the ground with a brown pencil and the straw with yellow;

13. Color the manger brown and the straw yellow. Paint over the blanket pink, and the halo around the baby’s head is light yellow. Shade the baby's head and hand with a flesh-colored pencil;

14. Color the donkey’s ears with a flesh-tone pencil, and his body with gray. Shade the animal's mane and bangs with a black shade. Color the blanket with pencils of various tones;

15. Paint the noses and ears of the rabbits with a flesh tone. And paint over their bodies with pencils brown shades;

16. Shade the sheep’s ears and nose with a flesh-colored pencil. Brown color color the hooves, and lightly paint the animal’s fur with gray.

The drawing is ready! So, drawing the Nativity of Christ is not at all difficult. This image would be perfect for a Christmas card!

Christmas is one of happy holidays, which believers around the world are waiting for. On such a holiday, you especially don’t want to buy ready-made gifts from the store. They do not carry the warmth, the kindness that gifts made with their own hands possess. The most favorite for children are drawings on the theme of the Nativity of Christ. This children's creativity has a lot of positive aspects.
Firstly ,
such a drawing will reveal creative potential a child who sometimes goes unnoticed by parents.
Secondly , a personalized gift hand-drawn by your child will give the recipient warmth and a piece of their heart.
Third
, these unforgettable minutes and hours spent for creative work, children still remember long years. In some families, this becomes a tradition that pleases both adults and children year after year.
Drawings on the theme of Christmas.
What can you offer children to draw for such a bright and joyful holiday? In many European countries Christmas is celebrated on a grander scale than New Year. Therefore, from childhood, children accumulate a lot of experience in decorating and holding this holiday.
1.
One of the classic drawings for Christmas can be the image of the moment when Jesus Christ was born. This is the cradle with again born child. Happy parents stand nearby: Joseph and Mary.
2
Another variation of such a classic scene is the image of the Magi who bring a gift to the born Prophet. Evening. One shines bright Star. She appeared in the sky to show people the way. Thanks to the evening sky and a bright star, the drawing will turn out very beautiful.
3
. Now let's try to draw a special Christmas: children's drawings for little ones. One option could be Santa looking at a star. Nearby are the gifts in socks that he collected for the children.
4
.
Another fun option for children’s drawings for Christmas could be the Teddy bear, popular in the West. You can add another little bear: together they are holding a card with the inscription “Merry Christmas!”
5.
An excellent solution for romantic children would be a drawing related to the image of nature. It could be a Christmas tree covered with snow, with bells on it. On background a church with a bell is visible.
6
.The plot of the next drawing, which we offer you, was used back in Ancient Rus'. This is a candle decorated with golden holiday ribbons. Nearby on the table are ribbons and several Christmas tree decorations.
7. AND last option Descriptions of the Nativity of Christ are a drawing depicting a fireplace with a burning fire. Christmas stockings with children's gifts are hung above or near it. You can add Santa's attributes: a bag, a wand with a golden ribbon.
Nativity. Pencil drawing.
Let's learn to draw the Nativity of Christ. These drawings are special. Such a pencil drawing, without the use of colored pencils or felt-tip pens, always attracts attention. It leaves a professional impression. We will try to help you master the basics of this type of drawing.
Outline approximate circle. It should cover more than half the sheet. In the inner parts of the circle are an animal feeder. Next we draw the baby's head. The edge of the rag is visible from under it. The body itself is wrapped in a sheet. Nearby, draw a sheep with a few strokes. After that, move on to the details. Draw hay sticking out of the cracks. In the background, draw a Christmas Star and use a few lines to depict the glow emanating from the star.
Well, that’s all, we helped you find out what Christmas-themed drawings you can prepare with your children.
Merry Christmas everyone!


Good afternoon, today I am uploading a large article that will help you choose the theme of the New Year's drawing, look at the idea and think over its embodiment in your creative drawing. On New Year's Day, schools and kindergartens often conduct "New Year's drawing competition" and we, parents, begin to rack our brains to find a simple idea that our child can do. Exactly like this easy to implement drawings on New Year's theme I collected them here in one big pile. Here you will find stories with snowmen, penguins, polar bears, deer and Santa Claus.
Today in this article I will do the following:
- I'll show you how to draw snowman(in different poses and angles)
- I'll give step by step drawings New Year's characters(penguin, polar bear).
- I'll teach you
- I'll offer simple techniques for image Santa Claus.
- And we will still learn draw beautiful Christmas decorations.
- And drawings - landscapes with the image of the New Year holiday.
So let's begin our journey into the world New Year's drawings for children and their parents.
How to draw a SNOWMAN
(simple ways)
In our New Year's drawings, we are used to depicting a snowman in the form pyramids of three rounds, topped with a rectangle-bucket. An established stereotype.
But this is the same as portraying a person only “ standing at attention, hands at your sides" If seasoned artists depict a person in the most different angles and poses, then young artists They can depict their snowman from the same angles.
Here's an example snowman portrait drawing. We draw only the head of a snowman, wearing a creative hat, and add a New Year's twist to our drawing - for example, we hang a Christmas ball on the carrot nose.

You can put a bird on the snowman's nose. Or try to depict lively emotions on the snowman’s face - rosy cheeks, a tilt of the head, a soft smile - and notice the direction of the carrot. It is not necessary to draw the carrot strictly sideways horizontally. The carrot drawn down and to the side (diagonally) gives the snowman a touching look. And a New Year's hat with a pompom will add the spirit of the New Year to our drawing.

Our portrait of a snowman can have a lively emotion - he can look with touching tenderness at a flying snowflake. Or stretch your paw-twig towards the falling snow and throw back your head and look for a long time at the skies generous with snow.

A portrait of a snowman may have a touch of solidity– a tall hat, a clear symmetry of the nose and a gracefully tied scarf. Or maybe a snowman in a New Year's drawing like a slow-witted lout catching his hat in flight, pulled off by the wind. Good work for the children's New Year's drawing competition.

Here is an example of a New Year's drawing-portrait of a snowman - simple and step-by-step master class.

New Year's stories
with a snowman and a bird.
The painted snowman can hold a small bird in his hands. If you are good at drawing with gouache, then you can draw such a bright snowman in a knitted hat and a woolen scarf - with a red bird in his hand.
And if you are a beginner artist, then you can depict the same touching story with a bird in watercolors. And then, using a black pencil, draw clear silhouette contours and small details in the form of buttons and a nest with a sparrow. A very touching New Year's drawing.

Like this New Year's duet of a snowman and a bullfinch bird Even a child can draw. Simple shapes, and light application of shadows along the cap (darkening on one side, highlighting with white on the other side of the cap - this creates a visual volume-convexity). And around the snowman’s face we also apply light shadows - we add a little light gray-blue color to the white - and with this “bluish” white we draw shadows around the circumference of the snowman’s face - this way we get the effect of a convex spherical face.

And here’s an idea for a New Year’s drawing based on the same plot, where a bird sleeps wrapped in the tip of a long snowman’s scarf

Snowman with his friend teddy bear.
And here's another drawing oil on canvas. Or maybe gouache draw the same one. First, we draw simple silhouettes... then we paint each element in its main color (white, green, light brown) and paint them in one color. And then we add additional shadows to each color (with a darker shade of the same color scheme we shade the snowman’s belly near the scarf and the circle around the teddy bear’s nose). And then with white gouache and an almost dry brush we add a white coating on the face and belly of the bear and the hat and scarf of the snowman.

That is, you just need to look carefully at the sample and poke the shaded brush into the same places where shadows are applied in our New Year's drawing. And continue until your drawing looks like the original.
And here's another simple examples New Year's drawings with a snowman. In the left photo the snowman is holding in his paws-branches Christmas garland of light bulbs. A simple silhouette - simple light blue shadows on the round snowman. And whitish strokes of white paint over the black silhouette of the hat. Everything is simple if you look closely and figure out exactly how it’s done.

And here’s another one in the right photo above – GIRL wraps a snowman in a scarf. It seems that the drawing is complicated, but in reality everything is simple. Let me describe how to make such a New Year's drawing with your own hands for a school competition. So that each of you CLEARLY AND CLEARLY REALIZES that the most complex drawings are actually created in very simple and understandable steps. As in principle, any work is done about general principle– start, continue and finish. Same with drawings. So let's see how a complex New Year's drawing plot is born from simple steps.
MASTER CLASS: How to draw a snowman.
STEP 1 - You first need to divide a sheet of paper into a white and blue background - cover it with gouache. Dry this background.
STEP 2 - use white gouache to draw the silhouette of a snowman. Dry it and add blue uneven shadows on the white sides of the snowman. They smeared the shadows as they applied them – evenness is not needed here. Dry.

STEP 3 - Use a pencil to draw a silhouette of a girl. The lines are simple. But if you doubt your abilities, then you can draw the girl’s template directly from the screen of your laptop onto a sheet of paper placed on the screen, and transfer it as a carbon copy to your canvas. If you need to enlarge on the screen girl size, you press buttonCtrl with one hand and the other hand at the same time roll the mouse wheel forward– the image on the screen will increase. The wheel back will decrease. And if, when enlarged, the image moves sideways beyond the border of the screen, then the left/right arrows on your keyboard will help you move the screen.
STEP 4 - Paint each element of the girl with its own color - carefully with a thin brush, slowly.

STEP 5 – Dry the girl’s face and then carefully draw a bang on it with an almost dry brush. Using the opposite tip of the brush handle, draw the eyes, mouth and blush of the cheeks.
STEP 6 - Then draw scarf lines around the snowman. Paint it red. Dry it and on the scarf (and on the girl’s hat too) use a thin brush with white gouache to apply a pattern of white stripes and crosses.

STEP 7 – Finish drawing small silhouettes. Nose, eyes, smile and snowman buttons. Pocket on a girl's coat. String ties on the girl's hat.
STEP 8 - Draw dark silhouettes of houses and trees in the background along the horizon line. Place blue shadows on the snow under the snowman and under the girl.

As you can see, everything is simple. If you break down all the work step by step - into simple and understandable steps. To avoid overwork, you can do the first 3 steps in one evening, and leave the remaining steps for the second evening. It’s more pleasant to work this way – without fatigue and stress.
Snowmen busy
(children's story drawings).
You can draw a whole group of cheerful New Year's snowmen riding on a swing. Or come up with your own plot. You can peek at him on canvases famous artists . And make a parody of famous work art, only the way it would look in the world of snowmen. Snowy Mona Lisa, with a mysterious smile, for example.


New Year characters
BEAR in a child's drawing.
Now let's talk about other characters Happy New Year appearance. These are, of course, polar bears. In red hats with white pompoms.
Bears can be drawn in different styles. In different cartoon genres. Here are some options for a children's drawing competition.

The leaders of drawing circles can draw such a cute New Year's teddy bear in gouache. The drawing, mind you, was taken from an ordinary table paper napkin.

And here's New Year's drawings with bears whose eyes are dreamily closed. One little bear is looking forward to opening a gift. Another polar bear listens to the singing of a bird. Cute New Year's motifs - simple subjects for children's drawings for the New Year. It can be depicted on greeting card or as a job for New Year's competition drawing at school.

Here a small master class on drawing a New Year's bear on a greeting card.

But a bear can be drawn not only in the classic red and white New Year's hat. The bear in your drawing may have a variety of New Year's paraphernalia(masquerade costumes, funny onesies in the Santa Claus style, knitted sweaters with deer, skis, skates, etc.). And you don’t have to be able to draw the whole bear - you can do something more cunning. And draw just a bear's head sticking out behind a pile of gift boxes(as in the right picture from the photo below).

PENGUIN in a New Year's drawing
for a school competition
And of course winter drawing With New Year theme- These are funny penguins. These birds are also considered northern, although they live at the south pole. But also at the South Pole snowy winters– that’s why the penguin is also a New Year’s character.
Here are options for New Year's drawings with penguins, which are also easy to depict using children's strength, with a little parental help.
You just need to take a close look and understand what steps you need to take in order to ultimately get this image(gouache, watercolor, or colored crayons). The main thing is to take your time and let one painted element dry before painting the second.

Below is a fairly simple gouache drawing made by children's hands. It only seems complicated - because there are a lot of small black details on it (black lines on the scarf, rounded curls on the fur, loops on the balls. But in fact, look carefully at each element - and you will understand how simple it is.

STEP 1 - First, paint over the background of the sheet with blue gouache - stains and stains are welcome - even if the background color is not even.
STEP 2 - The penguin itself is an ordinary oval. First it was painted with white gouache. And then they made a thick black outline around the edges (including the protrusions of the wings).
STEP 3 - Then we draw a white hat - wait until it dries - and apply stripes to it different colors one by one. Then we draw the scarf - also with white gouache - dry it, and apply stripes.
STEP 4 - Draw a New Year's staff on top with white color - dry it - and apply red oblique stripes to it.
STEP 5 - Draw the legs and beak. On the background we draw white lines of snowflakes (crosswise and diagonally, and round dots at the tips).
STEP 6 - Christmas balls - also just round spots of white gouache - and on top of the circle with colored gouache.
You can draw something like this penguin in the form of skittles- in a long New Year's cap. Also an easy-to-make penguin model.

Here are a few step-by-step master classes on New Year's drawings, where you can see how to draw a penguin yourself step by step.


Your penguin can be decorated with a variety of hats and gifts.

How to draw a New Year's deer.
The simplest images of a deer are a DEER FROM TWO PALM (left drawing in the picture below). Or deer FRONT VIEW. Everyone drew such a deer in childhood (a ball of a face, leaf-like ears, twig-like horns, and two columns of legs with hooves).

You can paint a deer in a sitting position (round tummy-pouch, two front legs hanging on the sides, and the lower legs spread slightly to the sides).

And your deer may also be funny fat man. A sort of Santa Claus-fed specimen. It’s generally easy to draw such a deer yourself - its figure resembles an upside-down coffee cup - add short legs with hooves, a red nose - dots of eyes, and cute horns. Light-colored belly (in the shape of an arch), a hat and a scarf. Everything is simple and accessible.

Your New Year's drawing does not have to contain the WHOLE BODY OF THE DEER - from the antlers to the hooves. You can limit yourself to a very schematic (triangular) image of a deer’s head - as in the left picture below.
Or draw a deer's head in a CUTTED VIEW (as if he is looking through the edge of his nose into your window) - as in the right picture below

Here master class showing how to draw a New Year's drawing with a deer yourself.


More often New Year's deer draw with Christmas tree decorations on the horns.

This technique can be performed in different stylizations of drawings. It could be children's drawing deer (as in the picture above).
Or your stag may be a graceful female doe with thick eyelashes, modestly lowered down. The Deer Lady is glamorous and majestic.


How to draw NEW YEAR
in the city, on the street.
And if you want to draw the NEW YEAR on the streets of the city, the festive atmosphere, cozy winter streets, Christmas trees in the city squares, then here is another selection of ideas for such New Year’s drawings.

Please note that all objects here are painted with paints. Then around the lines of houses it was made outline with a narrow gray frame along the contour of the paint(so that the elements of the drawing become more contrasting and the drawing acquires an overall stylization). The silhouettes of passers-by are round spots of faces, and trapezoidal silhouettes of jackets (just a spot of a jacket is applied with paint). Then, when the jacket silhouette dries, we take black felt-tip pen(or a marker) and on the spot of the coat we draw cut elements, pockets, collar, buttons, belt, cuff lines, etc.). In the same way, we highlight with a black marker subtle design elements– lines of roof tiles, window frames, etc.
If the size of the sheet of paper is not large, then it will be difficult to fit an entire street with houses. You can limit yourself to a Christmas tree in the square and draw a few children.

And here great idea New Year's drawing, where children ride on the skating rink.

Here's another idea New Year's city. True, here the city is depicted not in the picture, but in the form textile applications. But the compositional idea of arranging houses and a Christmas tree in the drawing.

You can draw a city from the TOP VIEW, as if from the wing of an airplane. And then place it on the wide dome of the sky Santa Claus flying on a sleigh.

Or you can not draw a crowded and crowded city, but just draw a small forest hut and a decorated Christmas tree nearby. And the retreating Santa Claus, who has just left his gifts under the tree.

These are the ideas for New Year's drawings that I have collected for you today in one pile. I hope that your drawing for the school competition turns into a happy family get-together with brushes and paints. I wish everything to work out - in a magical New Year's way. Let the soul of the New Year touch the tip of your pencil or brush - and flow into your New Year's drawing.
Happy New Year to Your Family.
Olga Klishevskaya, especially for the site ""
If you like our site, you can support the enthusiasm of those who work for you.
Happy New Year to the author of this article, Olga Klishevskaya.
Thousands of people look forward to this truly magical holiday every year. They decorate houses, prepare gifts and read stories related to Christmas.
Drawing a Christmas story

Scene of the birth of Jesus Christ
To draw the Nativity of Christ, you need to prepare the tools:
- paper;
- colored pencils (set);
- a simple pencil;
- sharpener;
- eraser.
However, you can use paints instead of pencils, then you will need paper thicker than regular office A4. As in children's albums, the sheets are adapted for drawing with paints.
Any drawing reflects some picture of what is happening. Will it be a portrait of one character or a whole scene. You can see ready-made images for Christmas as an example.
Sample plot: “An angel looks down on the newborn Jesus.”
Stages of work:
- Sharpen your pencil and, sitting comfortably, mentally divide the sheet into several zones. In one there will be the sky with the figure of an angel, in the second - the earth. If the angel is the central figure, you can give him more space and draw his figure more clearly.
- Make sketches with a pencil. Without specifying, outline where the angel is located, approximately its silhouette. What's around - clouds, the Moon, the Star of Bethlehem and other symbols of the holiday.
- Below, sketch out the trees and the outline of the barn. It is not necessary to add animal silhouettes. In the drawing the emphasis is on the angel. He seems to be looking at something happening on earth at night.
- When the draft is ready, move on to drawing the details. Pay attention to the location and size of the angel's wings and his appearance. Draw hair, facial features, try to convey the expression of the eyes. The entire figure of the character is directed downward, he is sitting or hovering in the sky. Perhaps part of the figure is hidden by a cloud.
- Below, in addition to trees and the roof of a barn, you can add silhouettes of several houses. Just sketches without detailed clarification, because they are surrounded by night fog. A picture of Christmas night and the first messenger who saw the miracle.
- To find out what angel wings look like, you can look through several ready-made images. The most difficult thing in the film is that he is also the main character. Therefore, we need to work harder on it. Draw the folds of clothing, facial features, and the angel's hairstyle. Using an eraser, carefully remove any excess lines.
- When pencil sketch The picture will be ready, decorate it.
Scene of the Gifts of the Magi
Of course, this scene is the most popular; it seems to reflect the spirit of the holiday. How to draw multiple silhouettes and character interactions? We must act step by step, clearly understanding where each figure is and what it is doing. Its size and form of interaction.
What you will need:
- paper;
- set of pencils;
- a simple pencil;
- eraser;
- sharpener.
Would you be interested in making such a craft with your child?
YesNo
Stages of work:
- Creating a pencil drawing in stages begins with presenting the plot of the picture. Look through a few finished images and read the stories to get a sense of what's going on. In a small stable at night the Savior was born and several wise men came to see. They gave gifts. What do such wanderers look like? According to some sources, they were travelers in ordinary traveling clothes. According to others, they are real kings. Choose how to portray them yourself.
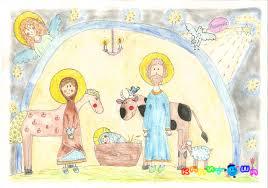
- Who, besides the Magi, will be present in the picture - the Mother of God Mary, the newborn Jesus himself, possibly several animals. The central figure uniting all the characters is Christ. And the location is the interior space of the stable.
- Start drawing. With a sheet of paper in front of you, use a pencil to outline the silhouettes characters. Where are they located, what size? When there are several human characters, it is important to maintain their proportions so that everyone in the drawing is the same. Animals can be added later. Imagine what everyone is doing. For example, a couple of wise men have already entered and are watching, the third stopped at the threshold. The Mother of God sits next to the reclining Jesus, surrounded by the silhouettes of a pair of animals. For example, bull and goats.
- If you are not too confident in your drawing skills, you can imagine the picture from afar, when only the dark silhouettes of the characters are visible. This makes it easier to draw them. At the same time, more details of the surrounding world are visible: the burning star of Bethlehem, trees around, perhaps the silhouettes of houses. It’s as if the artist is a spectator watching what’s happening from afar.
- Make sketches with a pencil. First, one character: body lines, location of the face and hands, clothes. Then the second one. Create a composition. Remember, the faces of those present are turned to the lying Jesus, they are smiling, because a wonderful, bright event has happened. It is important to convey the mood of the characters.
- There is no need to bother much with clothes: the traveler has long cloaks for travel, staffs in their hands, and the Mother of God is in a simple long dress, hair removed. Jesus is wrapped in cloth.
- Once you've finished your rough sketches, color the picture. If there is a candle in the picture, you need to convey its light and the dark areas. You can draw the Star of Bethlehem, as if it looked into the room and illuminated it.