This lesson shows how to work with color and brush techniques, as well as step-by-step work over the background, middle and foreground.
For beginners, it is best to use inexpensive acrylic or oil paints. For example, acrylic paints from the company "Sonnet"
This picture was chosen for the lesson. Simple night landscape with some brush work on the thistle in the foreground.

This is a sketch. The horizon is below the middle, two mountains, an area with waves and a sand dune in the foreground. Sketch it casually, just as you see in the photo.

Mix some cadmium yellow light with white and start painting the sky.

Add cadmium yellow dark and more cadmium yellow light to get this color.

Apply paint where I am in the photo and, accordingly, make a color stretch.

Add cadmium red light and black to the final color to get the color shown in this photo.

Fill the mountain behind with color.

Add cadmium red light and blue to get the next color.

Write another mountain like you see in this photo.

Add the same colors for the horizon.

Fill the back area with paint as you see in this photo.

Add black, cadmium red light and blue to get this color.

Make the same mixture as for the mountains or use some of what is left and continue writing.

Mix blue and red until you get this color and fill in with paint where you see in the photo.

Here more black, red and blue are mixed to create a darker color. Using upward strokes, blend the paint onto the canvas to create the fluffy outline of soft grass.

Here I used a fan brush to add fluffiness. A fan brush works very well for this process. Now you need to wait for everything to dry before continuing.

Make sure the surface is dry before taking the next step. For the main color of the foam, mix blue, a little black and white.

After the main wave and a few at the back are painted, I add the foam pattern in the foreground.

This is what your underpainting should look like. Leave to dry before continuing.

Using a flat brush, mix black, phthalocyanine green and cadmium red to create dark green color. Red dampens the brightness, but leaves a green tone.

Draw the lines as you see in this photo. The trick is to make them look more natural they need to be placed on at different levels. Try to avoid very curved and very straight lines. Practice on a separate canvas if you are unsure.

We begin to paint the base of the thistle, moving the brush from below from the middle to the side.

Now mix Neopolitan yellow with light cadmium yellow to lighten the dark green mixture. We will use the resulting color to highlight the lightest areas in the foreground.

Add the thistle stems as you see in this photo. Let them overlap each other under different angles to achieve maximum natural effect.

Using the same color, bending and turning the brush, we paint the leaves with strokes. This takes practice, so practice on a different canvas to get the effect right in both directions: left and right.

Here I used Alizarin Crimson to change the color of the leaf. This adds interest and play to the foreground.

Mix in a light blue color for the thistle flowers. Use blue or phthalocyanine blue.

We write with sharp movements from below so that the flower seems to dissolve in the darkness. Wipe your brush and repeat, so you won't get dark color above. Use white and yellow to highlight bright areas.

The lesson is over.
It may take you several times to get the strokes right. Don't give up, keep going. Don't be afraid of mistakes because you will make them anyway. Paint this picture 3 times and the fourth time you will get it right. Use art panels, they are inexpensive and good for practice.
Watercolor paints are one of the most loved by artists. First of all, watercolor has a lot of various techniques, and secondly, with its help you can create beautiful drawing, even if you don’t know how to draw at all.
These techniques will help beginners learn how to draw, and professionals will refresh their memory and find inspiration and ideas.
1. Painting with a flat brush
Step 1
Draw a square or rectangle to mark the start and end of the layer.
Select a darker shade (it's easier to see) and starting in the top left corner, touch your brush to the paper and gently draw a straight line all the way to the top right corner.
But: Left-handers should draw from the right corner to the left.
Step 2

Fill your brush with paint again.
Start the next stroke from the bottom edge of the first, trying to cover the accumulation of paint that has formed at the bottom of the first stroke.
Hint 1: If the buildup of paint in the first stroke does not flow completely into the second, then increase the angle of your easel to help the paint flow freely.
Hint 2: By increasing the angle of inclination, you also increase the chances of getting uncontrollable paint flows. So try to work faster or have something like a rag or sponge on hand to quickly clean up spills.
Step 3

Repeat the previous step, also trying to cover the accumulation of paint in the top stroke.
Hint 3: You can use the flat edge of the brush to “cut” the beginning of the layer and make it even.
Hint 4: If you want to smooth out the end edge of a layer, then at the end of the stroke, pause and move the brush up and then down as you would with the beginning edge.
Hint 5: If the stroke turns out to be intermittent, then immediately fill the brush with paint and re-stroke it.
Step 4

Repeat the previous steps until the very end. Try to stick to the same paint tone.
Hint 6: You won't believe how different the behavior of brushes, paints and paper can be between different brands. Usually, more expensive and popular brands make your job easier by providing high quality products.
Hint 7: If your strokes are choppy even though your brush is full of paint, you are using paper that is too thick or the paper is too rough in texture. If you come across such paper, spray it with water, blot it with a clean sponge and let it dry. This will make the surface more receptive to your paint.
Step 5

Rinse the brush and squeeze out all remaining water from it. Gently pick up any clumps of paint left from the bottom of the final stroke with your brush, but don't pick up too much paint or you will discolor your drawing.
To create more texture in your design, let it dry at an angle. This will give the paint a more interesting look.
Gradient
Step 1

Draw a square or rectangle. Then dip your brush into a darker shade of paint (mix on your palette) and carefully brush over the stroke.
Step 2

Dry your brush with a sponge or paper towel and dip it again in a lighter shade.
Then swipe new touch, overlapping the bottom of the previous one. Notice that the left side of the layer has already merged with the previous stroke. Let gravity do its thing.
Step 3

Rinse the brush again and dry it. And then refill the brush with paint and make another stroke. Repeat this process until the very end.
Hint 1: If your stroke breaks or doesn't go on as smoothly as you'd like, quickly refill your brush with paint and repeat the coat.


Step 4
Rinse your brush clean water, wipe it off and pick up any remaining paint.
Hint 2: Try this technique when working with different colors and creating interesting transitions.

Watercolor glaze
Step 1

This technique requires improvisation and imagination. Using the example, we will draw an improvised landscape.
First we paint the sky and river with blue paint. We will separate the paint with a small amount of water, this will be a waterfall.
Step 2

Draw the clouds in dark pink color and start drawing the mountain yellow. We will also mark the bottom part of the picture in yellow.
The example uses light and transparent tones so you can see how the layers interact.
Step 3

By mixing cobalt blue and ultramarine blue, we will paint the horizon of the mountain and shade the small yellow slope.
Hint 1: allow each layer to dry. You can use a hair dryer to speed up this process. Keep it at least 25-30 cm away, turn on the cool setting and set the hair dryer to the lightest air flow. No steam or hot air!
Step 4

To shade and add interesting colors, we use Orange color. With its help we will create the shores in the foreground and shade the sky.
Hint 2: If you get droplets of excess paint, rinse and dry your brush as you did in the previous techniques, and pick up the droplets with it.
Step 5

Please note that the images show different brushes for drawing. You can use the ones you have on hand.
Let's take dark Blue colour and use it to shade the top of the mountain, changing the pressure on the brush and turning it to create an interesting texture.
Step 6

Using the same blue color, let's play with the waterfall by drawing some circles. Sometimes visual clichés become your friends.
Rinse the brush and pick up yellow, we will add visual details to our shores.
Step 7

After the paint has dried, shade the bubbles in the waterfall with a shade purple. This way we will make them more interesting.
Step 8

We need to link some elements and add trees. In the example, we used round templates for the crowns, but you can draw as you like.
Step 9

We will use brown color to depict tree trunks. We will also use blue to shade the water and sky a little more. Then, using pink, blue and green, we will paint the grass in the foreground.
Step 10

Use a mixture of pink and red to add the final details. Our trees are now bearing fruit, and several fruits lie under them.
If you look closely, you can see how each layer interacts with each other. A darker shade has more power, but when the colors overlap each other, they create an interesting and beautiful combination.
“Wet” technique
Step 1

Wet the paper with water
Step 2

Blot the paper with a clean sponge, removing excess water. Try to achieve an even distribution of moisture throughout the paper, you should get a satin effect.
If the paper is shiny, it is too wet, blot it again.
Step 3

We will draw the landscape again. Let's start, of course, from the sky. Using this technique, it is easier to draw the background first, then moving on to the foreground objects.
Step 4

We continue to draw the sky until we start to like it. The strokes will blur, creating an interesting effect.
Step 5

Now let's move on to the grass in the foreground. Using green, we will make several broad strokes, leaving space for the stones.
As the paper dries, the strokes blur less and less.
Step 6

Let's add forms. To do this, we use different shades of green and draw trees on the horizon.
Step 7

Having added the trees, let's try to add texture to them. To do this, use a darker shade of green to create accents.
Step 8

Add stones using gray color. We filled in the gaps in the foreground with this color, leaving some gaps.
Try to use either dark or cool shades. Using both dark and cool shades will create visual dissonance.
Step 9

Let's place accents to diversify the design. Using a crimson tint, we will depict several floral elements in the foreground. Let the crimson flow as it pleases. Then, using a dry brush, remove the color from the middle of the spots.
Step 10

Then drop clean water into the center of these spots to allow them to blend into the grass.
The hardest part about this technique is knowing when to stop. Overdoing it with blurs and colors will result in a messy drawing.
This technique gives a slightly strange but interesting result. A drawing made using this technique has a hypnotizing effect.
Dry brush painting
Step 1

We think the name of the technique speaks for itself. We will need to put paint on the brush, blot it from excess liquid paper towel or sponge, and only then draw.
First, let's make a pencil sketch. After this, we roughly outline the sky by moving the brush over the surface of the paper.
Step 2

Let's draw green trees on the horizon, outlining what would later become our lake.
Then, mixing purple and blue, we will draw the first layer of the tree trunk.
Step 3

Let the drawing dry and add some elements: the reflection of a tree in the lake and the flow of water.
Mixing green and blue, shade the shore in the background of the image and let the drawing dry again.
Step 4

Mix an intense blue with ultramarine and paint a layer on the tree trunk to create shadows and bark texture.
Step 5

Then, using shades of orange, we will depict autumn landscape, painting over the background trees.
Step 6

Having finished with the previous step, use a light orange tint to depict the reflection of the trees in the water.
Also, mixing gray with blue, we will place dark accents on the trees.
We will also add trees on the other side of the horizon. Let's denote the tree shapes in orange.
Step 7

Let's take care of the water. Use dark green and brown to achieve the desired color. And with wave-like movements we will draw the water in the lake.
Step 8

When painting a lake, change the pressure on your brush to add texture.
Clue: if the brush is too wet, the paint will look flat. Dry the brush to intensify the colors.
Step 9

Let's add some grass under the tree, using the same color as for the grass in the background.
Step 10

Let's add some details to the foreground.
We will also darken the lake a little by adding a blue tint. We’ll also shade the sky with the same color.
Removing moisture
This technique will require several sponges. It is suitable for depicting clouds and soft light. It can also control the behavior of paints.

Sponges

Makeup sponges are best. They absorb well and give an interesting effect.
Try not to rub the sponge on the paper, and if you do, do it very carefully so as not to damage the paper.
Paper towels

With their help you can create sharper highlights. But paper towels absorb very quickly great amount paints. Therefore, they can completely absorb fresh paint.
Paper towels can come in handy if you make a mistake. Then you can quickly remove the paint.
Dry brush

You can use a dry brush to create a design using this technique. To do this, rinse thoroughly and squeeze out the brush. With its help you can create clear lines.
Other methods:
- You can spray water where you want to remove the paint and then soak it up with a sponge.
- Use different fabrics to add texture
- You can use your fingers or other body parts. Skin can also absorb moisture.

Discoloration of dried paint
Watercolor brushes

Use clean water and a cloth, wet the desired areas, gently rub the drawing and remove the moisture with a dry brush. This method allows you to control the areas you lighten.
Brushes for oil or acrylic paint

Stiff bristles allow you to quickly scrape paint off the desired area. But it is worth noting that this method can damage the paper, so control yourself.
Here, just like in the first method, you first need to wet the area and then brush it on.
Spray and towel

Take a spray bottle and spray the desired area, and then apply a paper towel to it. This method leaves large light spots and gives an interesting effect.
Sandpaper

It is very rarely used, as it can damage the paper. It's best used at the end to add texture. You don't need water for this method, just rub the design where you want it.
Blades and knives

Can be used to highlight small areas and create crisp lines. This method is also very risky as it can damage the paper.
Sponges

You can also use sponges. Wet the desired area and dry it with a sponge.
magic techniques For children's creativity">
10 simple magic techniques for children's creativity
1. Monotype
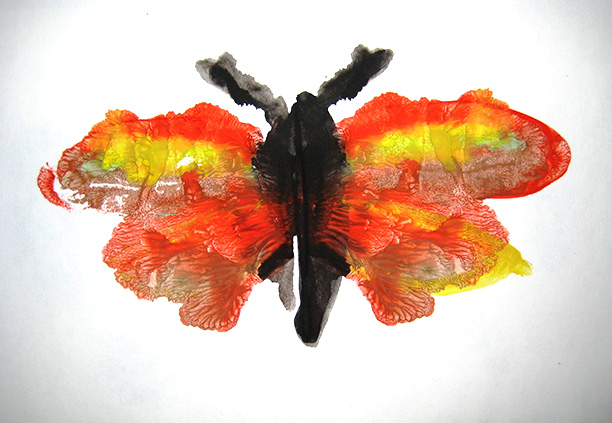
Essence: imprint of paint on paper from a smooth surface. What do you need: a piece of glass or tile, paper, watercolor, soft brushes, water. Process: We wet the glass, apply spots of paint on it, put a sheet on top, carefully turn it over and remove the glass. What happens: very picturesque stains that give room for imagination: “Look, mom, these are clouds! And here is the forest... And here are the waves!”Of course, God himself then ordered that what he saw among the spots be supplemented with details. Using this technique, you can make a background, and draw a graphic image on it, using a thin gel pen - when it dries.

You can create targeted prints, including symmetrical ones: paint is applied to one half of the sheet, then we fold it and get the other half of the picture!
You can “print” with paint different forms- for example, from leaves or templates cut out of cardboard. Then it's better to take more thick paints- gouache or acrylic.

Or pre-apply cut-out simple stencils to the sheet - then the background will be colorful and the images will be white.

2. Blotography
Essence: You can “inflate” original figures from colorful blots. What do you need: thick paper, thick brush, gouache, drinking straws. What happens: we drip paint onto the sheet, then we blow on it through a straw, making lines. Then, depending on what we see, we supplement the image with a drawing or appliqué.
This technique is especially great for drawing trees - the branches come out very naturally curved.
3. Fun dots
Essence: For professional artists this is a separate style called “pointillism”. What do you need: paper, gouache, palette, cotton buds. What happens: We apply paint of different colors to the palette, dip the sticks - and tightly cover the space with colored dots. For convenience, we’ll first make an easy one pencil sketch.
You can draw with dots using brushes, but, unlike sticks, you will need to be careful about washing them. Another cool dots are fabric outlines, but you should work with them carefully so as not to squeeze out too much and make puddles.
4. Spray
Essence: What children love is to splash. And doing it with paint is much more fun, and even meaningful! What do you need: paper, liquid paint, stencils (silhouettes cut out of cardboard), old toothbrushes. What happens: We put our stencils on the leaf - and with the help of a brush we “spray” the paint on the surface, then we remove the cardboards and see the pictures. You can apply several layers - both contour images and paints.
5. Scratches
Essence: this technique is elegant French name“grattage”. What do you need: wax crayons, gouache, paper, liquid soap, a candle and a thin stick (for example, a knitting needle or a used rod). What happens: We color the sheet with pencils, then rub it with a candle, and cover it with a layer of dark gouache mixed with soap (so that it lies evenly). When the paint dries a little, scratch the design on it. It turns out very unusual and mysterious, especially the night and space scenes.
6. Candle arts
Essence: drawing magically appears as white lines on a colored background. What do you need: paper, candle, watercolor paints and a wide brush. What happens: We draw the outlines of some objects or creatures on paper with a candle, like a felt-tip pen. Then we cover the sheet with watercolors. As the paint flows off the paraffin or wax, the outlines they draw remain white or dotted.
7. Paper mosaic
Essence: Ancient artists decorated temples and palaces in this way, and we can do the same at home. What do you need: a sheet of thick paper, a glue stick, colored paper, scissors. What happens: colored paper cut into strips and then into small squares. We draw the outline of the drawing with a simple pencil, carefully cover the sheet with glue and sculpt a mosaic on it. It turns out beautifully when the slightly visible background is dark.
8. Both drawing and applique
Essence: great idea for joint family project: the mother draws smoothly, the child paints and glues with pleasure. What do you need: base sheet, paper for details, paints or felt-tip pens, carbon paper (you can make it yourself by thickly coloring the paper with a soft pencil or charcoal), scissors and glue. What happens: The senior artist draws a general drawing on the base “in a conventional style”, and onto another sheet we transfer its individual details - simple and geometric, like circles and semicircles. Child colors details the right colors, cuts it out and glues it onto the template, putting together a puzzle picture.Drawing with paints is not only very interesting, but also educational. Landscape executed in different techniques calms, gives positive emotions and fosters in the artist a sense of beauty.
From our lesson you will learn how to draw a landscape step by step and what you will need for this.
Landscape
Painting with watercolor or gouache provides a wide choice of landscapes.
For example, one of the most impressive subjects for drawing is mountains. They can be either smooth, like a mountain range, or sharp. By depicting mountains, you have the opportunity to show the contrast between sky and earth, high plains and slopes.
Another significant point is the weather. It’s very exciting to draw winter mountains: you can “play” with shadow and light, with various shades and reflexes on white snow. Ultramarine, yellowish, turquoise, ocher or burgundy color– all this is quite appropriate on snow cover. The main thing is to choose the right color scheme.
A summer landscape depicting mountains will be no less interesting for novice artists. Picturesque and beautiful: warm shades of grass or cool colors on pine branches, a riot of greenery and colors. At the same time, you do not need to carefully draw them - the bolder and freer the brush lies in your hand, the easier and more relaxed the picture will be.
Important: landscape is not only nature, but also a certain atmosphere, into the creation of which we invest our mood and emotions.
Where does the landscape begin?
Any drawing must begin with a layout on a sheet of paper. Make the sky less land or vice versa. Please note that these parts do not have to be the same.
If you are drawing mountains, be sure to think about which peak will be higher and which will be lower. You should not depict identical mountains, although this happens in reality. It is best to make them different compositionally, which will add a certain dynamics to your drawing.
Please pay attention Special attention objects located in the foreground - what is closest to the artist, that is, to you. The foreground is always drawn more diligently and in more detail than the background.
Now let's try to draw Mountain landscape gouache.
Landscape in gouache step by step: drawing mountains

Stage 1
Take special A3 drawing paper and make a preliminary sketch, mixing white and blue gouache, paint over the sky. While it is still wet, paint clouds with white gouache, using a circular motion with the brush to create a mixture of colors. Using this technique will make the sky cloudy and a little fantastical. 
Stage 2
Let's move on to the image of the mountains. Mix white gouache with blue, add a little purple and completely paint over the mountains. Mix the same color with white and immediately paint over the areas of the mountains that are located in the light. In order not to disturb the aerial perspective at the base of the mountains, make the color light.
Now comes the fun part! Do you want to learn how to draw a landscape step by step for beginners? various options? Then let's draw snow-capped mountains.
Stage 3
Using a palette knife, scoop up some whitewash and, pressing lightly until the paint is dry, use the tip of the palette knife to make slits on the mountain. Paint the shadow areas in the same way, only with a bluish tint of gouache.
Important: do not use a large number of gouache and do not mix it with water - the paint should be thick. Practice first on a separate sheet of paper and only then start drawing. 

Stage 4
Mix white with blue gouache, and then use smooth strokes to walk at the foot of the mountains.
Stage 5
Now mix blue paint with green and paint a forest. Add ocher or other shades of yellow and green to depict a forest. Use the same colors to paint the ground.


Stage 6
Paint the lake by mixing white and blue gouache and adding a little green. 
Stage 7
The final step. Again, mix the blue and green paint, and then, making large strokes, paint over the future bushes. 
Stage 8
Using light ochres and greens, complete the bushes. 
Landscape in watercolors step by step: painting a sunset

Next we will look at how to paint a sunset using watercolors. Everything you need in in this case– watercolor and watercolor paper. Shall we get started?
Stage 1
Without making a preliminary sketch and after moistening the sheet a little with water, start painting the sky. To do this, take blue, purple, pink and orange watercolor colors. You can draw the clouds the way you like, mixing colors and creating unusual transitions. 
Stage 2
While the paint is still wet, mark the background with a darker color - it should be different from the sky. And a little closer to you, using a dark purple tint, make the plan even darker. Also draw a small fluffy tree and leave the work until completely dry. 
Stage 3
Using a dark purple hue, paint the tree trunk, adding burgundy splashes in some places. Paint the ground with the same color to make it look as much like the roots of a tree as possible.
Then, using a thin brush, slowly draw tree branches of different widths and lengths: thick and thin, long and short. Make the branches a little lighter in the background and darker in the foreground. 
Ready! You yourself painted a colorful and very beautiful sunset.
There are many techniques to paint a landscape with paints. But if you are a beginner artist, then step by step drawing It will be easier using gouache. It is easy to use: it has no specific odor, easily mixes with water and washes off. Any brushes are suitable for working with gouache, but it is best to give preference to pony or synthetic brushes.
This technique is also suitable for beginners because if you make a mistake, it can be easily corrected by painting it with another layer of paint. In addition, the next layer applied to the dried pigment will not mix with the previous one. The main difference between gouache and acrylic oil paints– she can draw more freely, without fear of making a mistake.
It doesn’t matter how you draw parts of the picture - all at once or separately. For example, you can first paint over the ground and sky with gouache, and then paint the foreground, trees and clouds.
Note: to speed up your work, apply paint to objects immediately, without leaving it “for later.” Agree, it is much easier to do everything in one stage, rather than wait for the painting to “dry”.
This option for painting a landscape is no less interesting and is also quite suitable for beginning artists. You can easily master the watercolor technique if you know some tricks and important rules.
— Painting with watercolors is, first of all, working with layers. The paint is translucent, which means mixing each new layer with the previous one cannot be avoided.
— Errors are excluded - that’s what anyone who picks up watercolors needs to know.
— The key to success is thick paper. Rough special surface absorbs perfectly watercolor paint and guarantees a good effect.
— Nearby objects must be painted with bright colors, everything else must be mixed with water and pale. Unlike oil, acrylic or gouache, watercolors are written “liquidly”.
— When working with watercolors, it is best to use brushes with natural squirrel or pony bristle.
And, of course, do not forget that painting a landscape with paints in several stages is a rather difficult task for a beginning artist. Many questions arise here: how to arrange everything on a sheet, how to get a certain color, how to highlight this or that object, etc. Answers come only with experience.
The best advice that can be given to all beginners in painting is to practice more - draw the most ordinary objects. Remember that the sooner you understand that realism directly depends on highlighting some details and creating contrast, the sooner everything will work out.

So what is landscape? This good workout for any artist that doesn't allow you to get away from main topic images and at the same time gives freedom of imagination.
If you're tired of regular watercolor and oil - try painting acrylic paints, which combine the properties of both materials. The peculiarity is that dried paintings are not afraid of water and sun, so they remain forever the way you created them. To master this kind of creativity, use the instructions below.
Drawing with acrylic paints for beginners step by step
Acrylic is often used for arts and crafts. It is universal, and unlike watercolors, it allows you to apply one layer to another without the danger of damaging the already applied drawing. The scope for creativity is expanding - you can create any picture. The main thing is to know how to paint with acrylic paints correctly and take into account all the recommendations for this process.
How to use acrylic paints for painting
For a beginning artist, 6 colors will be enough. Having learned to use acrylic, you can expand your palette to 12 or 18 shades. In addition, you will also need something on which you can paint with acrylic paints. What to use:
- The most suitable as a basis for paintings different materials– wood, glass, plastic, thick paper or cardboard, canvas and even metals.
- Brushes can be natural or synthetic.
- It is allowed to use a palette knife. If properly diluted with water, even an airbrush can be used.
You need to dilute acrylic paints for painting on a palette with a special solvent or water, adding them little by little to the acrylic so that the consistency becomes similar to watercolor. When such translucent layers are applied to a painting one after another, a very interesting effect is obtained. For undiluted acrylic, only synthetic flat and wide brushes are suitable, but you need to paint quickly, because the drying speed of the paint increases.
Drawing techniques
Before painting with acrylic paints, it is worth familiarizing yourself with the techniques in which paintings are made. Among the main methods of creating canvases are:
- Wet technique. It involves applying diluted paints onto a canvas moistened with warm water.
- The “dry” method. To paint a picture using this technique, it is recommended to use several brushes at once, which can be used to edit the composition on a dry canvas.
- "Glassing in layers." A thick acrylic layer is applied with a brush, on which a picture is then drawn.
- "Impasto." The paintings resemble oil paintings, the strokes are voluminous and clearly distinguishable.
How to paint with acrylic paints

You can paint with acrylic paints on different surfaces, but it’s suitable for every occasion. general instructions, following which it is easy to create a real masterpiece:
- Choose a surface that will serve as the basis for the future painting. Depending on its structure, select certain paints - the manufacturer gives recommendations on this matter on the jars or tubes.
- Decide on your drawing technique. For a watercolor effect, arm yourself with water or thinner and prepare your palette.
- Stock up on brushes - synthetics are suitable for undiluted acrylic, and with watercolor technique It is easier to deal with natural bristles made from ox hair or sable.
- Complete the picture with additional touches using felt-tip pen, ink, markers, gel pens or pencil.
On fabric
Painting with acrylic paints on fabric can be a little more difficult for beginners, so it's worth practicing. Silk or cotton surfaces are more suitable for materials - the pattern will lie better on them and will stick well. Before you start creative process, the fabric needs to be prepared - washed, ironed, stretched on a special frame or laid out on a flat and hard surface. Don't forget to separate the front and back side things, otherwise paint can only spoil its appearance - put cardboard or oilcloth. Then use the following instructions:
- Buy a special felt-tip pen that is used for drawing on fabric, and apply the selected design to the fabric. When using a simple pencil for this, keep in mind that you will need to draw slightly beyond the contours so that they are not visible.
- Use artistic brushes to paint the fabric, using thinner if necessary.
- After completing the work, leave it to dry for a day and then iron it.
- Wash the item only 2 days after ironing in a gentle cycle at a temperature of about 30 degrees.
On canvas
For the first time, it is better to choose a smaller canvas. In addition, you will need a sketch made in a simple pencil. For the basis of your future painting, use ready-made photo drawings or rely on your imagination. On a separate sheet of paper, sketch out the options and transfer it to the canvas. Then prepare your brushes, a spray bottle with water, a palette and a cloth. Start drawing from the background and large details, thinking through the combination of shades. To prevent the paint from drying out, use a spray bottle - this will make the transitions between colors smoother.

On paper
It is better to take thicker paper, for example, intended for watercolors. Of all the materials, it is more economical and suitable for beginners, as it has shallow embossing, which is easy to apply strokes to. You can buy either an album or a folder with individual sheets of any format. You need to prepare a palette, a set of several brushes and water if you need to dilute the paint.
The simplest acrylic paints are suitable for painting. If you have already decided on a drawing, then start with a sketch too. Then start working on the background part using a wide rectangular brush - movements should be fast so that the paint does not have time to dry. For watercolor techniques, dilute it with water or draw on damp paper, and for oil painting, use it in pure form using a brush with uneven bristles.
On glass
The most original is acrylic painting on glass. To do this you will need:
- toothpicks or cotton swabs for pattern correction;
- acrylic paints and varnish;
- brushes;
- diluent;
- contours to complete the basis of the drawing;
- palette.
The technique of drawing on glass is as follows:
- Clean the surface of the glass by leaving it for 20 minutes. in hot water and then degreased with alcohol.
- Use a thin marker to draw a design, placing the sketch under the glass.
- Draw a special outline around the lines.
- Apply paint to the glass in layers, waiting for the previous layer to dry. Apply more paint to the brush and lightly touch the surface to distribute the acrylic evenly.
- When finished, rinse the brushes with water and coat the painting with acrylic varnish.

What can you paint with acrylic?
Having mastered the technique of painting with acrylic paints, you can create any painting, be it a light landscape with airy clouds or a portrait loved one. An individual T-shirt design and even wall painting will be beautiful. Standard waterproof acrylic paints can also be used for drawing beautiful patterns on nails - for example, for a French-style manicure. They are applied directly over shellac. If you are creating children's toys, then acrylic is perfect for drawing eyes on a textile doll.


Painting video tutorials
Acrylic is used to paint materials and even the body - drawings on the skin look very original and bright, so such works are even performed in various competitions. Such creativity has a more complex technique and requires a certain experience and diligence. To learn how to use acrylic correctly, watch interesting videos about the stages of drawing a particular picture.
On gel polish
Flowers
By numbers